SECTION 9S
BODY REAR END
Caution : Disconnect the negative battery cable before removing or installing any electrical unit or when a tool or equipment could easily come in contact with exposed electrical terminals. Disconnecting this cable will help prevent personal injury and damage to the vehicle. The ignition must also be in LOCK unless otherwise noted.
SPECIFICATIONS
Fastener Tightening Specifications
Application
|
N•m
|
Lb-Ft
|
Lb-In
|
|
Fuel Filler Door Screws
|
4
|
-
|
35
|
|
Gas Support Assembly Studs
|
8
|
-
|
71
|
|
Luggage Compartment Lock Cylinder Bolt
|
4
|
-
|
35
|
|
Luggage Compartment Lock Screws
|
6
|
-
|
53
|
|
Luggage Compartment Lock Striker Bolts
|
8
|
-
|
71
|
|
Rear Deck Lid Bolts
|
10
|
-
|
89
|
|
Remote Cable Handle Bolt
|
10
|
-
|
89
|
MAINTENANCE AND REPAIR
On-Vehicle Service


Fuel Filler Door
Removal Procedure
- Remove the screws and the fuel filler door.
Installation Procedure
- Install the fuel filler door with the screws.
Tighten
Tighten the fuel filler door screws to 4 N•m (35 lb-in).
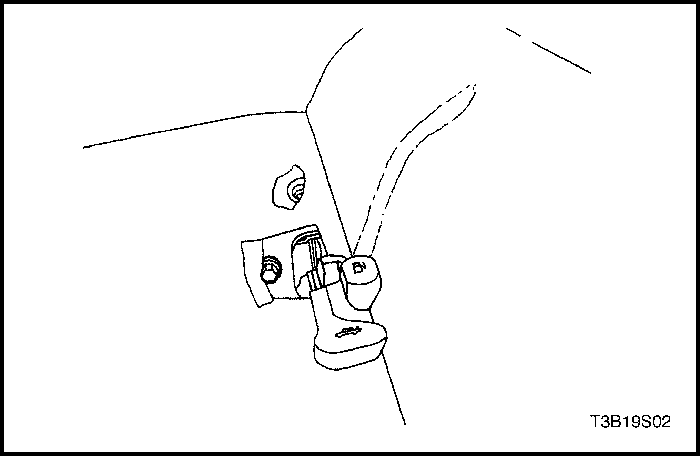
Fuel Filler Door Remote Cable and Handle
Removal Procedure
- Open the luggage compartment.
- Remove the left luggage compartment wheelhouse trim panel, both luggage compartment rear quarter trim panels, and the luggage compartment rear trim panel. Refer to Section 9G, Interior Trim.
- Disconnect the cable from the fuel filler door.
- Remove the driver front and the rear seats. Refer to Section 9H, Seats.
- Reposition the floor carpet on the left side of the vehicle.
- Remove the bolt and the handle.
- Disconnect the cable from the handle.
- Remove the cable
Installation Procedure
- Feed the cable from the luggage compartment to the passenger compartment.
- Connect the cable to the handle.
- Install the handle with the bolt.
Tighten
Tighten the remote cable handle bolt to 8 N•m (71 lb-in).
- Install the floor carpet to its original position.
- Install the front and the rear seats. Refer to Section 9H, Seats.
- Connect the cable to the fuel filler door.
- Install the left luggage compartment wheelhouse trim panel, both luggage compartment rear quarter trim panels, and the luggage compartment rear trim panel. Refer to Section 9G, Interior Trim.
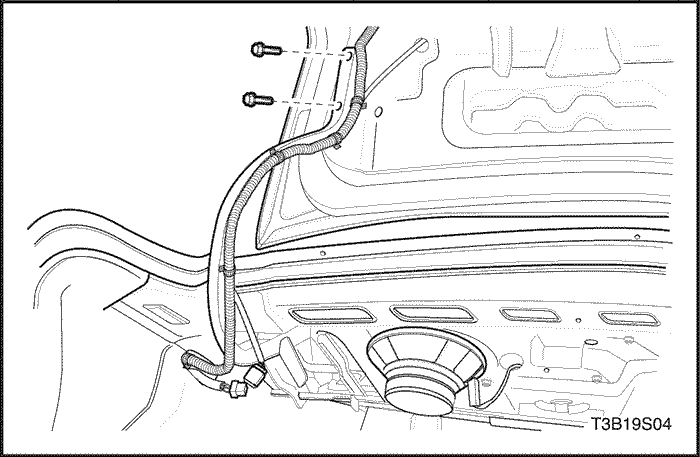
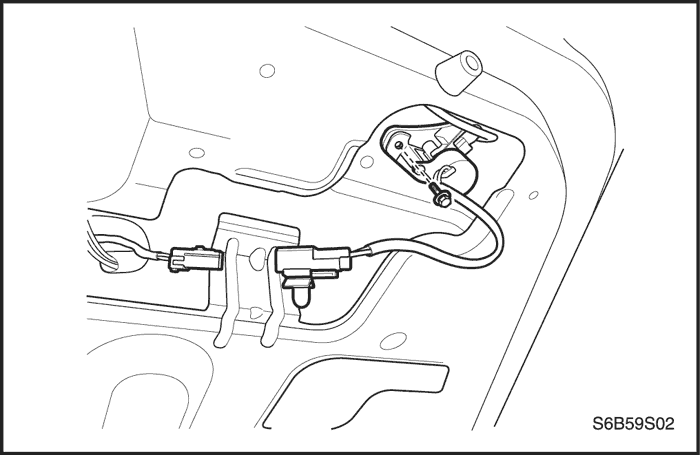
Rear Deck Lid
Removal Procedure
- Disconnect the negative battery cable.
- Disconnect the electrical connector.
- Disconnect the electrical harness from the rear deck lid hinge arm.
- Remove the bolts and the rear deck lid.
Installation Procedure
- Install the rear deck lid with the bolts.
Tighten
Tighten the rear deck lid bolts to 10 N•m (89 lb-in).
- Connect the electrical harness to the rear deck lid hinge arm.
- Connect the electrical connector.
- Connect the negative battery cable.
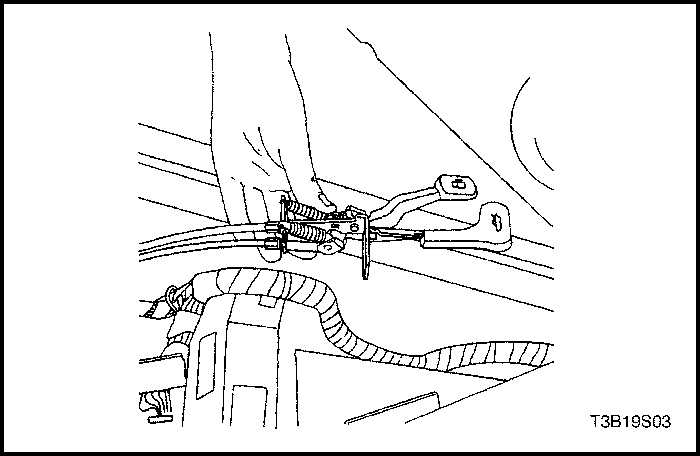
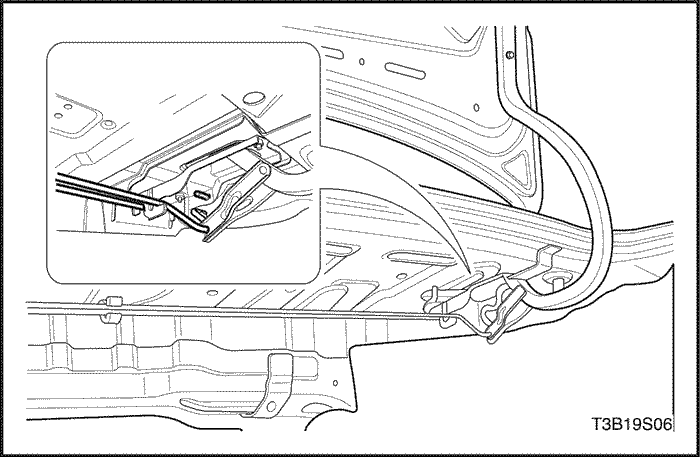
Rear Deck Lid Remote Cable and Handle
Removal Procedure
- Open the luggage compartment.
- Remove the luggage compartment left side wheel house, the rear quarter, and the rear trim panels. Refer to Section 9G, Interior Trim.
- Remove the clips and the trunk lid trim.
- Remove the screws and the luggage compartment lock. Refer to "Luggage Compartment Lock"
in this section.
- Disconnect the cable from the lock.
- Remove the driver front and the rear seats. Refer to Section 9H, Seats.
- Reposition the floor carpet on the left side of the vehicle.
- Remove the bolt and the handle.
- Disconnect the cable from the handle.
- Remove the cable.
Installation Procedure
- Feed the cable from the luggage compartment to the passenger compartment.
- Connect the cable to the handle.
- Install the handle with the bolt.
Tighten
Tighten the remote cable handle bolt to 8 N•m (71 lb-in).
- Install the floor carpet to its original position.
- Install the front and the rear seats. Refer to Section 9H, Seats.
- Connect the cable to the lock.
- Install the luggage comperment lock. Refer to "Luggage Compartment Lock"
in this section.
- Install the trunk lid trim with the clips.
- Install the luggage compartment left side wheel house, the rear quarter, and the rear trim panels. Refer to Section 9G, Interior Trim.
Torque Rod
Removal Procedure
- Remove the torque rod from the rear deck lid hinge arm.
- Remove the torque rod from the hinges.
Installation Procedure
- Install the torque rod onto the hinges.
- Install the torque rod onto the rear deck lid hinge arm.
Luggage Compartment Lock Cylinder
Removal Procedure
- Disconnect the negative battery cable.
- Remove the clips and the trunk lid trim.
- Disconnect the electrical connector.
- Disconnect the lock rod.
- Remove the bolt and the lock cylinder.
Installation Procedure
- Install the lock cylinder with the bolt.
Tighten
Tighten the luggage compartment lock cylinder nuts to 4 N•m (35 lb-in).
- Connect the lock rod.
- Connect the electrical connector.
- Install the trunk lid trim with clips.
- Connect the negative battery cable.
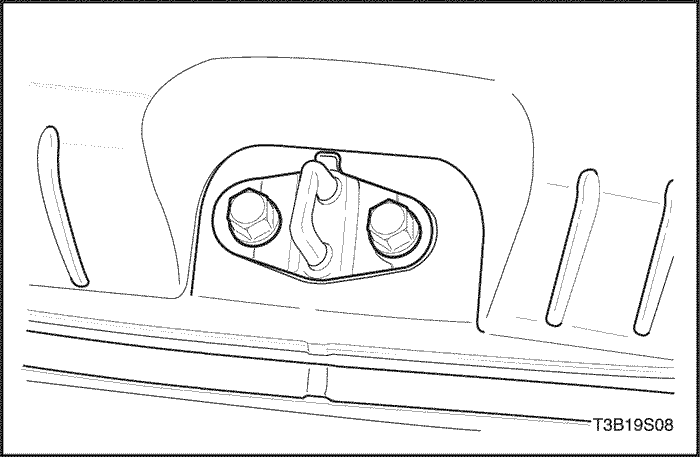
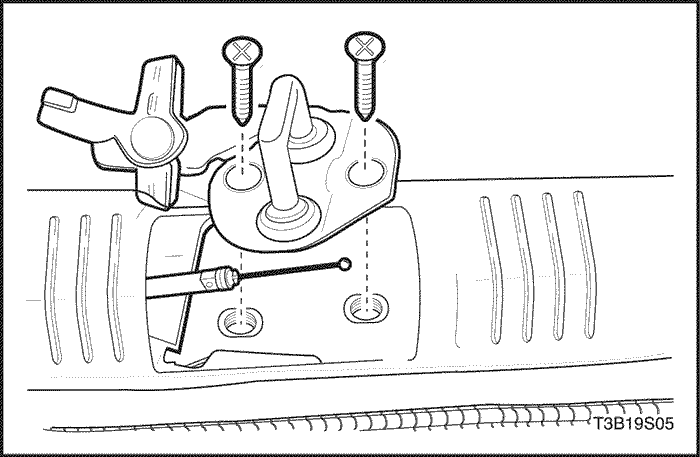
Luggage Compartment Lock Striker
Removal Procedure
- Open the luggage compartment.
- Remove the back panel lower cover. Refer to Section 9G, Interior Trim.
- Remove the bolts that secure the lock striker.
- Pull the lock striker out.
Installation Procedure
- Install the lock striker with the bolts.
Tighten
Tighten the luggage compartment lock striker bolts to 8 N•m (71 lb-in).
- Install the back panel lower cover. Refer to Section 9G, Interior Trim.
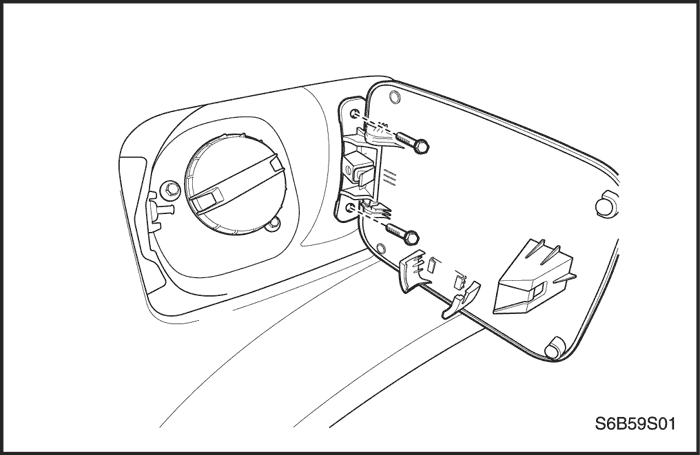
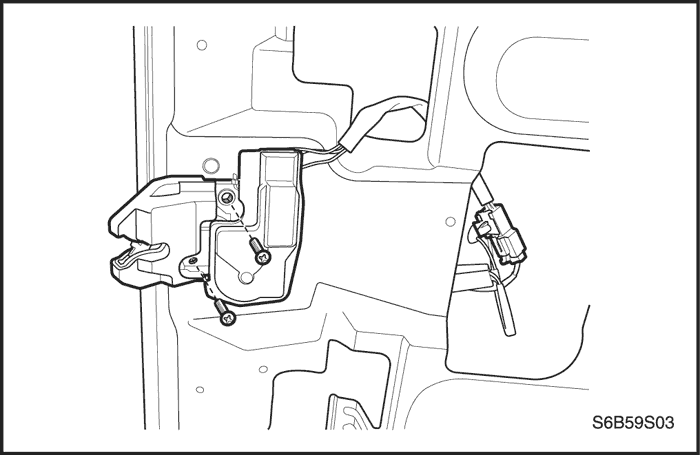
Luggage Compartment Lock
Removal Procedure
- Disconnect the negative battery cable.
- Disconnect the electrical connector.
- Remove the screws and the luggage compartment lock.
- Disconnect the lock rod.
- Disconnect the cable from the lock, if equipped.
Installation Procedure
- Connect the cable to the lock.
- Connect the lock rod.
- Connect the electrical connector.
- Install the luggage compartment lock with the screws.
Tighten
Tighten the luggage compartment lock screws to 6 N•m (53 lb-in).
- Connect the negative battery cable.
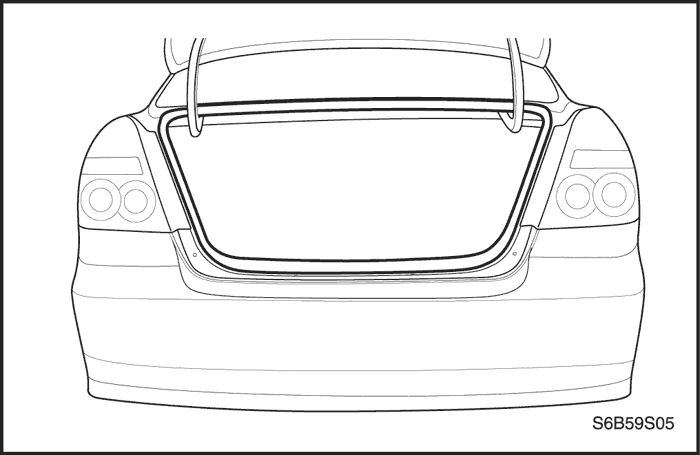
Weatherstrip
Removal Procedure
- Open the luggage compartment lid.
- Remove the back panel lower cover. Refer to Section 9G, Interior Trim.
- Remove the weatherstrip from around the gutter.
Installation Procedure
- Install the weatherstrip onto the gutter flange.
- Inspect the weatherstrip. Make sure that the clinch is completely seated onto the flange.
- Using a water hose without a nozzle, test the rear deck lid to make sure that no leaks are present.
- Install the back panel lower cover. Refer to Section 9G, Interior Trim.
GENERAL DESCRIPTION
AND SYSTEM OPERATION
Fuel Filler Door
The fuel filler door attaches to the fuel tank pocket on the right side of the vehicle.
Rear Deck Lid
The rear deck lid consists of an inner and an outer panel hemmed around the perimeter and bonded together with structural adhesive. The torque rods assist in the opening of the rear deck lid and hold it in the open position.


