Evaporative Emission Canister Purge Pipe Replacement
Removal Procedure
Warning: Refer to Petrol/Petrol Vapours Warning in the Preface section.
Warning: Refer to Battery Disconnect Warning in the Preface section.
- Disconnect the battery negative cableBattery Negative Cable Disconnection and Connection

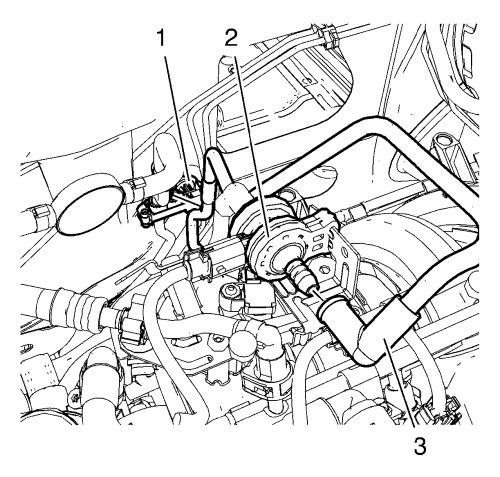
- Clip the evaporative emission canister purge pipe (3) out of the bracket (1).
- Remove the fuel tank vent pipe (3) from the evaporative emission canister purge solenoid valve (2).

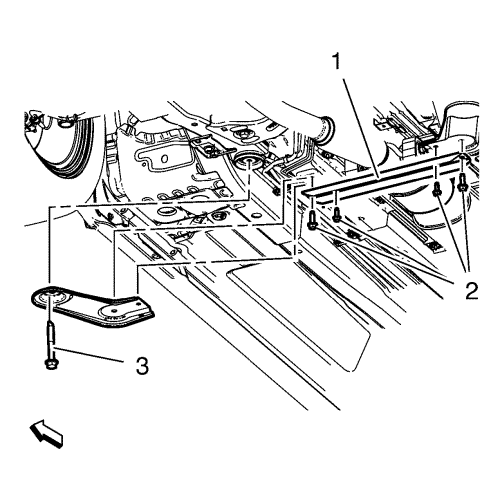
- Remove the exhaust pipe front hanger bolts (2).
- Remove and DISCARD the frame rear bolt (3)
- Remove the frame reinforcements.

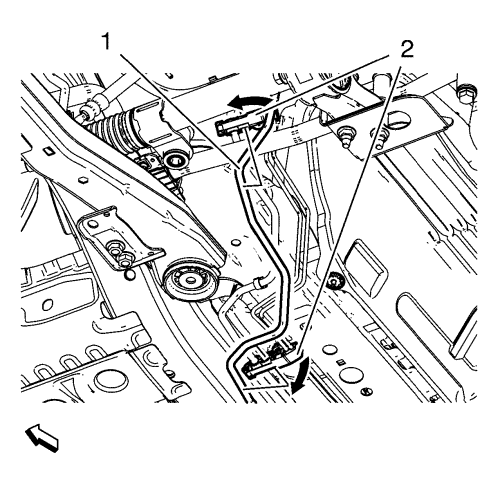
- Unclip the evaporative emission canister purge pipe (1) from the 4 bracket clips (2).

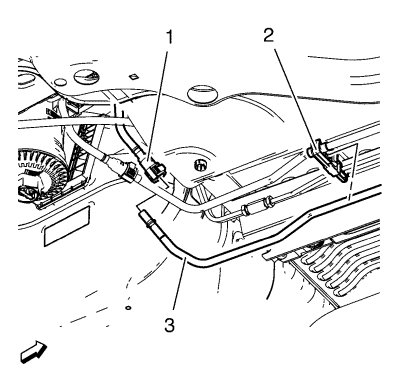
- Unclip the evaporative emission canister purge pipe (3) from the rear bracket clip (2).
- Disconnect the evaporative emission canister purge pipe (3) from the fuel return pipe connector (1).
- Remove the evaporative emission canister purge pipe (3).
Installation Procedure

- Install the evaporative emission canister purge pipe (3).
- Connect the evaporative emission canister purge pipe (3) to the fuel return pipe connector (1).
- Clip in the evaporative emission canister purge pipe (3) to the rear bracket clip (2).

- Clip in the evaporative emission canister purge pipe (1) to the 4 bracket clips (2).

- Install the frame reinforcements.
Warning: Refer to Torque-to-Yield Fastener Warning in the Preface section.
Caution: Refer to Fastener Caution in the Preface section.
- Install the NEW frame rear bolts (3) and tighten to 160 N·m (118 lb ft).
- Install the 4 exhaust pipe front hanger bolts (2) and tighten to 20N·m (15 lb ft).

- Install the fuel tank vent pipe (3) to the evaporative emission canister purge solenoid valve (2).
- Clip the evaporative emission canister purge pipe (3) into the bracket (1).
- Connect the battery negative cableBattery Negative Cable Disconnection and Connection .
| © Copyright Chevrolet. All rights reserved |


