Cylinder Head Assemble
Special Tools
| • | EN-6215 Mounting Equipment |
| • | EN 6086 Spring And Wedge Replacer Kit |
| • | EN-840 Pliers / Remover |
For equivalent regional tools, refer to Special Tools .
Note: Lubricate the valve guides and the valve stems with engine oil.
Note: Ensure that the valves will be installed in their original position.
- Install the 16 valves to the cylinder head.

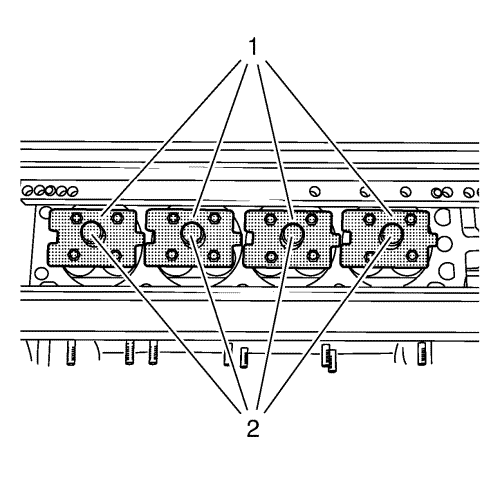
- Install EN-6167-1 braces (1) and hold with EN-6167-5 bolts (2) to support the valves.
- Install the 16 valve stem oil seals. Use EN-835-A installer to push down the valve stem oil seals.
Note: Ensure that the valve springs and the valve spring retainers are installed in their original position.
- Install the 16 valve springs and the 16 valve spring retainers.

Note: A wrong combination of mounting piece and plunger can cause damage to the plunger or the valve keys.
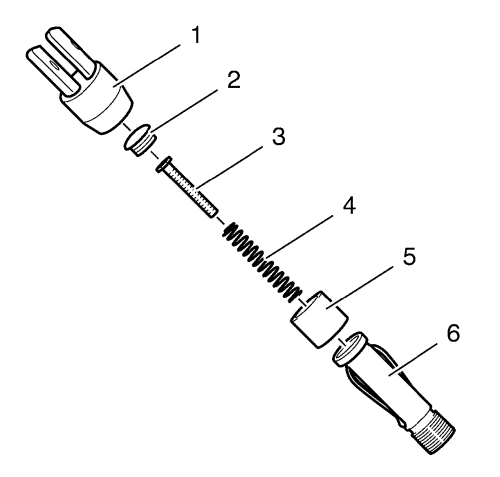
- Prepare EN-6086-200-1 mounting piece for the valve key installation. The mounting piece must be assembled in the following order:
| 5.4. | EN-6086-200-10 plunger (3) |
| 5.5. | Screw connection (2) |

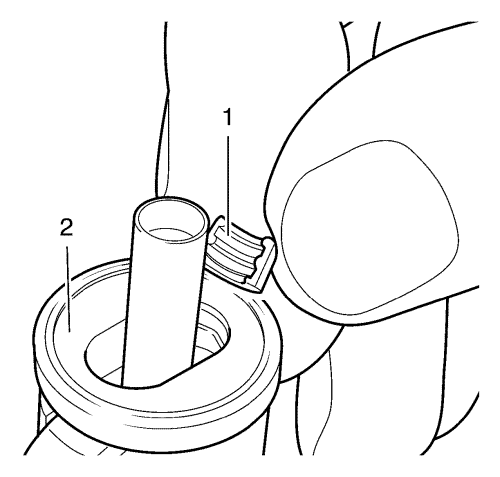
- Install the valve keys (1) to the mounting piece (2) as shown and hold them with the bushing.

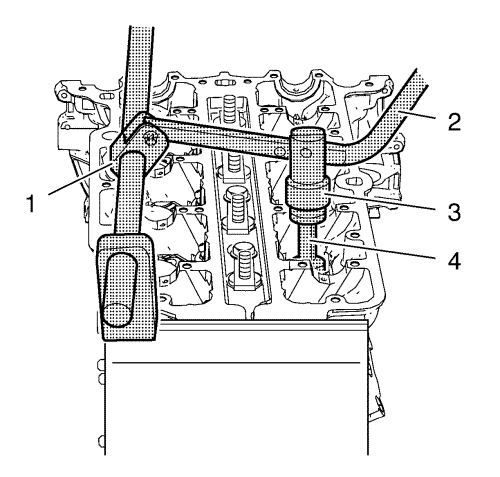
- Install EN-6086-7 lever (2) along with the lever adapter (3) and the mounting piece (4) to the handle (1).
- Push the mounting piece slightly down until the valve keys audibly engage.
- Repeat the procedure on the remaining 15 valves.
- Remove EN-6167-1 braces and EN-6167-5 bolts.
- Remove the cylinder head from the EN-6215-1 mounting table.
| © Copyright Chevrolet. All rights reserved |


