Drive Belt Tensioner Replacement
For equivalent regional tools, refer to Special Tools .
Removal Procedure
- Open the bonnet.
- Remove the engine mount bracket. Refer to Engine Mount Bracket Replacement - Right Side .

Note: Engine mount bracket is removed.
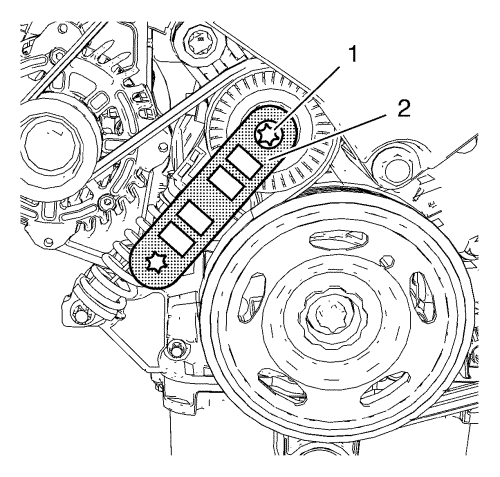
- Install the EN-956 holding wrench (2) to the drive belt tensioner (1).

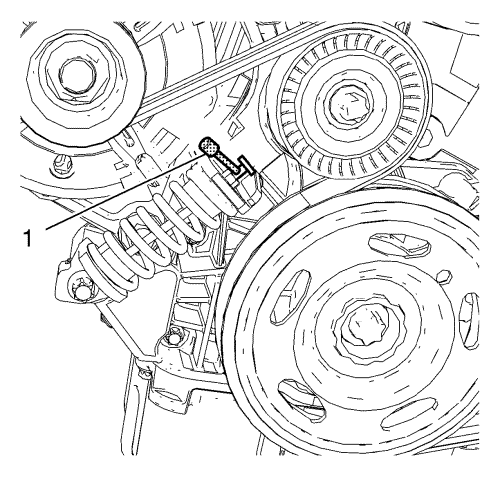
- Move the drive belt tensioner clockwise until the drive belt tensioner can be fixed with EN-955-2 locking pin (1).
- Remove the EN-956 holding wrench.
- Remove the drive belt.
- Repeat step 3 and 4 in order to remove the EN-955-2 locking pin the from drive belt tensioner.

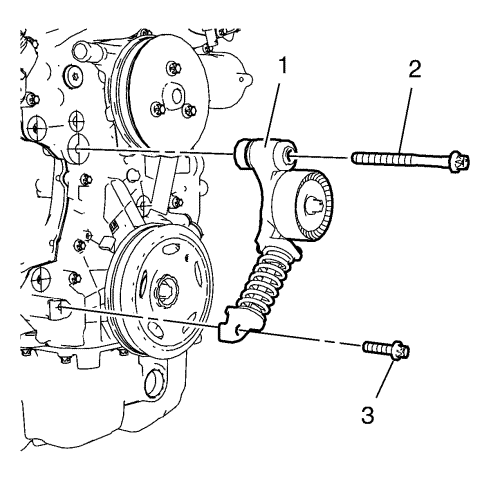
- Remove the upper drive belt tensioner bolt (2).
- Remove the lower drive belt tensioner bolt (3).
- Remove the drive belt tensioner (1).
Installation Procedure

- Install the drive belt tensioner (1).
- Install the lower drive belt tensioner bolt (3).
- Install the upper drive belt tensioner bolt (2).
Caution: Refer to Fastener Caution in the Preface section.
- Tighten the lower drive belt tensioner bolt to 22 N·m (16 lb ft).
- Tighten the upper drive belt tensioner bolt to 55 N·m (41 lb ft).

Note: Engine mount bracket is removed.
- Install the EN-956 holding wrench (2) to drive belt tensioner (1).

- Move the drive belt tensioner clockwise until the drive belt tensioner can be fixed with EN-955-2 locking pin (1).
- Install the drive belt.
- Move the drive belt tensioner clockwise until EN-955-2 locking pin can be removed.
- Allow the tensioner to slide back slowly.
- Remove the EN-956 holding wrench.
- Install the engine mount bracket. Refer to Engine Mount Bracket Replacement - Right Side .
- Close the bonnet.
| © Copyright Chevrolet. All rights reserved |


