Camshaft Cover Replacement
Removal Procedure
- Open the bonnet.
- Remove the upper intake manifold. Refer to Upper Intake Manifold Replacement .
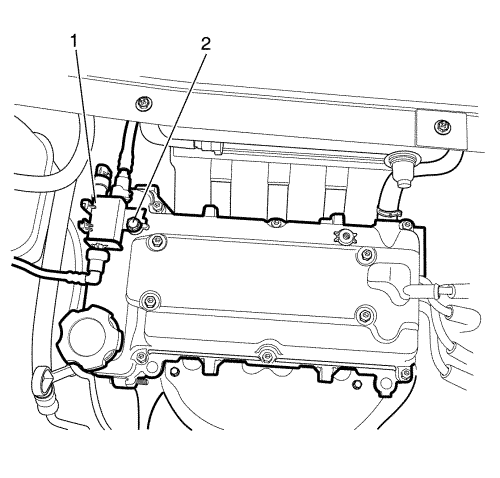
- Remove the canister purge solenoid to camshaft cover retaining bolt (2).
Note: It is not necessary to disconnect the canister pure solenoid connectors.
- Reposition and retain the canister purge solenoid/hose (1) away from the camshaft cover in order to provide clearance for removal of the camshaft cover.
- Remove the positive crankcase ventilation tube. Refer to Positive Crankcase Ventilation Hose/Pipe/Tube Replacement .
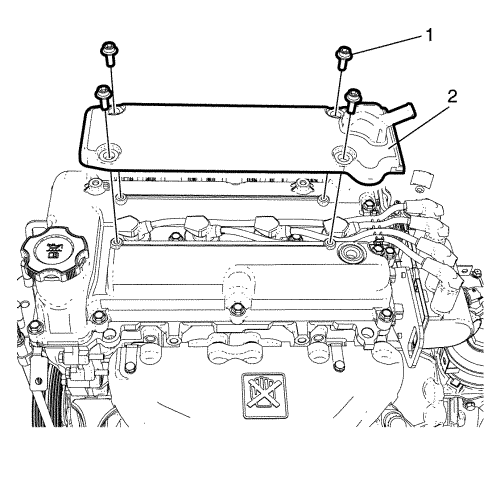
- Remove the upper camshaft cover to camshaft cover retaining bolts (1).
- Remove the upper camshaft cover (2).
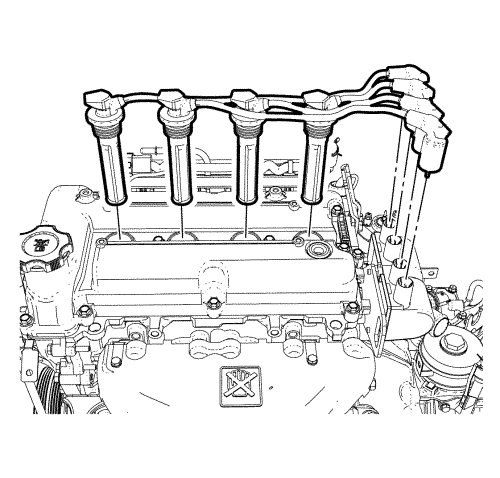
- Remove the ignition coil. Refer to Ignition Coil Replacement .
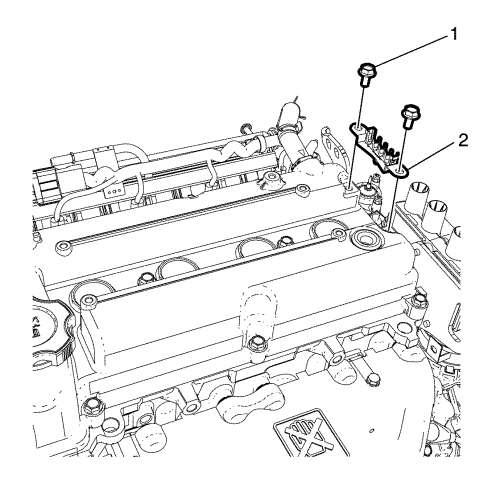
- Remove the clip (2), and bolts (1).
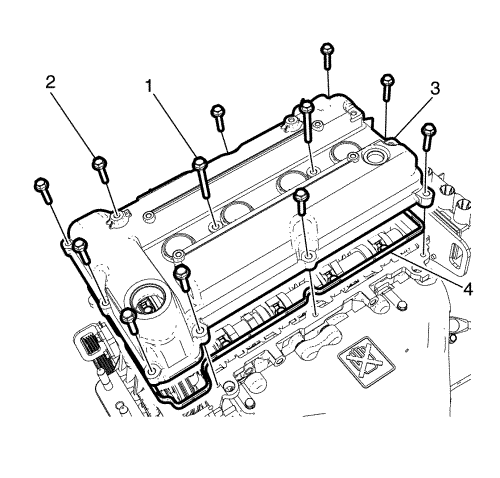
- Remove the 12 bolts (1, 2).
- Remove the camshaft cover (3).
Installation Procedure

Note: Make sure the sealing surfaces of the cylinder head and camshaft cover are clean.
- Install a NEW camshaft cover seal (4) and NEW grommets.
- Install the camshaft cover (3).
Caution: Refer to Fastener Caution in the Preface section.
- Install the 12 bolts (1, 2) and tighten to 10 N·m (89 lb in).

- Install the clip (2) and tighten the bolts (1) to 10 N·m (89 lb in).

- Install the ignition coil. Refer to Ignition Coil Replacement .

- Install the upper camshaft cover (2).
- Install the upper camshaft cover to camshaft cover retaining bolts (1) and tighten to 10 N·m (89 lb in).

- Install the positive crankcase ventilation tube. Refer to Positive Crankcase Ventilation Hose/Pipe/Tube Replacement .
- Install the canister purge solenoid (1) to camshaft cover.
- Install the bolt (2) and tighten to 9 N·m (80 lb in).
- Install the upper intake manifold. Refer to Upper Intake Manifold Replacement .
- Close the bonnet.
| © Copyright Chevrolet. All rights reserved |


