Washer Hose Repair
Washer Hose Repair and Routing
The washer hose can be a component within the main body wire harness conduit. The washer hose is a hard plastic convoluted tube that could be wrapped with electrical tape along the main body electrical wiring harness. It starts underbonnet where it connects to the washer solvent container jumper hose. The washer hose usually routes into the main body wire harness underbonnet and passes through the front of the dash panel grommet. The washer hose is routed either inside the vehicle interior behind the left front side window garnish moulding, along the floor pan area and continues to the rear of the vehicle, as equipped. The washer hose could be routed back to the centre of the vehicle where it could possibly connect to the high mounted brake lamp or the rear window washer pump where it connects by rubber flexible tubing, at the tailgate opening, if equipped.
Removal Procedure
- Locate the damaged section of the washer hose, this will be hard plastic convoluted tubing.
- If the leak is located inside the main body wire harness, carefully cut the electrical tape, securing the harness within the electrical conduit to expose the damaged section of washer hose.
- Cut and remove the damaged section of the washer hose.
Installation Procedure

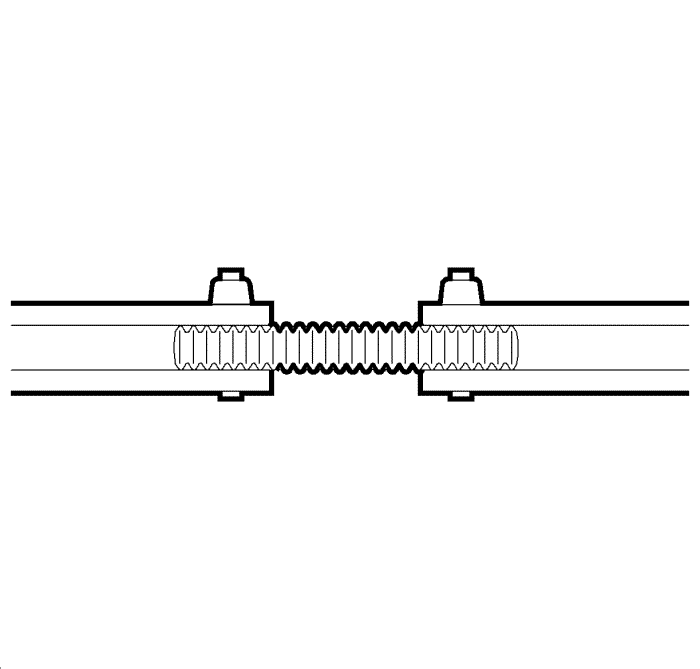
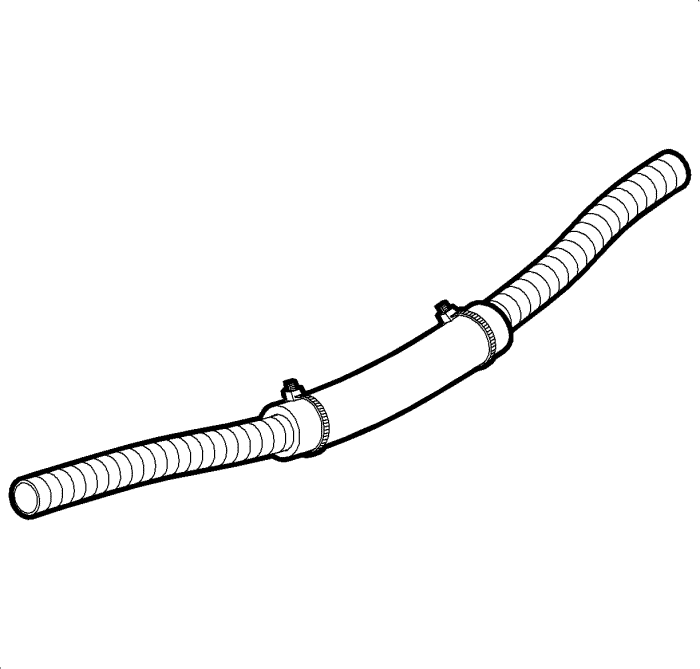
- In order to repair the damaged section of washer hose, use the following steps:
| • | Use a 9.5 mm (3/8 in) vacuum hose to replace damaged section. |
| • | Overlap the washer hose onto the plastic tubing by, 12.5 mm (0.50 in) on each end. |
| • | Secure each end of the vacuum hose with a 100 mm (4 in) cable tie. |
- Verify the repair by activating the front and rear (if equipped) washer system and check the system for leaks.
- If the leak was located inside the main body wire harness or conduit, use electrical tape to retain the repaired section to the electrical wire harness conduit.
- If the leak was located external from the conduit, secure the hose with cable ties to prevent unnecessary movement and noise.

- If the leak requires the washer hose to be removed in the front of dash panel grommet complete the following:
| • | Carefully slit the grommet next to the original washer hose. |
| • | Pass the new section of the washer hose through, next to the existing grommet tubing. |
| • | Repair the hose on either side of the grommet. |
| • | Use small tie straps to secure the hose onto the washer tubing. |
| • | Verify the repair by operating the washer system. |
| • | Seal any openings in the grommet, larger than the hose that was passed through. |
| © Copyright Chevrolet. All rights reserved |

