Front Disc Brake Mounting and Hardware Inspection
Warning: Refer to Brake Dust Warning in the Preface section.
Warning: Refer to Brake Fluid Irritant Warning in the Preface section.
- Inspect the fluid level in the brake master cylinder auxiliary reservoir.
- If the brake fluid level is midway between the maximum-full point and the minimum allowable level, no brake fluid needs to be removed from the reservoir before proceeding.
- If the brake fluid level is higher than midway between the maximum-full point and the minimum allowable level, remove brake fluid to the midway point before proceeding.
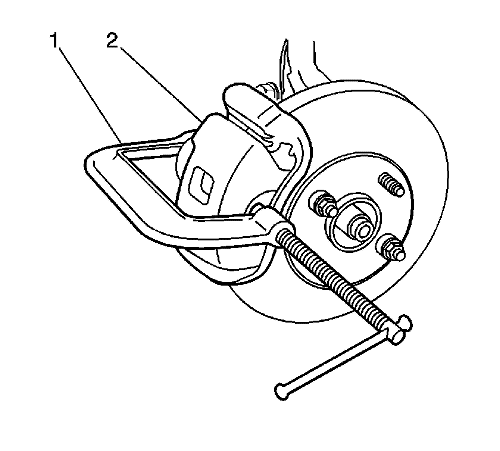
- Install a large C-clamp (1), over the body of the brake calliper (2) with the C-clamp ends against the rear of the calliper body and against the outer brake pad.
- Tighten the C-clamp (1) until the calliper piston is compressed into the calliper bore leaving a gap of approximately 10 mm (0.38 in) between the disc brake pads and the brake rotor.
- Remove the C-clamp (1) from the calliper (2).
- Grasp the brake calliper and attempt to move the brake calliper vertically. The brake calliper should not exhibit excessive looseness.
- Grasp the brake calliper and move the brake calliper inboard and outboard. The brake calliper should slide smoothly with minimal force.
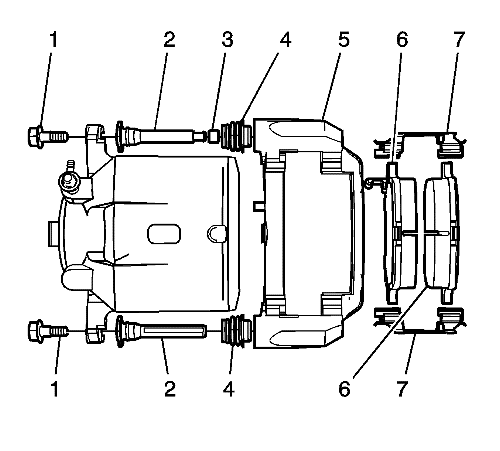
- Ensure the disc brake pads are held firmly in place on the brake calliper mounting bracket (5), yet slide easily on the mounting hardware without binding.
- Inspect the disc brake pad mounting hardware, pad retainers (7), for the following:
| • | Looseness at the brake calliper mounting bracket |
| • | Excessive wear and/or looseness at the disc brake pads |
| • | Missing mounting hardware |
- If any of the conditions listed are found, the disc brake pad mounting hardware requires replacement.
- Inspect the brake calliper guide pins (2) by gently pushing inward, without disengaging the slides from the boots, then pull outward, and observe for the following:
| • | Bent or damaged brake calliper bolts (1) |
| • | Restricted calliper guide pin movement |
| • | Split or torn boots (4) |
| • | Looseness in the brake calliper mounting bracket |
| • | Seized or binding calliper guide pins |
- If any of the conditions listed are found, the brake calliper mounting hardware requires replacement.
- Inspect the brake calliper mounting bracket (5) for being bent, cracked, or damaged.
- If any of the conditions listed are found, the brake calliper mounting bracket requires replacement.
| © Copyright Chevrolet. All rights reserved |


