Transfer Case Assembly Replacement
Removal Procedure
- Raise and support the vehicle. Refer to Lifting and Jacking the Vehicle .
- Remove the exhaust front pipe.
- Remove the propeller shaft.
- Remove the right drive axle.
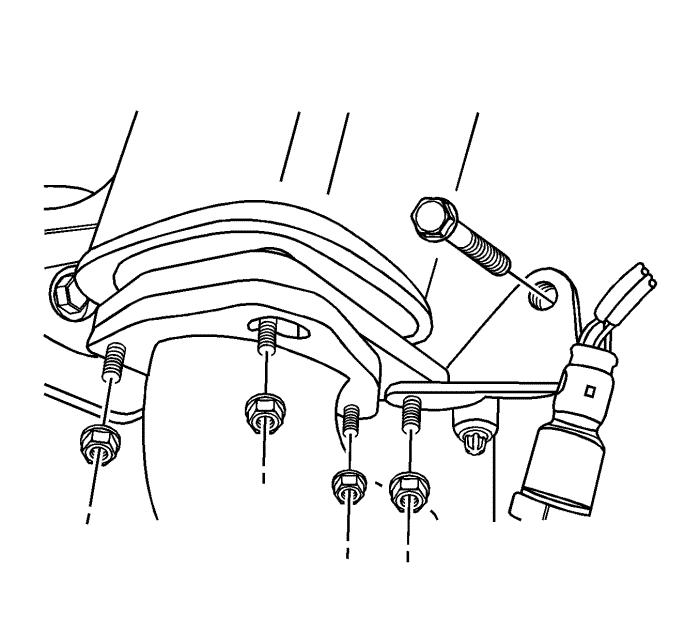
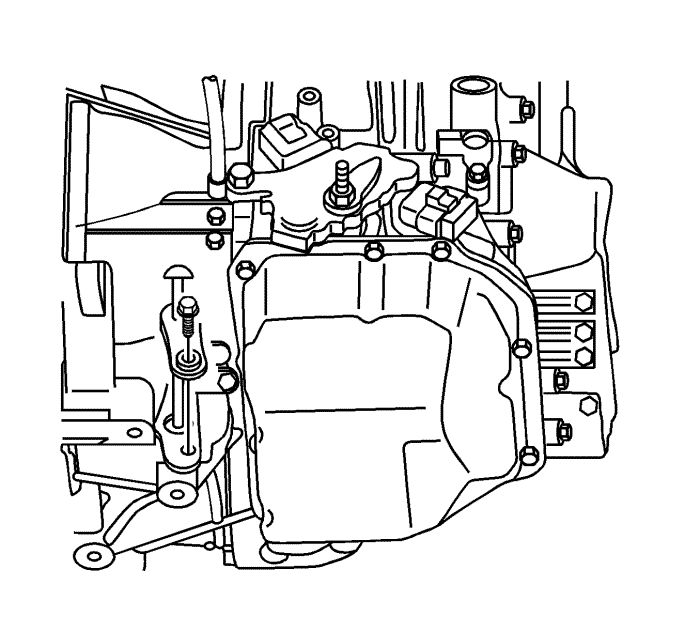
- Remove the upper transfer case bolt (1).
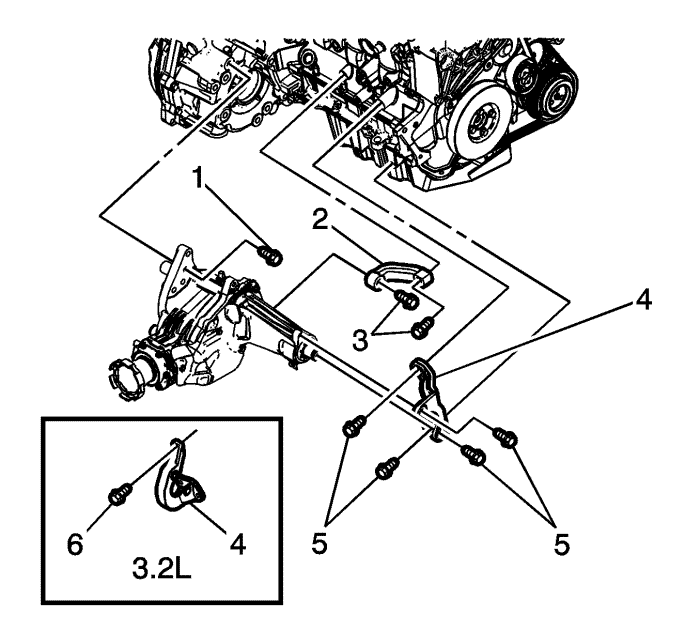
- Remove the transfer case brace bolts (3) and the brace (2).
- Remove the transfer case bracket bolts (5, 6) and the bracket (4).
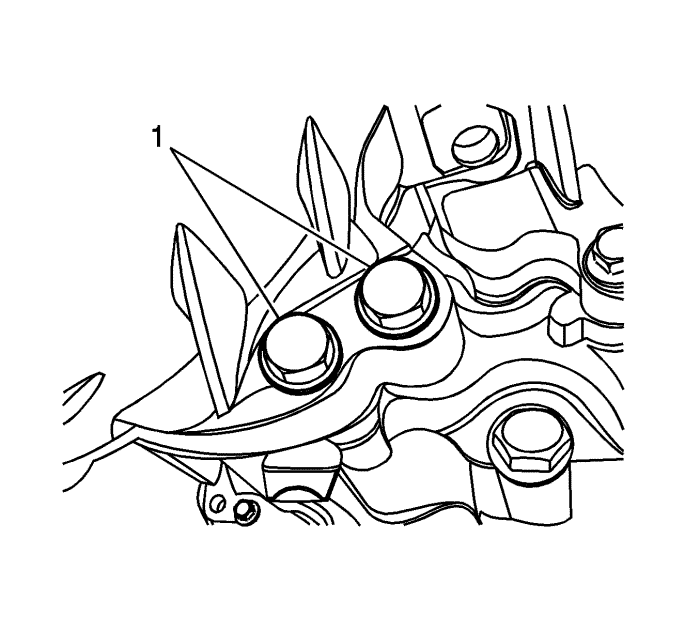
- Remove the lower transfer case bolts (1).
- Support the transfer case using the supporting jack.
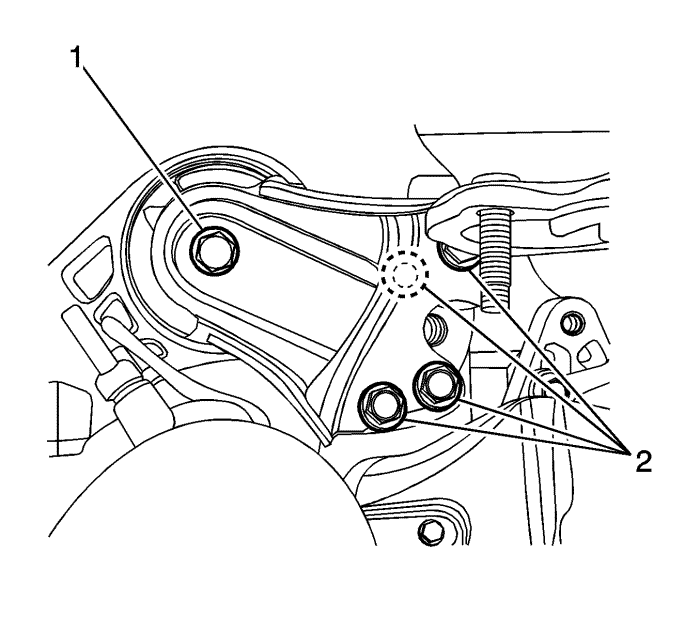
- Remove the transaxle rear mount-to-bracket through bolt (1).
- Remove the rear transaxle bracket mounting bolts and nuts (2).
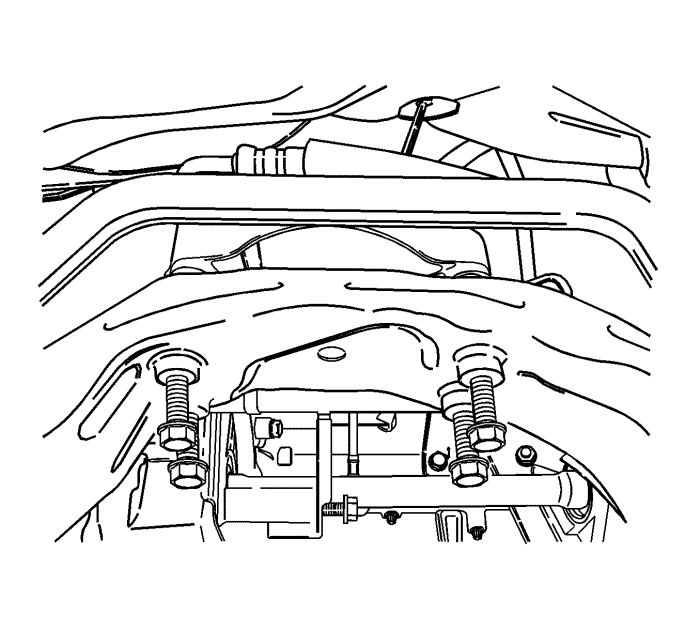
- Remove the transaxle rear mount retaining bolts from the cradle.
- Remove the rear transaxle bracket.
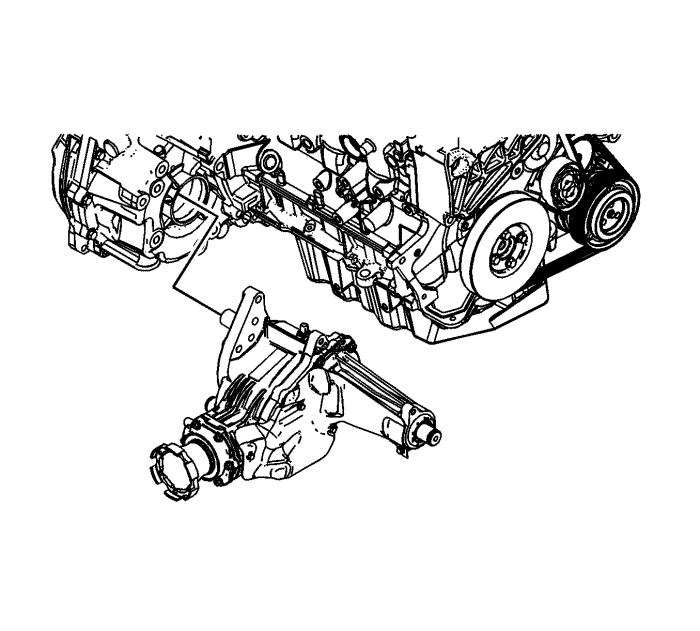
- Remove the transfer case from the transaxle.
- Remove the transfer case to transmission O-ring, then discard the O-ring.
- Plug the transaxle to minimise the transaxle fluid loss.
Installation Procedure
Note: Transmission fluid may creep from the transmission bore during installation.
- Thoroughly clean the transmission bore and ribbing of fluid and debris immediately prior to installing the transfer case.
- Install a NEW transfer case to transmission O-ring.
- Install the transfer case from the transaxle.
- Install the rear transaxle bracket.
Caution: Refer to Fastener Caution in the Preface section.
- Install the transaxle rear mount retaining bolts from the cradle and tighten to 90 N·m (66 lb ft).
- Install the transaxle rear mount-to-bracket through bolt (1) and tighten to 90 N·m (66 lb ft).
- Install the rear transaxle bracket mounting bolts and nuts (2) and tighten to 90 N·m (66 lb ft).
- Install the lower transfer case bolts (1) and tighten to 75 N·m (55 lb ft).
- Install the upper transfer case bolt (1) and tighten to 75 N·m (55 lb ft).
- Install the transfer case brace (2) and bolts (3) and tighten to 60 N·m (44 lb ft).
- Install the transfer case bracket (4) and bolts (5) and tighten to 60 N·m (44 lb ft).
- If the vehicle is equipped with a 3.2L engine, install the transfer case bracket bolt (6) and the other 4 bolts (5) and tighten.
Tighten
| • | Transfer case bracket bolt (6) to 40 N·m (30 lb ft). |
| • | The other 4 bolts (5) to 60 N·m (44 lb ft). |
- Install the right drive axle.
- Install the propeller shaft.
- Install the exhaust front pipe.
- Lower the vehicle.
- Check the transaxle oil level and fill as required.
| © Copyright Chevrolet. All rights reserved |


