Captiva |
||||||||
|
|
|
|||||||
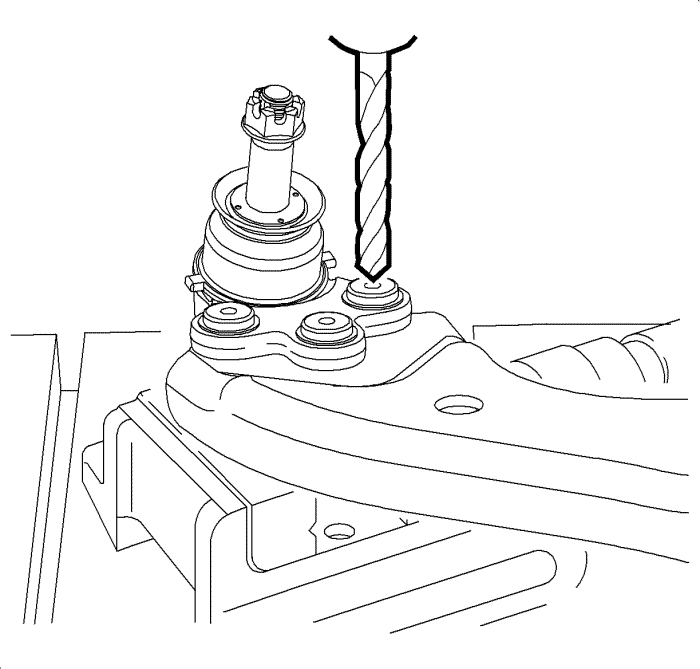
| 3.1. | Drill through the rivets using a 8 mm (5/16 in) drill bit. |
| 3.2. | Enlarge the hole using a 12 mm (31/64 in) drill bit. |
| 3.3. | Remove any remaining burs from the control arm. |
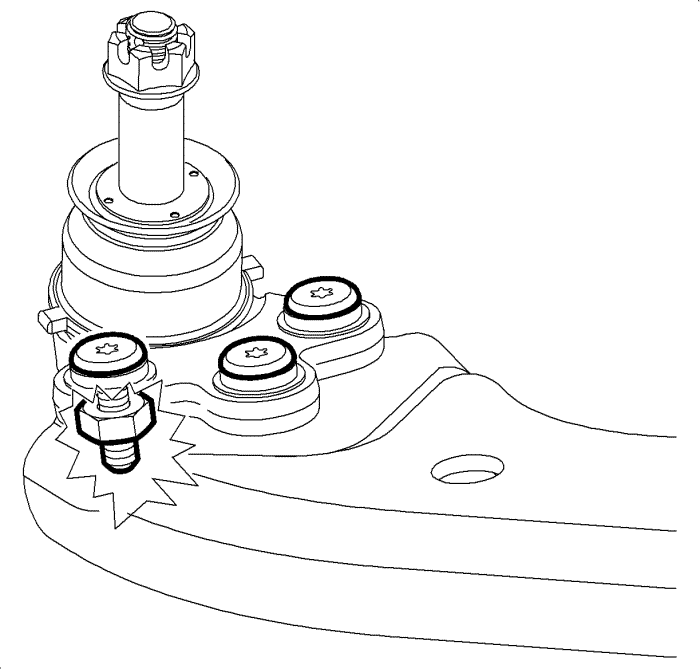
Note: The control arm must be clean and free of debris.
Caution: Refer to Fastener Caution in the Preface section.
Note:
• Only use hardware provided with the new ball joint. • The bolts must be installed with the bolt head on top of the ball joint.
| © Copyright Chevrolet. All rights reserved |


