Lower Control Arm Replacement
Special Tools
J 42100-B Ball Joint Separator
Removal Procedure
- Raise and support the vehicle. Refer to Lifting and Jacking the Vehicle .
- Remove the front tyre and wheel assembly. Refer to Tyre and Wheel Removal and Installation .
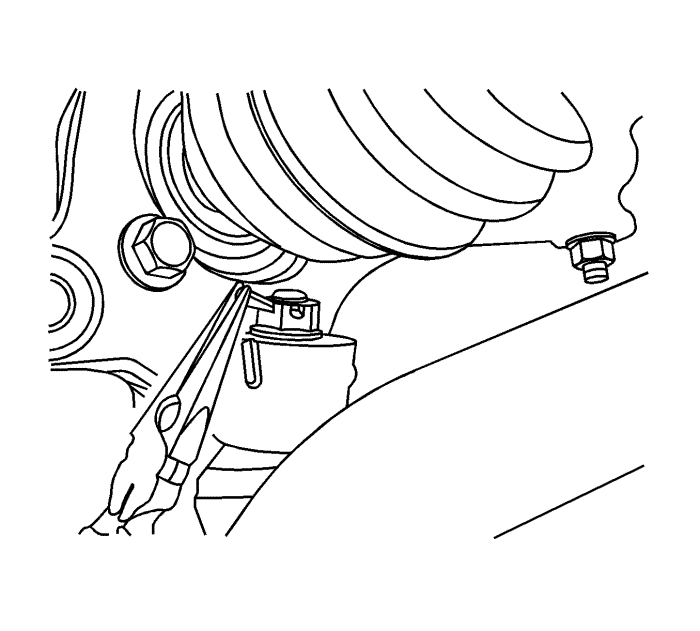
- Remove the cotter pin and the nut that retains the control arm ball joint to the knuckle.
- Using the J 42100-B Ball Joint Separator , remove the ball joint from the knuckle assembly.
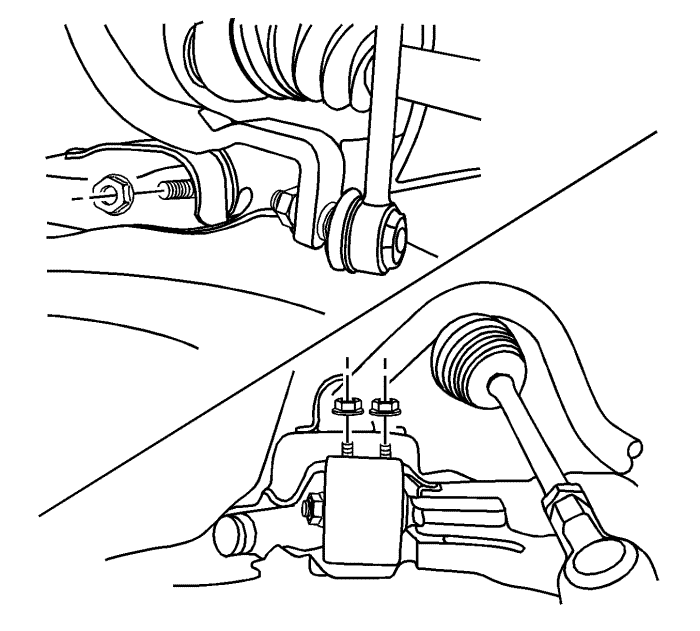
- Remove the control arm to cradle bolts and nuts.
- Remove the control arm.
Installation Procedure
Caution: Refer to Fastener Caution in the Preface section.
- Install the control arm to cradle front bolt and nut and tighten to 120 N·m (89 lb ft).
- Install the control arm to cradle rear bolts and nuts and tighten to 110 N·m (81 lb ft).
- Install the control arm ball joint to the knuckle.
- Install the nut to the ball joint stud and tighten to50 N·m (37 lb in)
- Install the cotter pin.
- Install the front tyre and wheel assembly. Refer to Tyre and Wheel Removal and Installation .
- Lower the vehicle.
| © Copyright Chevrolet. All rights reserved |


