Evaporative Emission Canister Replacement
Removal Procedure
Warning: Ensure that the vehicle is properly supported and squarely positioned. To help avoid personal injury when a vehicle is on a hoist, provide additional support for the vehicle on the opposite end from which the components are being removed.

- Raise and suitably support the vehicle. Refer to Lifting and Jacking the Vehicle .
- Disconnect the fuel tank wiring harness electrical connector (1) from the evaporative emission (EVAP) canister vent solenoid valve.
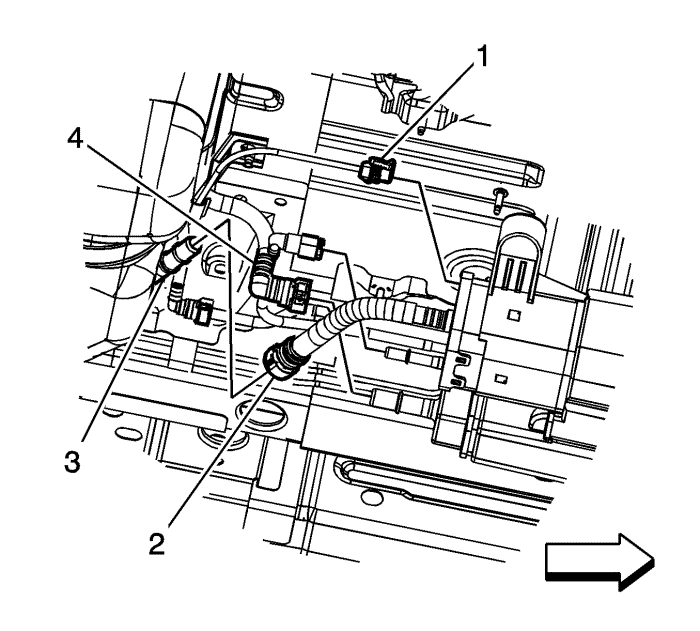
- Disconnect the fuel tank vapour line quick connect fitting (4) from the EVAP canister. Refer to Plastic Collar Quick Connect Fitting Service .
- Disconnect the chassis EVAP line quick connect fitting (1) from the EVAP canister. Refer to Plastic Collar Quick Connect Fitting Service .
- Disconnect the EVAP canister line quick connect fitting (2) from the fuel tank fresh air line (3). Refer to Plastic Collar Quick Connect Fitting Service .
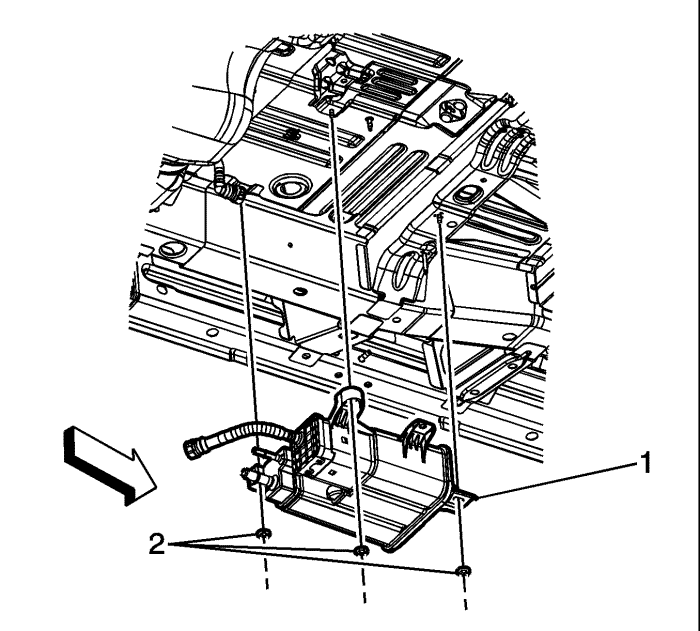
- Remove the EVAP canisters nuts.
- Remove the canister from the vehicle underbody.
Installation Procedure
- Position the EVAP canister to the underbody studs.
Caution: Refer to Fastener Caution in the Preface section.
- Install the EVAP canister nuts.
Tighten
Tighten the nuts to 8 N·m (71 lb in).
- Connect the EVAP canister line quick connect fitting (2) to the fuel tank fresh air line (3). Refer to Plastic Collar Quick Connect Fitting Service .
- Connect the fuel tank vapour line quick connect fitting (4) to the EVAP canister. Refer to Plastic Collar Quick Connect Fitting Service .
- Connect the chassis EVAP line quick connect fitting (1) to the EVAP canister. Refer to Plastic Collar Quick Connect Fitting Service .
- Connect the fuel tank wiring harness electrical connector (1) to the EVAP canister vent solenoid valve.
- Lower the vehicle.
| © Copyright Chevrolet. All rights reserved |


