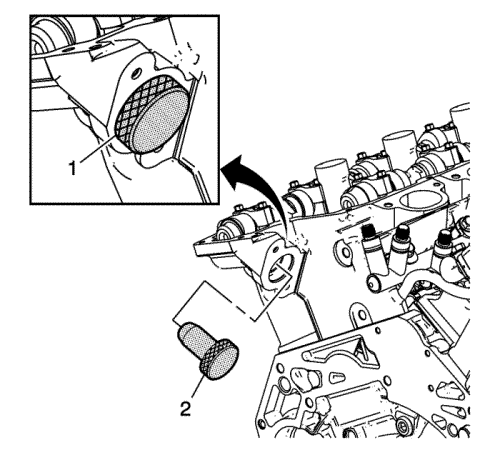
Note: The camshaft must be in the base circle position before the high pressure fuel pump is installed.
- Use the EN 48896 alignment gauge (2) to ensure that the camshaft lobe is in the base circle position. At base circle position, the tool will be flush with the head (1).
- Lubricate the high pressure fuel pump cylinder head bore with 5W30 engine oil.
Note: Ensure that the high pressure fuel pump roller tappet is oriented properly, the camshaft is at base circle and the number 1 piston is at top dead centre (TDC) on the exhaust stroke.
- Lubricate the high pressure fuel pump roller tappet with 5W30 engine oil and install into the cylinder head bore.
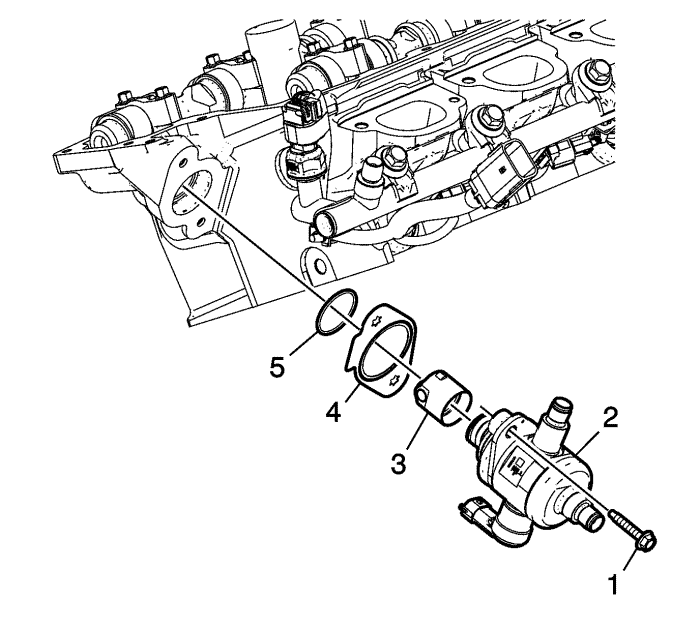
- Install a NEW high pressure fuel pressure fuel pump gasket (4).
- Install a NEW high pressure fuel pump O-ring (5).
Note: Ensure the plastic bolt retainers are installed in the high pressure fuel pump mounting holes before installing.
- Install the cam follower (3).
- Install the high pressure fuel pump (2).
Caution: Refer to Fastener Caution in the Preface section.
Caution: Alternately hand-tighten the fuel pump bolts one turn at a time until the pump is fully seated. Trying to draw down the pump without even side-to-side tightening may result in pump plunger damage.
- Start and hand-tighten the NEW high pressure fuel pump bolts (1) evenly and tighten the high pressure fuel pump bolts to 15 N·m (11 lb ft).
Note:
| • | DO NOT re-use the high pressure fuel rail crossover pipe. |
| • | The tightening order and torque are critical to proper fuel system fit and function. Be sure to follow installation and tightening steps exactly. |
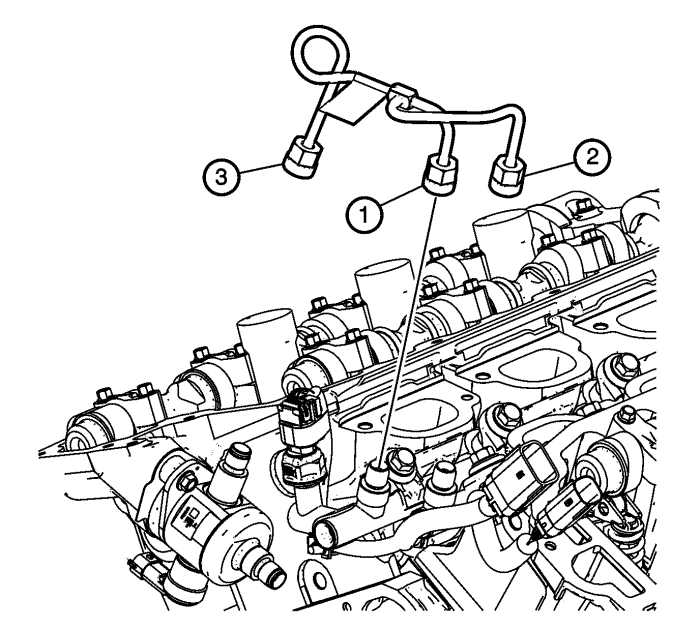
- Install the NEW high pressure LH to RH fuel rail crossover pipe by starting all three fuel crossover pipe fitting nuts (1), (2) and (3) to finger-tight only.
- Tighten the fuel rail crossover pipe fittings to 30 N·m (22 lb ft) in the following order: (1) Left Fuel Rail, (2) Right Fuel Rail, then (3) Fuel Pump.
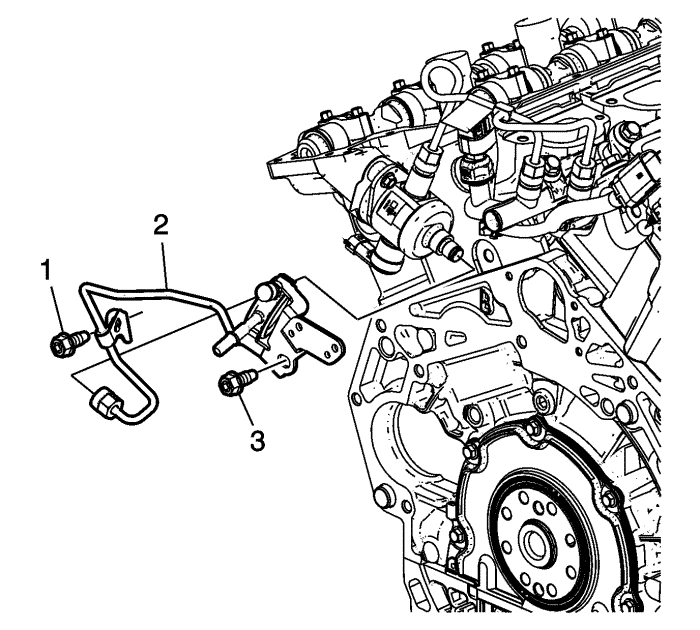
- Install the NEW fuel feed pipe (2) by installing the fuel line nut to the fuel pump finger-tight.
- Install the right fuel feed pipe bolt finger tight (3).
- Install the left fuel feed pipe bolt finger tight (1).
- Tighten the left fuel feed pipe bolt (1) to 10 N·m (89 lb in).
- Tighten the right fuel feed pipe bolt (3) to 10 N·m (89 lb in).
- Tighten the fuel feed pipe fitting nut to 30 N·m (22 lb ft).
- Install the fuel rail wiring connectors to the fuel feed pipe bracket.
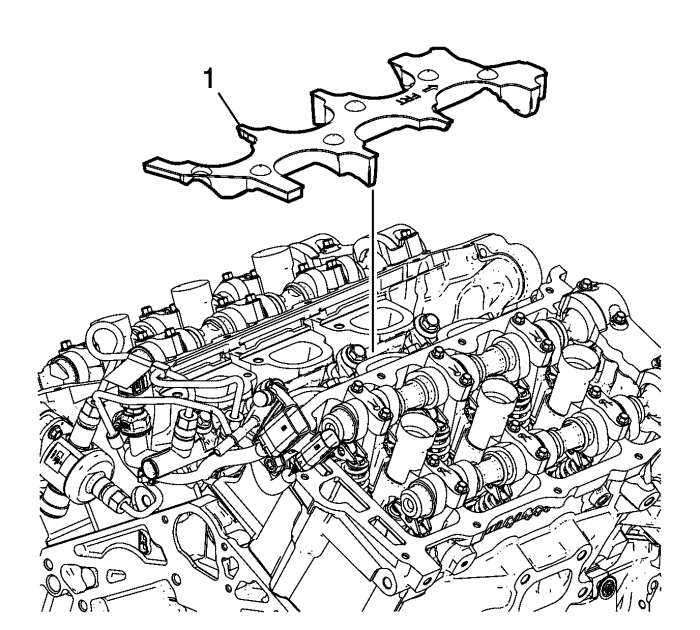
- Install the fuel rail noise shield (1).


