Water Pump Replacement — LE5
Special Tools
| • | GE 25025-5 Dial Indicator Mounting Post |
| • | EN 43651 Water Pump Holding Tool |
For equivalent regional tools, refer to Special Tools .
Removal Procedure
- Remove the thermostat housing . Refer to
Engine Coolant Thermostat Housing Replacement : LF1 → LE5 .
- Remove the coolant heater. Refer to
Coolant Heater Replacement : LNQ → LF1 → LE5 .
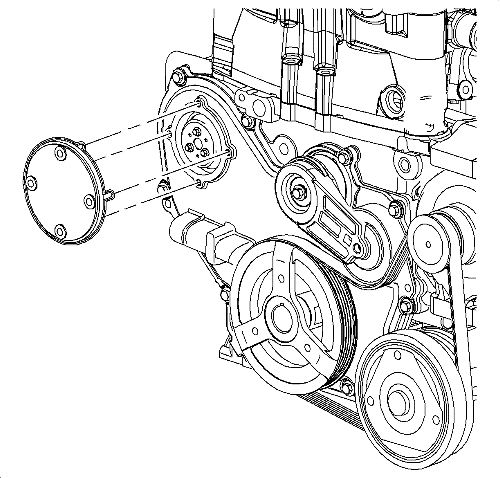
- Remove the water pump access plate from the front cover.
Note: The water pump holding tool supports the sprocket and chain during water pump service. The tool must be used or the balance shaft must be re-timed.
- Install the EN 43651 water pump holding tool into position.
- Tighten the bolts on the water pump holding tool into the threads on the water pump sprocket.
- Install the access cover bolts that were removed earlier to secure the water pump holding tool to the front cover assembly.
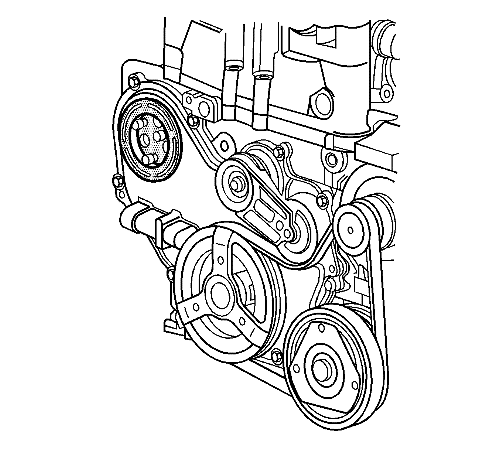
- Remove the 3 inner water pump sprocket to water pump bolts through the holes in the water pump holding tool.
Note: Be sure to remove both water pump bolts from the front of the engine block.
- Remove the 2 water pump bolts (1).
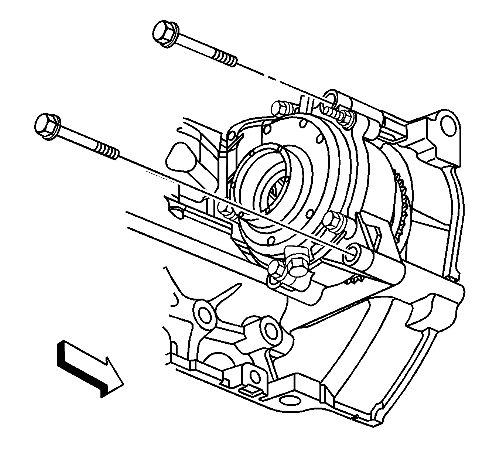
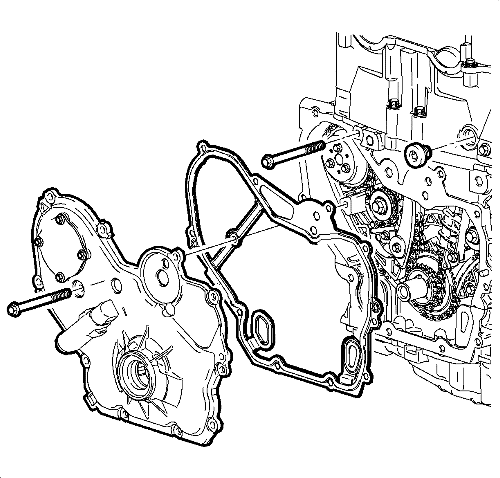
- Remove the rear 2 water pump bolts (1).
- Remove the engine wiring harness clip nut from the water pump stud.
- Remove the engine wiring harness clip from the stud.
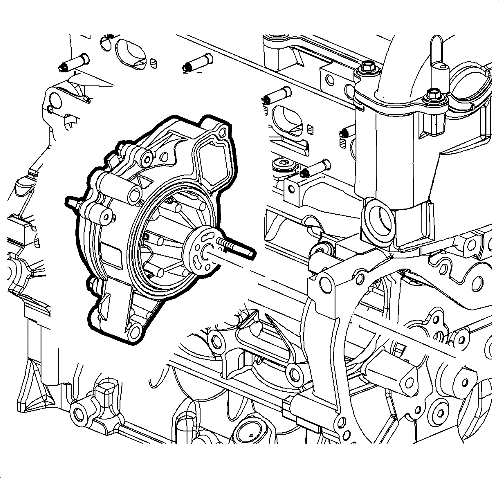
- Remove the water pump (1).
Installation Procedure
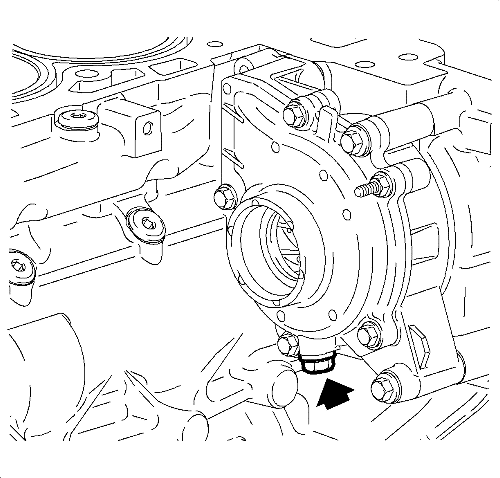
- Apply sealant to the water pump drain plug. Refer to Adhesives, Fluids, Lubricants, and Sealers
Caution: Refer to Fastener Caution in the Preface section.
- Install the water pump drain plug.
Tighten
Tighten the drain plug to 20 N·m (15 lb ft).
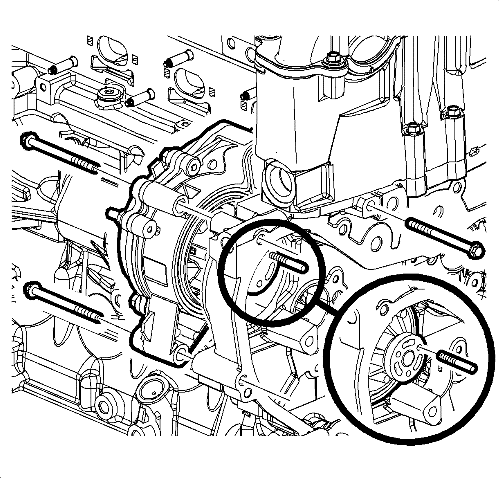
Note: A guide pin can be created to aid in water pump alignment. Use a M6 m x 6 mm stud. Thread the pin into the water pump sprocket.
- Using the GE 25025-5 dial indicator mounting post , align the pin with the water pump holding tool.
- Position the water pump against the engine block and hand tighten the water pump bolts.
- Install the inner water pump sprocket bolts. After 2 are snug, remove the guide pin and install the 3rd bolt.
Tighten
Tighten the water pump bolts to 25 N·m (18 lb ft).
- Tighten the water pump sprocket bolts last.
Tighten
Tighten the water pump sprocket bolts to 10 N·m (89 lb in).
- Remove the EN 43651 water pump holding tool .
- Install the coolant heater. Refer to
Coolant Heater Replacement : LNQ → LF1 → LE5 .
- Install the water pump access plate and bolts.
Tighten
Tighten the bolts to 10 N·m (89 lb in).
- Install the thermostat housing . Refer to
Engine Coolant Thermostat Housing Replacement : LF1 → LE5 .
| © Copyright Chevrolet. All rights reserved |


