- Remove any old thread sealant, gasket material, or sealant using remover such as chisel or scraper.
- Clean the upper oil pan and upper oil pan components with solvent.
Note: Ensure that the sealing surface is clear of oil, grease and old sealant material.
- Clean out debris from the bolt holes
Warning: Refer to Safety Glasses Warning in the Preface section.
- Dry the upper oil pan and upper oil pan components with compressed air.

Note: The complete installation procedure of the upper oil pan should be done in 10 minutes.
Note: Do not coat sealing compound on the upper oil sump bolt holes and bolt threads.
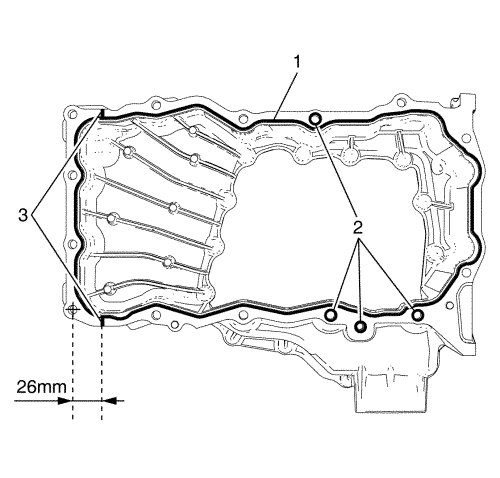
- Apply sealing compound on sealant line (1) including circular dispensing on 4 holes (2).
- Apply spot dispensing at 2 areas (3).

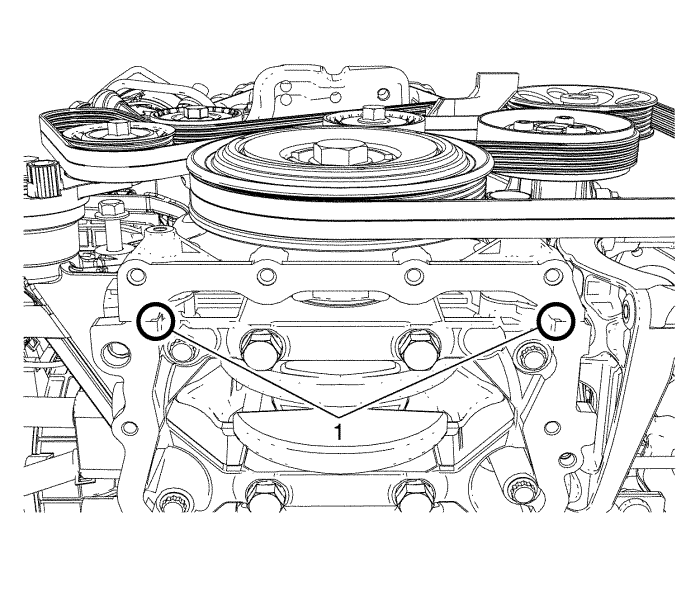
- Fill sealant compound at 2 areas (1) between front cover and bed plate if the space is empty.

Note: The alignment pins will help maintain position while installing the bolts.
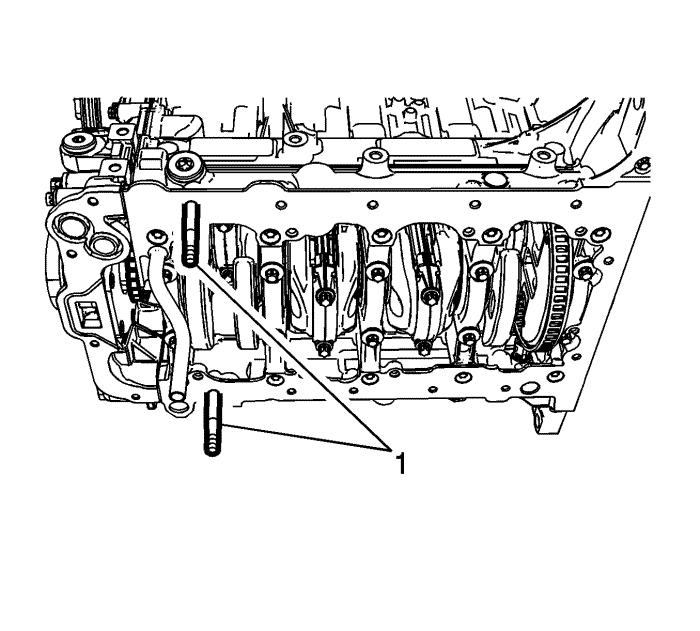
- To aid in upper oil sump alignment, install two EN-50435 guide pins (1) on the bed plate.

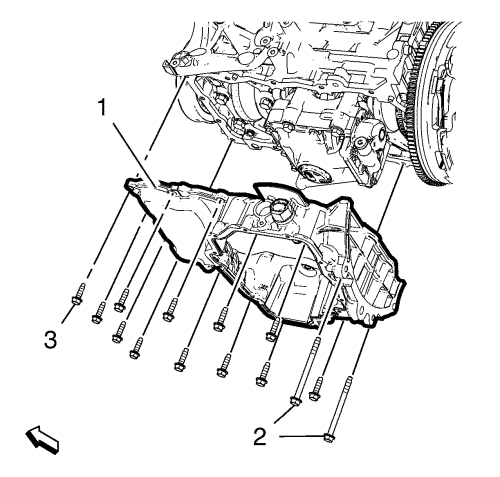
- 9. Install the upper sump (1).
- Start upper oil sump bolts and remove EN-50435 guide pins .
Caution: Refer to Fastener Caution in the Preface section.
- Install 14 upper sump retaining bolts (2, 3) and tighten evenly to 25 N·m (18 lb ft).


