To the top of the document
Captiva
   
GMDE Start Page Load static TOC Load dynamic TOC Help?

Air Conditioning Evaporator Thermal Expansion Valve Replacement

Removal Procedure

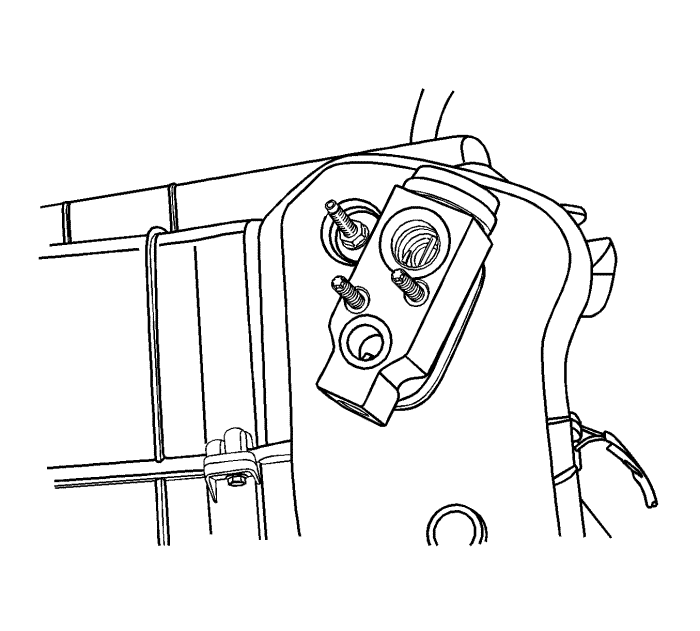
    Note: The left-hand drive is shown. The right-hand drive is similar.

  1. Remove inlet manifold cover. Refer to Inlet Manifold Cover Replacement : LE5 or LE9 or Inlet Manifold Cover Replacement

  2. 1760750
  3. Remove the nuts retaining the liquid line and evaporator outlet hose clips to the vehicle.
  4. Remove the nuts retaining the liquid line and evaporator outlet hose to the thermal expansion valve.
  5. Remove the liquid line and evaporator outlet hose from the thermal expansion valve.

  6. 1760751
  7. Remove the thermal expansion valve bolts.
  8. Remove the thermal expansion valve.
  9. Remove and discard the O-rings from the evaporator lines. Refer to Air Conditioning O-Ring Seal Replacement .
  10. Cap all of the openings to prevent contamination.

Installation Procedure


    1760751
  1. Clean the O-ring surface areas of dirt or contamination.
  2. Install the new O-rings on the evaporator lines. Refer to Air Conditioning O-Ring Seal Replacement .
  3. Install a new thermal expansion valve onto the evaporator lines.
  4. Caution: Refer to Fastener Caution in the Preface section.

  5. Install the thermal expansion valve bolts and tighten to 10 N·m (89 lb in).

  6. 1760750
  7. Install the liquid line and evaporator outlet hose to the thermal expansion valve.
  8. Install the liquid line and evaporator outlet hose nuts to the thermal expansion valve. Tighten the nuts to 16 N·m (12 lb ft).
  9. Install the liquid line and evaporator outlet hose clip nuts to the vehicle and tighten to 16 N·m (12 lb ft).
  10. Recharge the A/C system. Refer to Refrigerant Recovery and Recharging .
  11. Install inlet manifold cover. Refer to Inlet Manifold Cover Replacement : LE5 or LE9 or Inlet Manifold Cover Replacement


© Copyright Chevrolet. All rights reserved