To the top of the document
Captiva
   
GMDE Start Page Load static TOC Load dynamic TOC Help?

Clutch Assembly Replacement - 2.4 Engine

Removal Procedure

  1. Remove the transmission from the vehicle. Refer to Transmission Replacement : 2.4 Engine  → Diesel Engine .

  2. 1773703

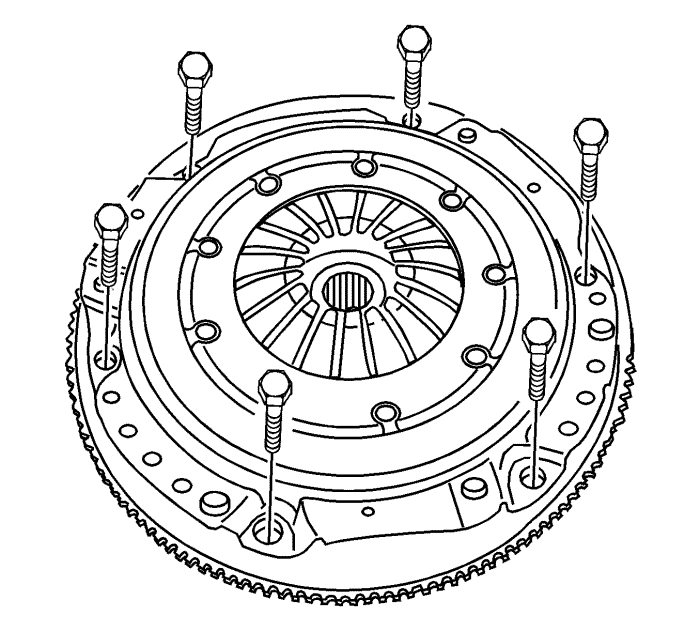
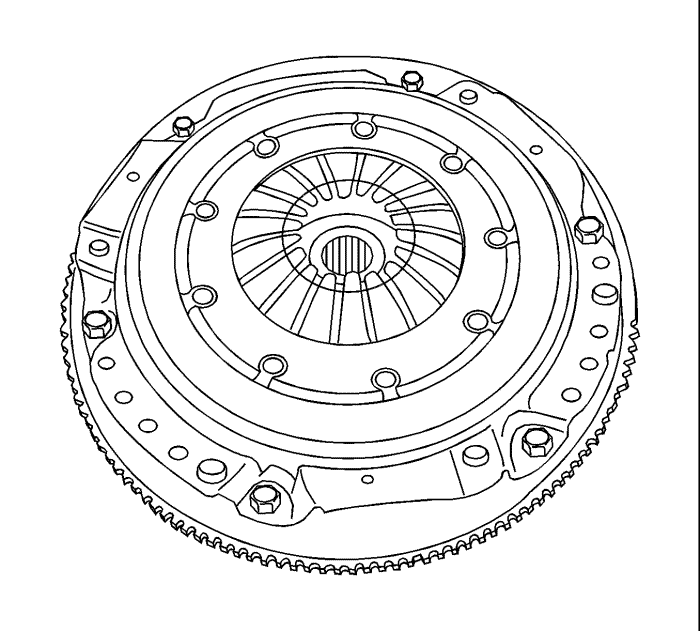
    Note: Support the pressure plate when you remove the last bolt.

  3. Remove and DISCARD the pressure plate bolts.
  4. Remove the pressure plate.

  5. 1773705
  6. Remove the clutch disc from the flywheel.

Clutch Disc Inspection


    1773707
  1. Visual Inspection
  2. • Inspect the worn or oily contamination on the clutch surface.
    • Inspect the damaged or weakened torsion spring.
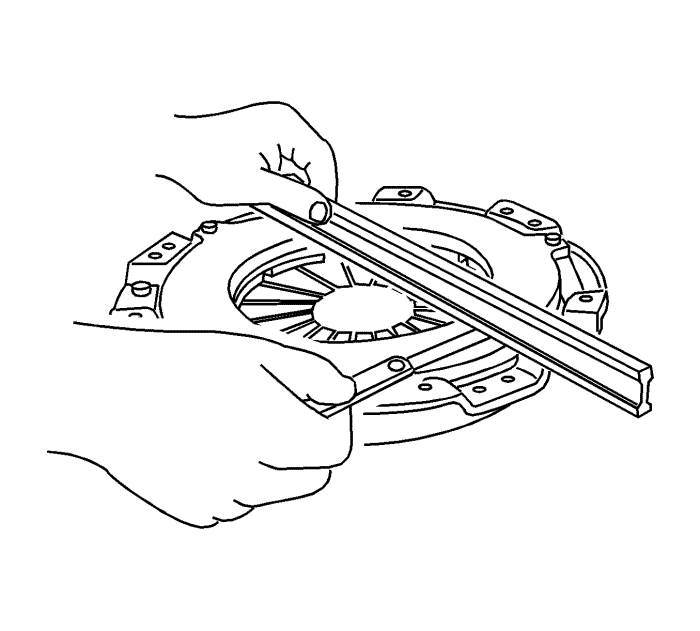
    • Inspect the a warped or bent clutch disc. After inspection, replace new clutch disc, if necessary.
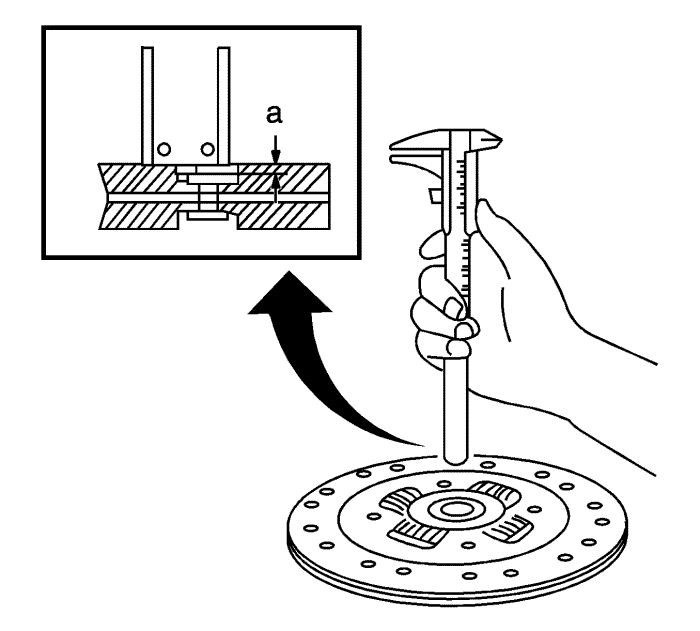
  3. Clutch Disc Inspection
  4. • Measure the rivet head depth from the clutch disc surface.
    • Replace the clutch disc if the measured value is below the limit.
    • Rivet Head Depth (Limit) : 1.1 mm (0.043 in).

Pressure Plate Inspection


    1773710
  1. Check for a worn diaphragm spring finger.
  2. Check for a worn or cracked pressure plate surface.
  3. Check for the polluted face by the oil. After inspection, replace the pressure plate if necessary.

Installation Procedure


    1858648
  1. Coat the spline on the clutch disc with multi-purpose grease.
  2. Align the pressure plate and the clutch disc onto the flywheel using a suitable tool.
  3. Caution: Refer to Fastener Caution in the Preface section.

  4. Install the NEW pressure plate bolts and tighten crosswise to 24 N·m(18 lb ft).
  5. Install the transmission into the vehicle. Refer to Transmission Replacement : 2.4 Engine  → Diesel Engine .


© Copyright Chevrolet. All rights reserved