Rear Axle Bush Replacement - Compound Crank
Special Tools
| • | CH 6616 Hydraulic Hand Pump |
| • | CH 6615-10 Hydraulic Cylinder |
For equivalent regional tools. Refer to Special Tools
Removal Procedure
Warning: Use of eye goggles is necessary to prevent personal injury.
- Remove the rear axle. Refer to Rear Axle Replacement
- With the aid of second mechanic, place rear axle onto work bench.
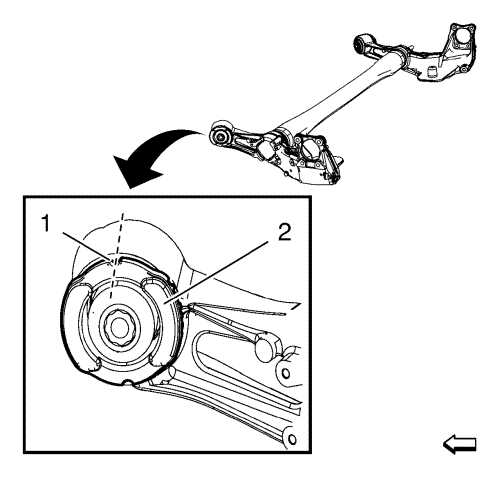
- Mark installation position (dashed line) for rear axle bush (2) on rear axle using a permanent marker.
Use upper gap (1) of bush for alignment.
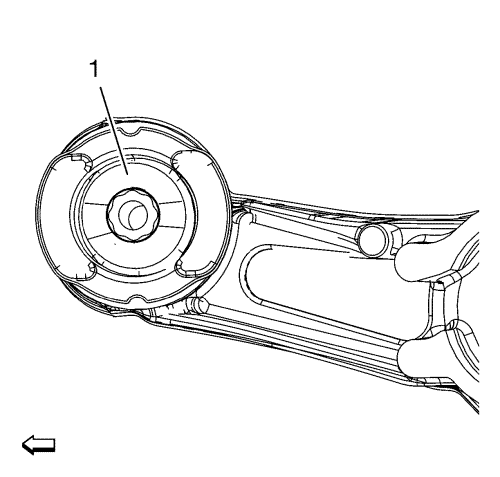
- Drill 8 times all around through rubber (1) bush with drill 10 mm (0.4 in)
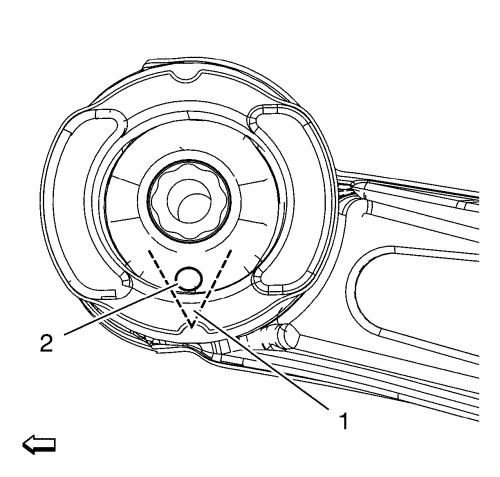
- Carefully jigsaw a V-cut (dashed line) into lower side (1) of rear axle bushing. Use lowest bore (2) to insert saw.
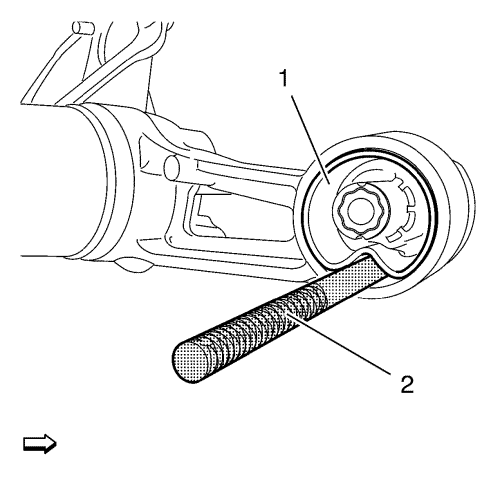
- Remove bush (1), using CH-48377-1 chisel (2) and a hammer. Insert CH-48377-1 chisel on place of V-cut.
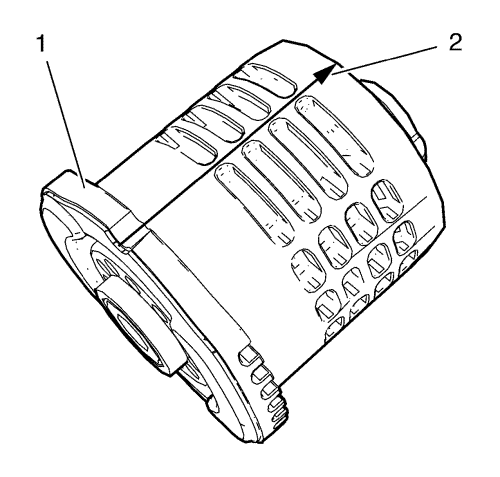
- Mark installation position (2) of NEW rear axle bush (1) as shown in graphic above
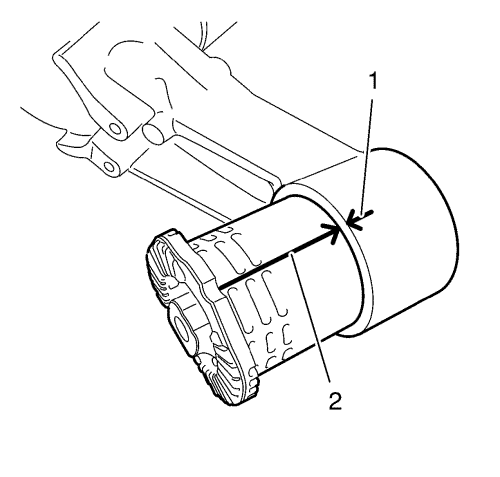
- Align bushing marking (2) to rear axle marking (1).
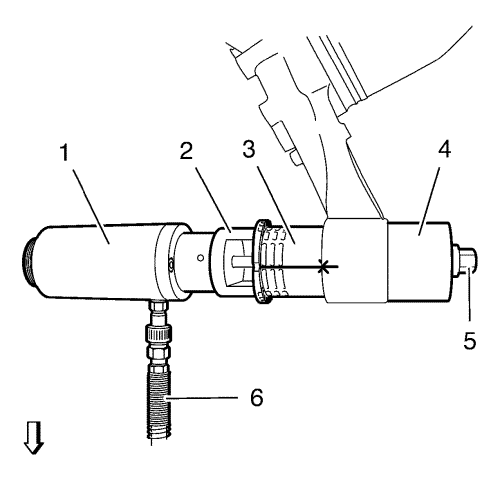
- Install the following components onto rear axle bush and rear axle:
| • | CH 6615-10 cylinder (1). |
| • | NEW rear axle bush (3). |
| • | Install and tighten counter nut (5) onto spindle of CH 6615-10 cylinder (1) |
- Connect pressure hose (6) of CH 6616 pump to CH 6615-10 cylinder
- Carefully press the rear axle bushing in to rear axle, using CH 6616 pump.
- When lift way of CH 6615-10 cylinder reaches stop, release pressure on CH 6616 pump , retighten counter nut (5) and press rear axle bushing in to rear axle until final installation position.
- Remove ALL special tools.
- Install rear axle. Refer to Rear Axle Replacement
| © Copyright Chevrolet. All rights reserved |


