Camshaft Timing Chain, Sprocket, and Tensioner Replacement
Special Tools
| • | EN-48953 Camshaft Actuator Locking Tool |
For equivalent regional tools, refer to Special Tools .
Removal Procedure
- Remove the camshaft position exhaust actuator. Refer to Camshaft Position Exhaust Actuator Replacement .
- Remove the camshaft position intake actuator. Refer to Camshaft Position Intake Actuator Replacement .
- Remove the adjustable timing chain guide . Refer to Adjustable Timing Chain Guide Replacement .
- Remove the timing chain guide. Refer to Timing Chain Guide Replacement .
- Remove the timing chain oil nozzle. Refer to Timing Chain Oil Nozzle Replacement .
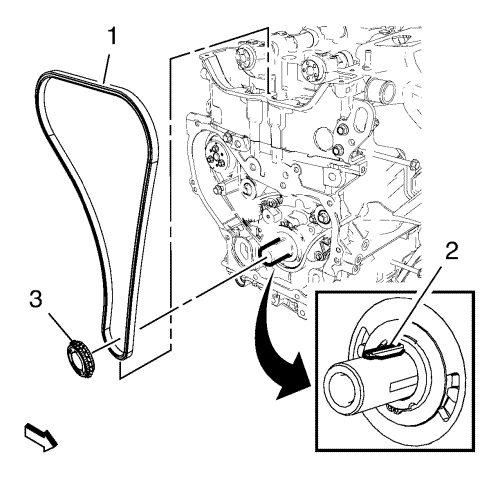
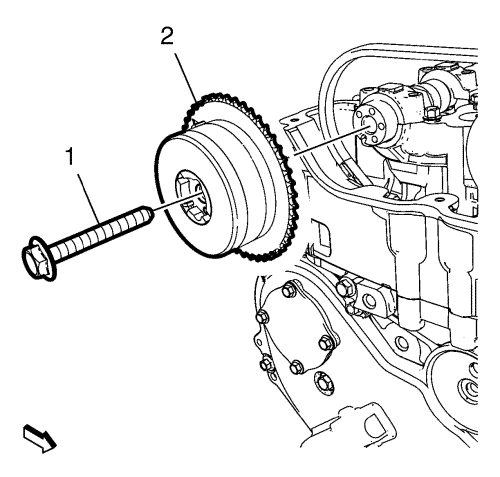
Note: Mind the crankshaft key (2).
- Remove the timing chain crankshaft sprocket (2).
- Remove the timing chain (1) in top direction.
Installation Procedure
- Install the timing chain (1).
Note: Ensure that the crankshaft sprocket (3) fits into the crankshaft key (2).
- Install the crankshaft sprocket (3) to the crankshaft.
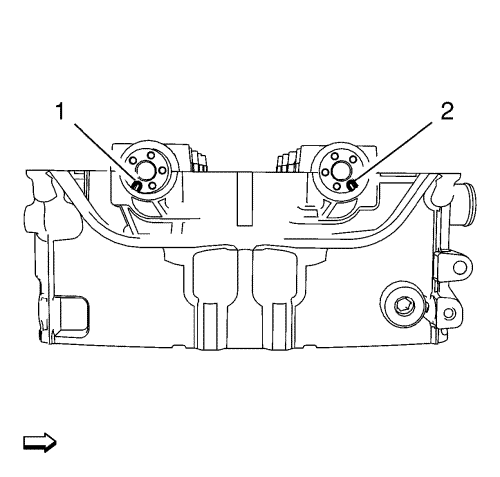
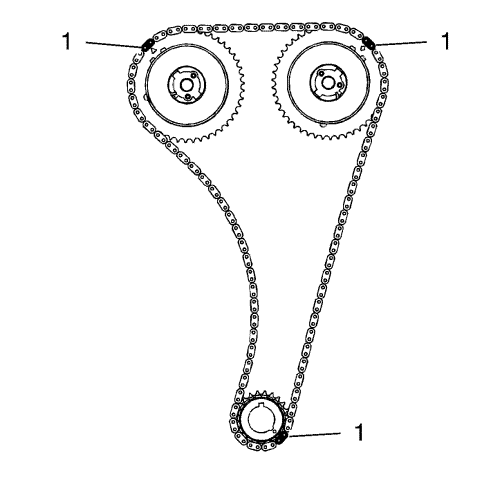
- Set the exhaust camshaft to the position shown (1).
- Set the intake camshaft to the position shown (2).
- Ensure the crankshaft is still adjusted to TDC of the combustion stroke of the cylinder 1, correct if necessary.
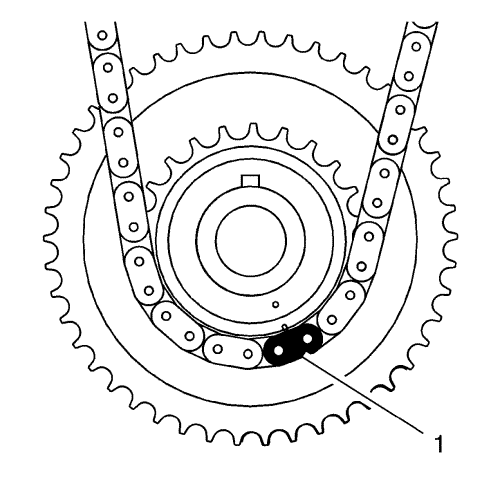
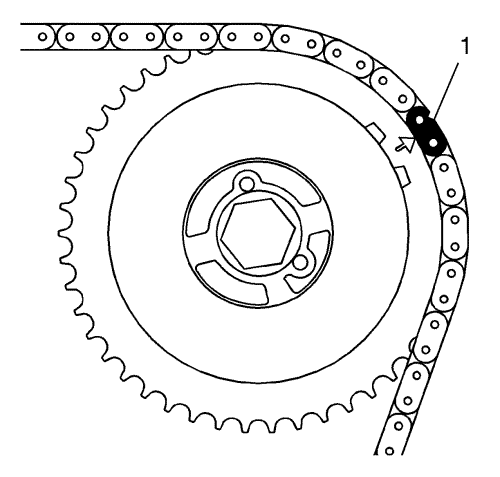
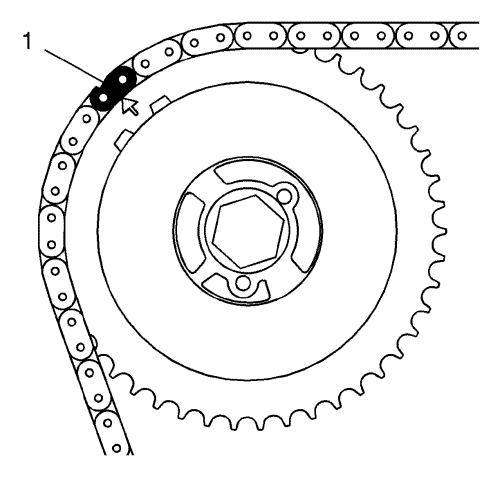
- Route the timing chain around the crankshaft sprocket and line up the first matching coloured link with the timing mark on the crankshaft sprocket, approximately in the 5 o'clock position (1).
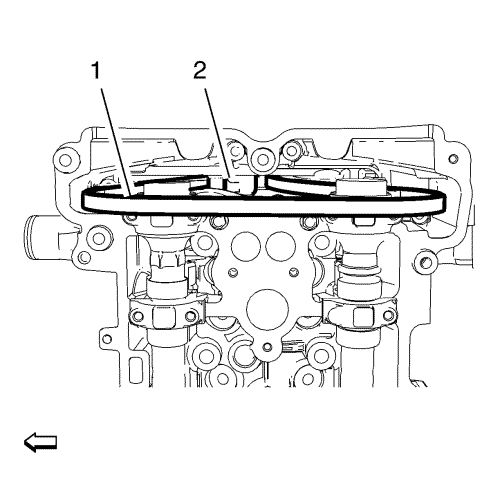
- Ensure that the bar (2) is in center of the timing chain (1) routing.
- Install the intake camshaft actuator to the camshaft while also installing the actuator at the timing chain. Ensure that the colored link is at the mark on the camshaft actuator (1).
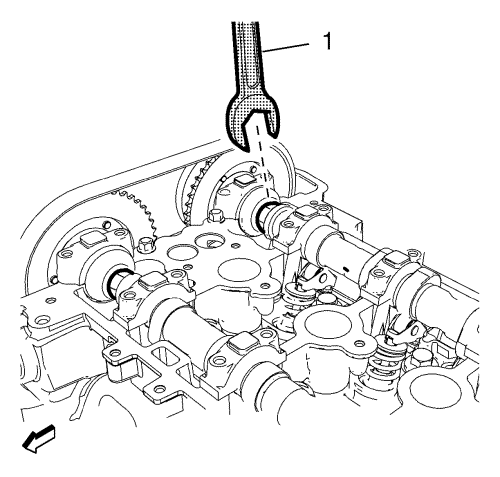
- Rotate the intake camshaft with an open ended wrench (1) to install the camshaft exhaust actuator on the marked points.
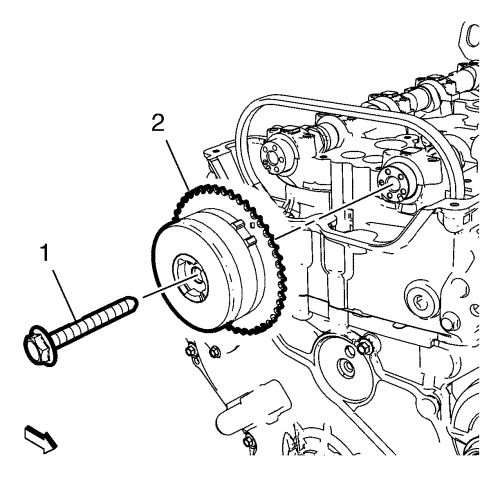
- Install the NEW intake camshaft actuator bolt (1) to the intake camshaft actuator (2) and handtighten.
- Install the timing chain guide. Refer to Timing Chain Guide Replacement .
- Install the adjustable timing chain guide. Refer to Adjustable Timing Chain Guide Replacement .
- Install the exhaust camshaft actuator to the camshaft while also installing the actuator to the timing chain. Ensure that the colored link is at the mark on the camshaft actuator (1).
- Rotate the exhaust camshaft with an open ended wrench (1) to install the camshaft exhaust actuator on the marked points.
- Install the NEW exhaust camshaft actuator bolt (1) to the exhaust camshaft actuator (2) and handtighten.
- Install the timing chain oil nozzle. Refer to Timing Chain Oil Nozzle Replacement .
- Ensure again that the marks are on the points as shown (1).
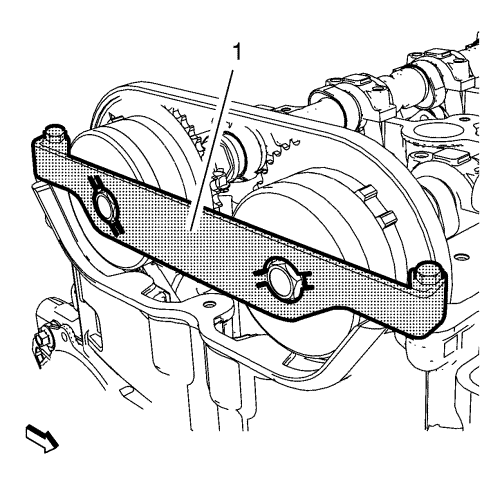
- Install the EN-48953 locking tool (1) to the camshafts.
- Install the EN-48953 locking tool bolts and tighten to 10 N·m (89 lb in).
Caution: Refer to Fastener Caution in the Preface section.
- Tighten the exhaust camshaft actuator bolt a first pass to 30 N·m (22 lb ft).
Caution: Refer to Torque-to-Yield Fastener Caution in the Preface section.
- Tighten the exhaust camshaft actuator bolt a final pass to an additional 100 degrees, using the EN-45059 meter .
- Tighten the intake camshaft actuator bolt a first pass to 30 N·m (22 lb ft).
Caution: Refer to Torque-to-Yield Fastener Caution in the Preface section.
- Tighten the intake camshaft actuator bolt a final pass to an additional 100 degrees, using the EN-45059 meter .
- Remove the EN-48953 locking tool .
- Rotate the crankshaft clockwise at the crankshaft balancer bolt to 720 degrees and ensure that the marks are still fit. If the marks are not fit, repeat the procedure.
- Install the front wheelhouse liner. Refer to Front Wheelhouse Liner Replacement .
- Install the upper timing chain guide . Refer to Timing Chain Guide Replacement - Upper .
- Install the 4 spark plugs. Refer to Spark Plug Replacement .
- Install the camshaft cover. Refer to Camshaft Cover Replacement .
| © Copyright Chevrolet. All rights reserved |


