To the top of the document
Orlando
   
GMDE Start Page Load static TOC Load dynamic TOC Help?

Engine Front Cover Replacement

Removal Procedure

  1. Remove the drive belt tensioner. Refer to Drive Belt Tensioner Replacement .
  2. Set crankshaft to TDC of combustion stroke 1. cylinder.
  3. Remove the crankshaft balancer. Refer to Crankshaft Balancer Replacement .
  4. Install the engine support fixture. Refer to Engine Support Fixture .
  5. Remove the engine mount bracket. Refer to Engine Mount Bracket Replacement .
  6. Lower the engine as deep as necessary to remove the engine front cover bolts/water pump bolt.

  7. 2512770
  8. Remove the 11 engine front cover bolts (1).
  9. Remove the engine front cover (2) and the gasket (3).

Installation Procedure


    2538105

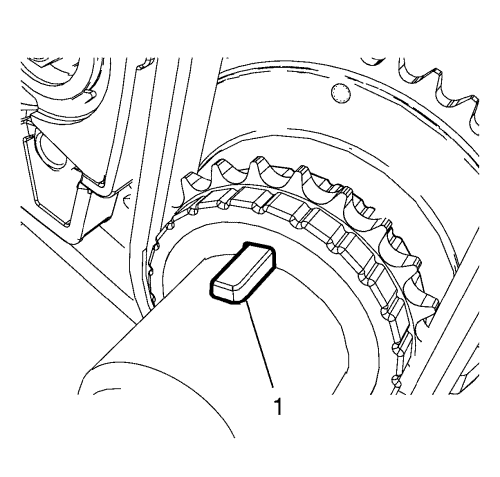
    Note: The cam (1) is only plugged into the recess.

  1. The cam (1) and the groove in the oil pump driven gear must align. Rotate the oil pump driven gear to match cam (1) and the groove in the oil pump driven gear.
  2. Clean the sealing surfaces.

  3. 2512770
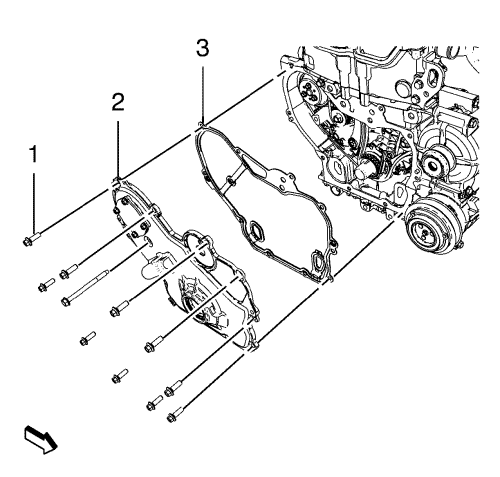
  4. Install the engine front cover (2) and a NEW gasket (3).
  5. Caution: Refer to Fastener Caution in the Preface section.

    Note: Remind the longer water pump bolt.

  6. Install the engine front cover bolts (1) and tighten the bolts to 28 N·m (21 lb ft).
  7. Install the engine mount bracket. Refer to Engine Mount Bracket Replacement .
  8. Remove the engine support fixture. Refer to Engine Support Fixture .
  9. Install the crankshaft balancer. Refer to Crankshaft Balancer Replacement .
  10. Install the drive belt tensioner. Refer to Drive Belt Tensioner Replacement .


© Copyright Chevrolet. All rights reserved