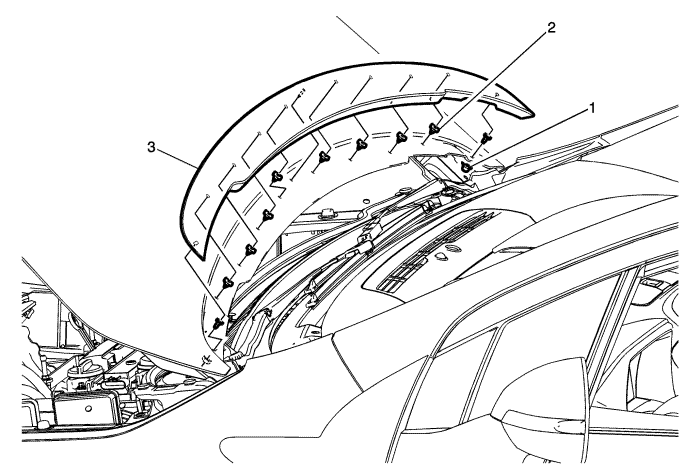
Callout
| Component Name
|
Preliminary ProcedureOpen and suitably support the bonnet assembly.
|
1
| Bonnet Rear Reveal Moulding Nut (Qty: 2)
Caution: Refer to Fastener Caution in the Preface section.
Tighten
4.7 N·m (42 lb in) |
2
| Bonnet Rear Reveal Moulding Retainer (Qty: 8)
Procedure
- Access the two nuts from the bottom of the bonnet assembly.
- Using a trim-type release tool, insert the tool between the rear of the outer bonnet panel and rear reveal moulding.
- Gently pry each retainer upward, one retainer at a time
- Remove the moulding from the rear edge of the bonnet.
|
3
| Bonnet Rear Reveal Moulding Assembly
Caution: Refer to Exterior Trim Emblem Removal Caution in the Preface section.
Procedure
- Using a plastic flat-bladed tool, clean any adhesive tape residue from the bonnet panel surface.
- Use a 50 / 50 mixture by volume of isopropyl alcohol and clean drinkable water to clean any tape residue off the bonnet panel.
- Dry the bonnet surface thoroughly before installing the new bonnet rear reveal moulding.
- Peel the adhesive tape backing from the new bonnet rear reveal moulding.
- Align the centre alignment pin to the centre bonnet hole.
- Align and secure all of the retainers using a dry clean cotton shop towel and the palm of the hand.
- Wet out the adhesive tape strip.
- Secure the two outer nuts.
|
