To the top of the document
Volt
   
GMDE Start Page Load static TOC Load dynamic TOC Help?

Rear Axle Replacement

Removal Procedure

  1. Raise and support the vehicle. Refer to Lifting and Jacking the Vehicle .
  2. Remove the tires and wheels. Refer to Tyre and Wheel Removal and Installation .
  3. Note: 

       • It is not necessary to remove the brake rotor from the rear wheel bearing/hubs. The brake rotors can remain on the rear wheel bearing/hub assembly.
       • When removing the rear brake caliper assemblies, it is not necessary to remove the hydraulic brakes lines, or the park brake cable from the rear brake caliper. Relocate the brake caliper assembly to the side and support with mechanic's wire.

  4. Remove the rear wheel bearing/hubs assemblies. Refer to Rear Wheel Bearing and Hub Replacement .

  5. 2547328
  6. Secure the rear axle assembly to the hydraulic transmission jack (1).
  7. Note: Replace the rear spring insulators or the rear suspension jounce bumper if they are found to be damaged.

  8. Remove the rear springs and the insulators. Refer to Rear Spring, Insulator, and Jounce Bumper Replacement .
  9. Remove two lower fasteners for the rear wheel house panel liner to allow enough clearance to remove the trailing arm through bolt. Refer to Rear Wheelhouse Panel Liner Replacement .

  10. 2371375
  11. Remove the rear axle bushing nuts (1) and discard the bolts (2). Replace with NEW only.

  12. 2547342

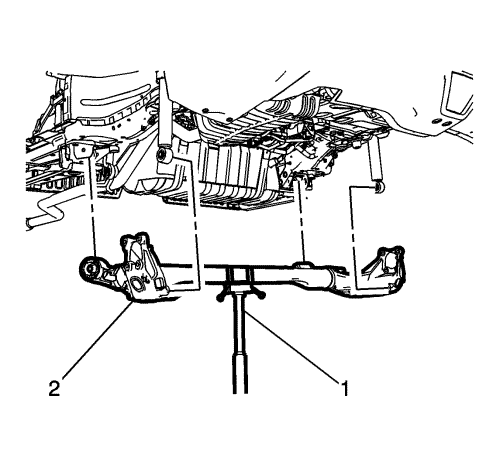
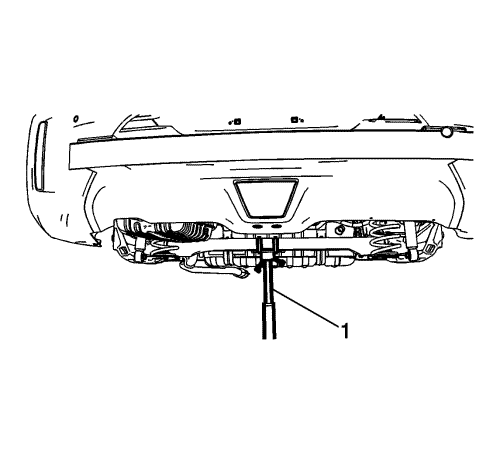
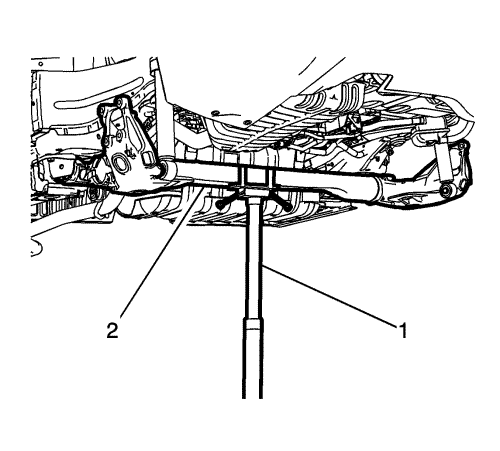
    Note: It maybe necessary to have an assistant to help remove the rear axle from the vehicle.

  13. Using the hydraulic transmission jack (1), remove the rear axle (2) from the vehicle.
  14. With the aid of an assistant, remove the rear axle assembly from the hydraulic transmission jack.

Installation Procedure


    2547342
  1. With the aide of an assistant, position the rear axle assembly (2) on the hydraulic transmission jack (1).

  2. 2547357
  3. Using the hydraulic transmission jack (1) and the aid of an assistant, position the rear axle (2) in the rear axle brackets.

  4. 2371375
  5. Install the rear axle bushing nuts (1) and the NEW bolts (2) and hand tighten.
  6. Install the rear springs. Refer to Rear Spring, Insulator, and Jounce Bumper Replacement
  7. Install the rear wheel bearings/hub assemblies. Refer to Rear Wheel Bearing and Hub Replacement .
  8. Install the two front lower rear wheel house panel liner fasteners. Refer to Rear Wheelhouse Panel Liner Replacement .
  9. Install the tyre and wheels. Refer to Tyre and Wheel Removal and Installation
  10. Remove the support and lower the vehicle.
  11. Inspect the trim height and adjust as required. Refer to Trim Height Inspection .

  12. 2547212

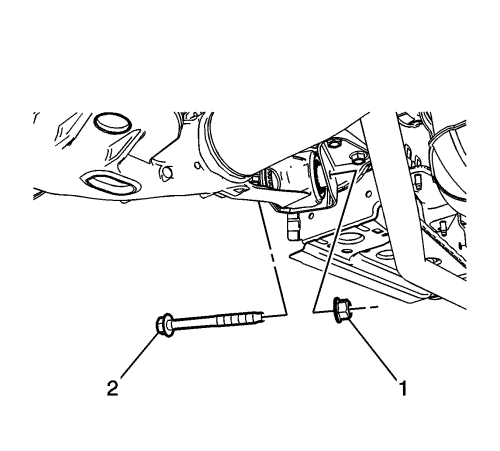
    Warning: This component is equipped with torque-to-yield fasteners. Install a NEW torque-to-yield fastener when installing this component. Failure to replace the torque-to-yield fastener could cause bodily injury and damage to the vehicle or component.

  13. Once the trim heights have been checked, tighten the trailing arm nuts (1) to:
  14. • First Pass: 70 N·m (52 lb ft)
    • Final Pass: additional 120 degrees


&#169© Copyright Chevrolet. All rights reserved