- Lubricate crankshaft, crankshaft bearings and crankshaft bearing cap tie plate with engine oil.

- Install the 4 upper crankshaft bearings (2) and the crankshaft thrust bearing (3).
- Install the crankshaft (1).
Note: Refer to the electronic parts catalogue to find a suitable sealing compound.
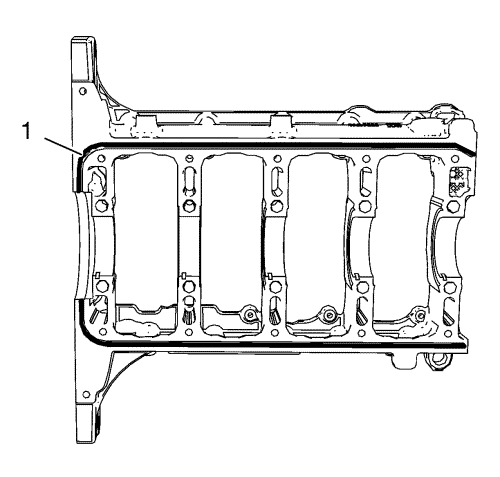
- Apply sealing compound (1) to the outer rim of the groove on the crankshaft bearing cap tie plate. The thickness of the sealing bead should be 2 mm (0.0787 in).
Note: The complete installation procedure should be done in 10 minutes.
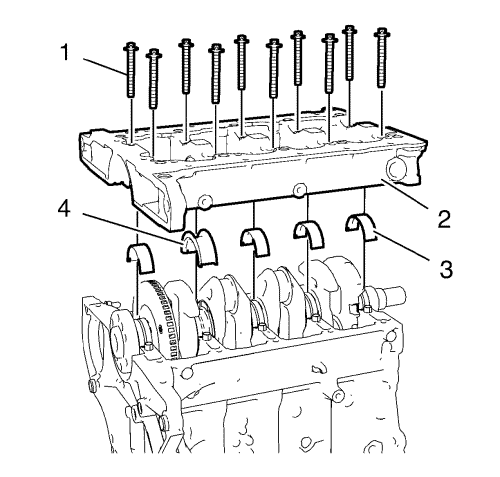
- Install the 4 lower crankshaft bearings (3) and the lower crankshaft thrust bearing (4).
- Install the crankshaft bearing cap tie plate (2).
Note: Do not reuse the old bolts.
- Install the 10 inner crankshaft bearing cap tie plate bolts (1).
Caution: Refer to Fastener Caution in the Preface section.
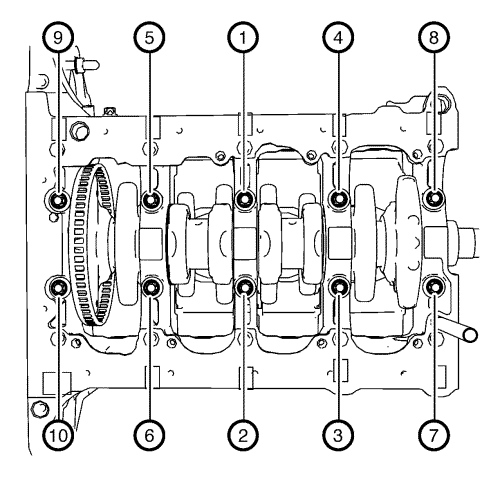
- Tighten the 10 NEW inner crankshaft bearing cap tie plate bolts in a sequence as shown and in the following order:
| 8.1. | Tighten the inner crankshaft bearing cap tie plate bolts to 25 N·m (18 lb ft). |
| 8.2. | Tighten the inner crankshaft bearing cap tie plate bolts an additional 60°. Use EN-470-B wrench . |
| 8.3. | Tighten the inner crankshaft bearing cap tie plate bolts an additional 15°. Use EN-470-B wrench . |
Note: Do not reuse the old bolts.
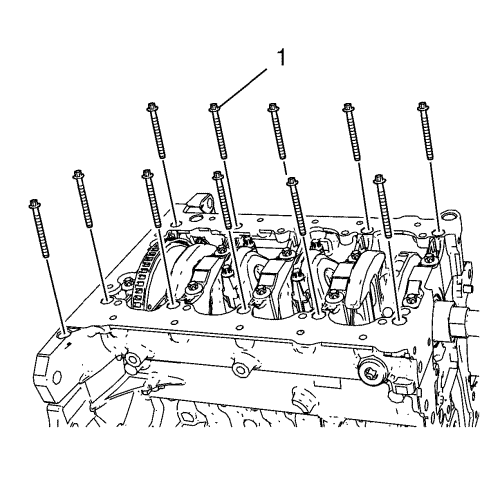
- Install the 12 NEW outer crankshaft bearing cap tie plate bolts (1) and tighten in the following order:
| 9.1. | Tighten the outer crankshaft bearing cap tie plate bolts to 10 N·m (89 lb in). |
| 9.2. | Tighten the outer crankshaft bearing cap tie plate bolts an additional 60°. Use EN-470-B wrench . |
| 9.3. | Tighten the outer crankshaft bearing cap tie plate bolts an additional 15°. Use EN-470-B wrench . |
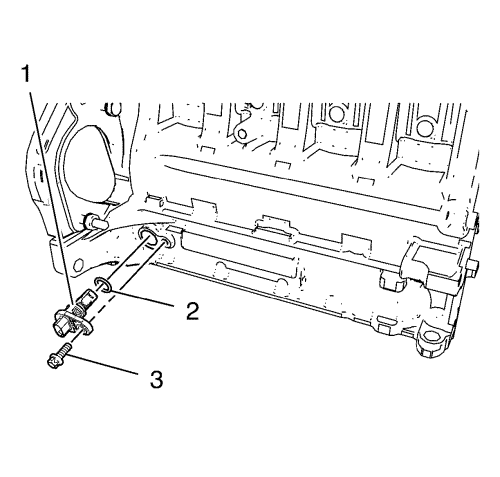
- Install the crankshaft position sensor (1) and a NEW crankshaft position sensor seal ring (2).
- Install the crankshaft position sensor bolt (3) and tighten to 8 N·m (71 lb in).
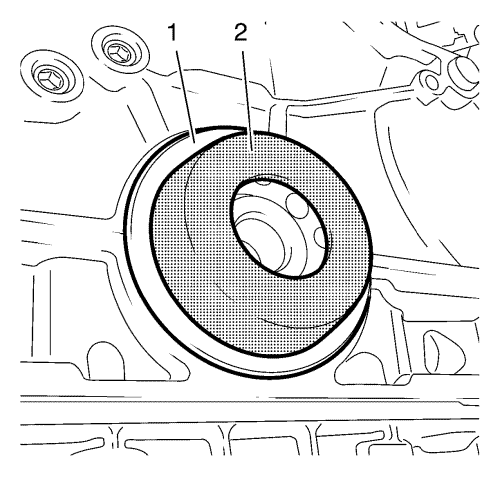
Note: Lubricate the crankshaft rear oil seal.
- Install the crankshaft rear oil seal (1) with EN-235-6 installer (2).
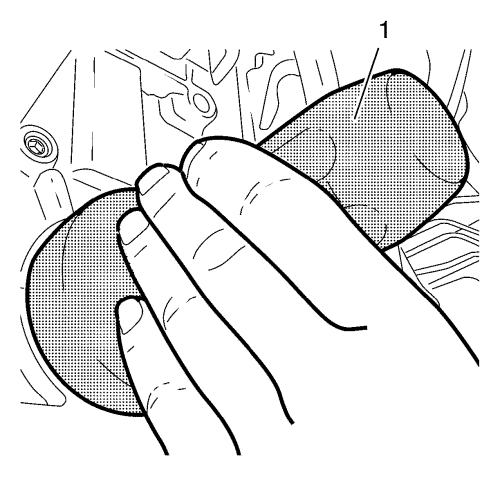
- Use EN-658-1 installer (1) to strike the crankshaft rear oil seal.


