Note: Refer to electronic parts catalogue to find a suitable sealing compound.
- Clean the sealing surfaces from old sealing material, dirt, oil and grease.

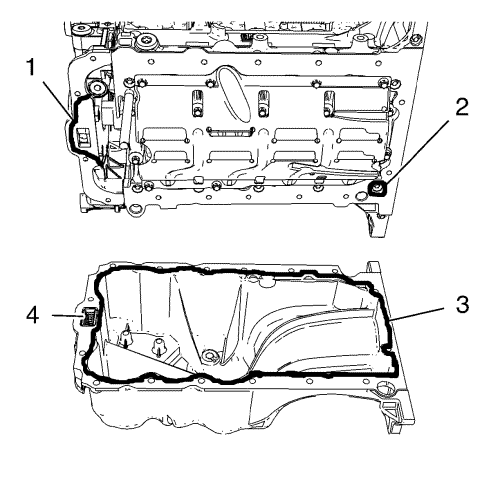
Note: The sealing bead should be applied close to the inner edge of the oil sump. Take care that the oil suction gallery (4) will not get contaminated with sealing compound or dirt.
- Apply sealing compound to the oil sump. The thickness of the sealing bead (3) should be 2 mm (0.0787 in).
- Apply sealing compound to the groove of the engine front cover (1).
- Apply sealing compound around the screw bore (2) of the crankshaft bearing cap tie plate.
- Install the oil sump seal rings to the grooves of the engine front cover.

Note: The complete installation procedure of the oil sump should be done in 10 minutes.
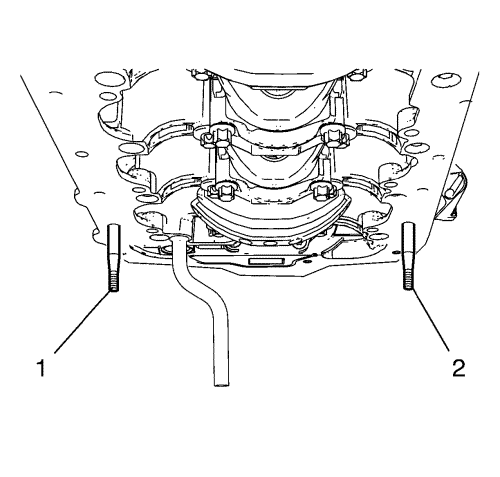
- Install the 2 EN-49980 pins (1) and (2) to the shown oil sump screw bores.

Note: Take care that the sealing bead will not get smeared while the installation procedure. A smeared sealing bead in the area around the oil suction gallery will cause engine damage.
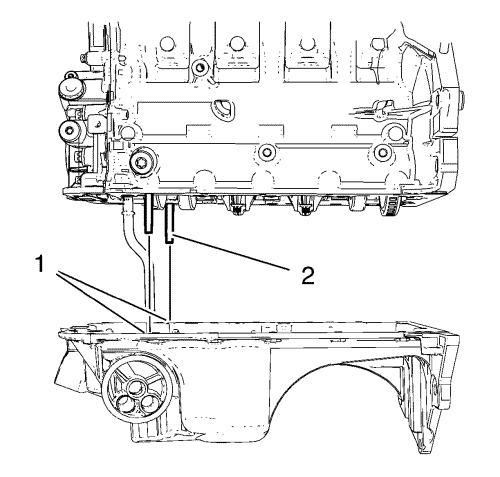
- Cautiously install the oil sump. Guide the oil sump with EN-49980 pins (2) and the equivalent screw bores (1).
- Fix the oil sump with 4 oil sump bolts.
- Remove EN-49980 pins.
- Install the remaining 12 sump bolts and hand tighten.

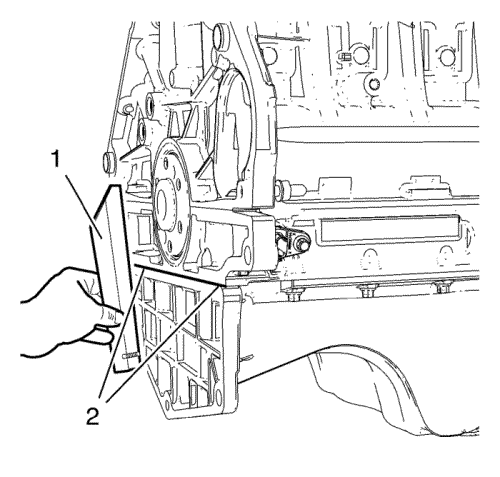
- Lay on a straight edge (1) to oil sump and engine block and adjust the transition in area (2) until there is no clearance between oil sump and straight edge. Use a rubber mallet.
Caution: Refer to Fastener Caution in the Preface section.
- Tighten the 16 oil sump bolts to 10 N·m (89 lb in).


