Brake Pedal Assembly Replacement
Removal Procedure
- Remove the air cleaner resonator outlet duct. Refer to Air Cleaner Resonator Outlet Duct Replacement .
- Remove the front suspension strut housing brace. Refer to Front Suspension Strut Housing Brace Replacement .
- Remove the bolt and position aside the engine wiring junction block.
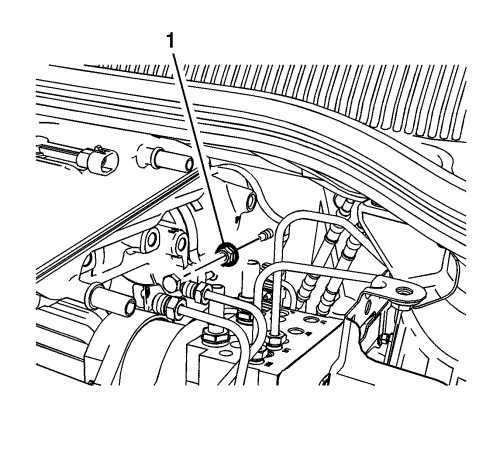
Note: Do not reuse the master cylinder nuts.
- Remove and discard the 2 master cylinder nuts (1).
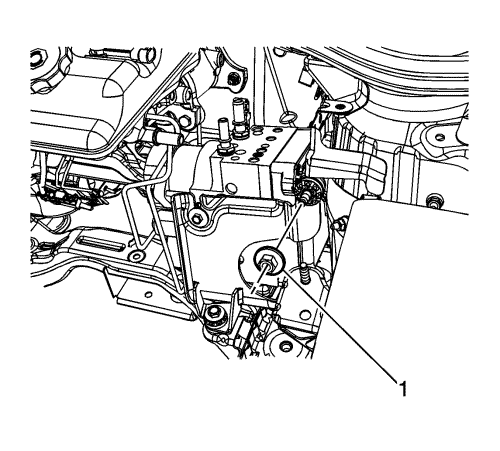
- Remove the brake pressure modulator valve (BPMV) bracket nut (1).
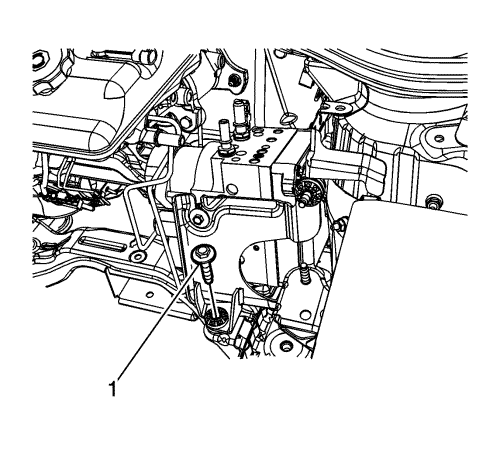
- Remove the BPMV bracket bolt (1).
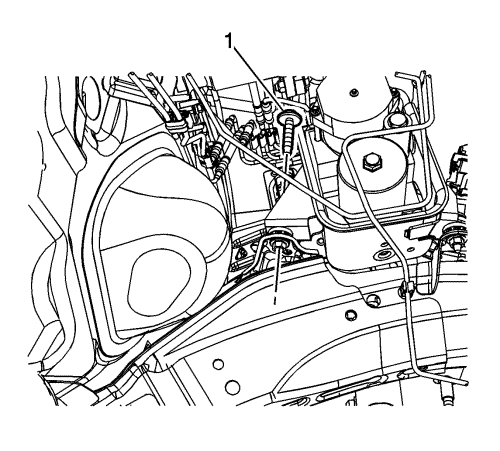
- Remove the BPMV bracket bolt (1).
Note: Do not bend the brake pipes.
- Carefully remove and position aside the master cylinder and the BPMV and bracket assembly. Support the components with heavy mechanics wire or equivalent.
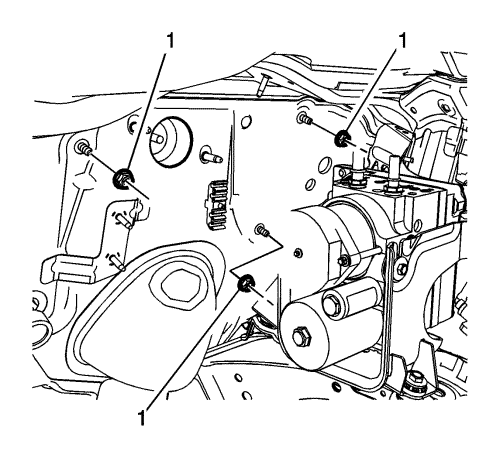
- Remove the brake pedal assembly nuts (1).
- Remove the front floor console. Refer to Front Floor Console Replacement .
- Remove the left side floor front air outlet duct. Refer to Floor Front Air Outlet Duct Replacement - Left Side .
- Remove the steering column. Refer to Steering Column Replacement .
- Remove the accelerator pedal position sensor. Refer to Accelerator Pedal Position Sensor Replacement .
- Disconnect the brake pedal position sensor electrical connector.
- Disconnect the electronic brake pedal travel sensor electrical connector.
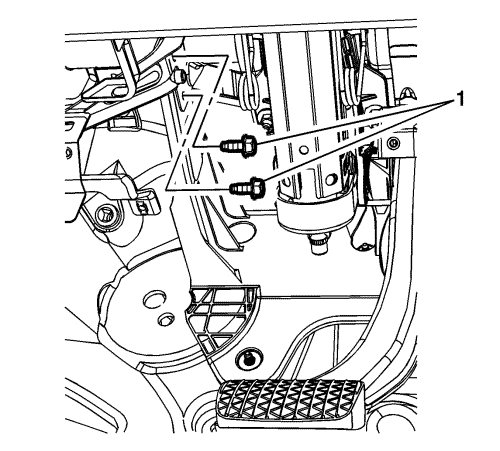
- Remove the left upper brake pedal assembly bolts (1).
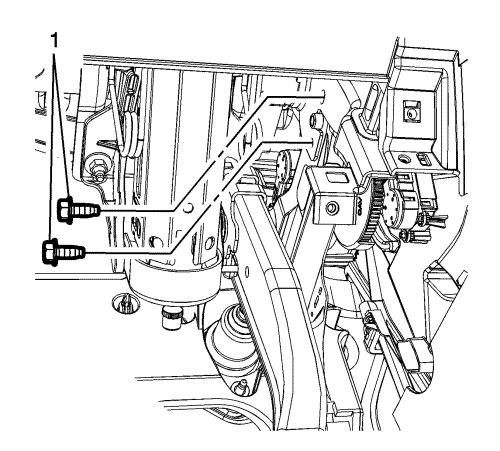
- Remove the right upper brake pedal assembly bolts (1).
- Without removing the instrument panel tie bar assembly, remove the fasteners retaining the tie bar assembly to the vehicle. Refer to Instrument Panel Tie Bar Replacement .
- With the aid of an assistant, pull the instrument panel and tie bar assembly rearward and upward approximately 25 mm (1 in) and remove the brake pedal assembly.
Installation Procedure
- With the aid of an assistant, pull the instrument panel and tie bar assembly rearward and upward approximately 25 mm (1 in) and install the brake pedal assembly.
- Install the fasteners retaining the tie bar assembly to the vehicle. Refer to Instrument Panel Tie Bar Replacement .
Caution: Refer to Fastener Caution in the Preface section.

- Install the right upper brake pedal assembly bolts (1) and tighten to 12 N·m (106 lb in).

- Install the left upper brake pedal assembly bolts (1) and tighten to 12 N·m (106 lb in).
- Connect the brake pedal position sensor electrical connector.
- Connect the electronic brake pedal travel sensor electrical connector.
- Install the accelerator pedal position sensor. Refer to Accelerator Pedal Position Sensor Replacement .
- Install the steering column. Refer to Steering Column Replacement .
- Install the left side floor front air outlet duct. Refer to Floor Front Air Outlet Duct Replacement - Left Side .
- Install the front floor console. Refer to Front Floor Console Replacement .

- Install the brake pedal assembly nuts (1) and tighten to 23 N·m (17 lb ft).
- Apply silicone brake lubricant to the brake master cylinder pushrod tip.
Note: Do not bend the brake pipes.
- Carefully reposition the master cylinder and the BPMV and bracket assembly to the vehicle.

- Install the BPMV bracket bolt (1) and tighten to 22 N·m (16 lb ft).

- Install the BPMV bracket bolt (1) and tighten to 22 N·m (16 lb ft).

- Install the BPMV bracket nut (1) and tighten to 22 N·m (16 lb ft).

Note: Install new master cylinder nuts.
- Install 2 new master cylinder nuts (1) and tighten to 22 N·m (16 lb ft).
- Install the engine wiring junction block and bolt.
- Install the front suspension strut housing brace. Refer to Front Suspension Strut Housing Brace Replacement .
- Install the air cleaner resonator outlet duct. Refer to Air Cleaner Resonator Outlet Duct Replacement .
- Calibrate the brake pedal position sensor. Refer to Brake Pedal Position Sensor Calibration .
| © Copyright Chevrolet. All rights reserved |


