|
Danger: Always perform the High Voltage Disabling procedure prior to servicing any High Voltage component or connection. Personal Protection Equipment (PPE) and proper procedures must be followed. The High Voltage Disabling procedure will perform the following tasks:
| • | Identify how to disable high voltage. |
| • | Identify how to test for the presence of high voltage. |
| • | Identify condition under which high voltage is always present and personal protection equipment (PPE) and proper procedures must be followed. |
| • | Safety glasses with appropriate side shields when within 15 meters (50 feet) of the vehicle, either indoors or outdoors. |
| • | Certified and up-to-date Class "0" Insulation gloves rated at 1000V with leather protectors. |
| - | Visually and functionally inspect the gloves before use. |
| - | Wear the Insulation gloves with leather protectors at all times when working with the high voltage battery assembly, whether the system is energised or not. |
Danger: The Volt Battery Pack will utilise an exchange program. Please consult the most recent revision of bulletin/PI #PIP4841, available in Service Information (SI), for a list of approved Volt Battery Pack service procedures. Components that may be removed and serviced without exchanging the complete battery pack are identified in the bulletin/PI. Please contact the GM Technical Assistance Centre (1-877-446-8227) if you have any questions.
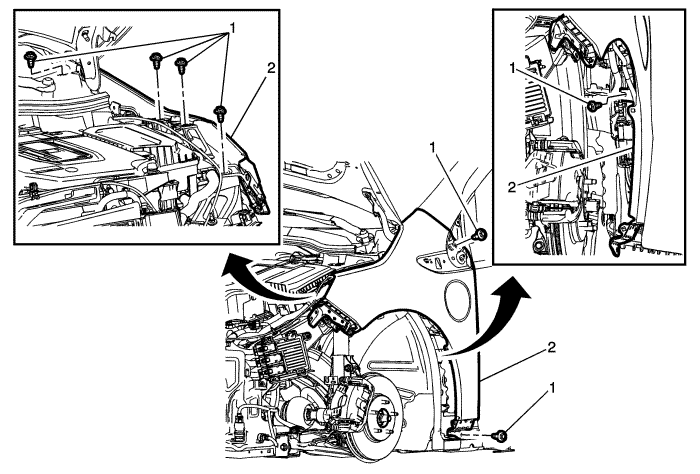
Preliminary Procedures
- Remove the front fascia. Refer to
Front Bumper Fascia Removal and Installation : Volt → Ampera .
- Remove the air inlet extension. Refer to Air Inlet Grille Panel Extension Replacement .
- Remove the front wing upper rear moulding. Refer to Front Fender Upper Rear Moulding Replacement .
- Remove the front compartment side sight shield. Refer to
Front Compartment Side Sight Shield Replacement : Volt → Ampera .
- Remove the front wheelhouse front liner. Refer to Front Wheelhouse Front Liner Replacement .
- Remove the front wheelhouse rear liner. Refer to Front Wheelhouse Rear Liner Replacement .
- Remove the sill panel moulding. Refer to Sill Panel Moulding Replacement .
- Remove the left headlamp. Refer to
Headlamp Replacement : Volt → Ampera .
- Disconnect all electrical connectors to remove the wing.
|