Exhaust Resonator Replacement
Removal Procedure
Warning: Refer to Hot Exhaust System Warning in the Preface section.
Danger: Do not use a service jack in locations other than those specified to lift this vehicle. Lifting the vehicle with a jack in those other locations could cause the vehicle to slip off the jack and roll; this could cause injury or death.
- Raise and support the vehicle. Refer to Lifting and Jacking the Vehicle .
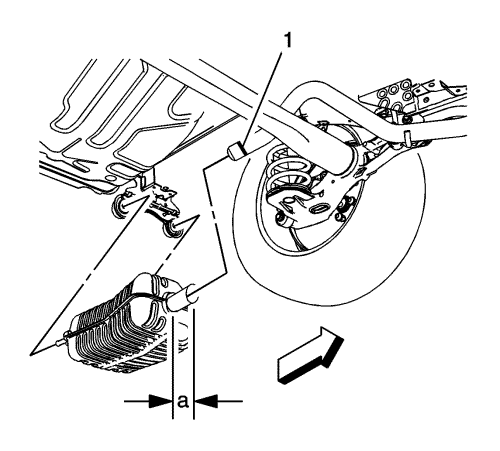
- Make a cut on the exhaust resonator pipe (1), a distance of 60 mm, from the edge of the muffler flange (a).
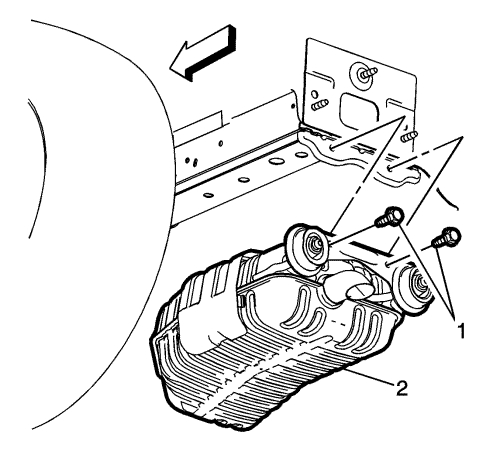
- If replacing the rear muffler, remove the rear exhaust muffler bracket bolts (1) and lower to the floor.
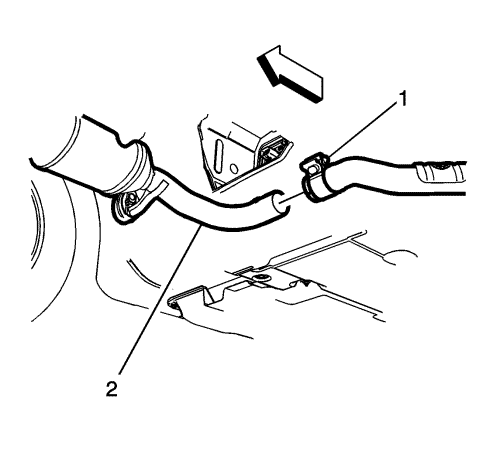
- Loosen the exhaust muffler clamp (1), from the 3-way catalytic converter.
Note: Replce exhaust muffler clamp with a NEW clamp.
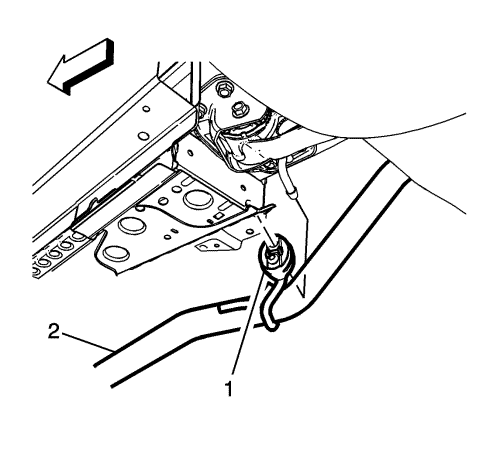
- Remove the exhaust resonator pipe from the exhaust isolator (1).
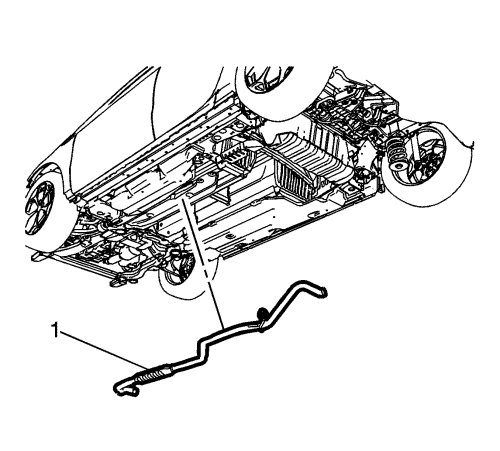
- Carefully lower the exhaust resonator pipe (1) from the vehicle.
Installation Procedure

- Install the exhaust resonator pipe onto the exhaust isolator (1).
Caution: Refer to Fastener Caution in the Preface section.

Note: Make sure the exhaust muffler clamp is fully seated into the slot on the catalytic converter before tightening the exhaust clamp nut.
- Install the exhaust muffler resonator pipe into the 3-way converter (2) and tighten the clamp to 55 N·m (41 lb ft).
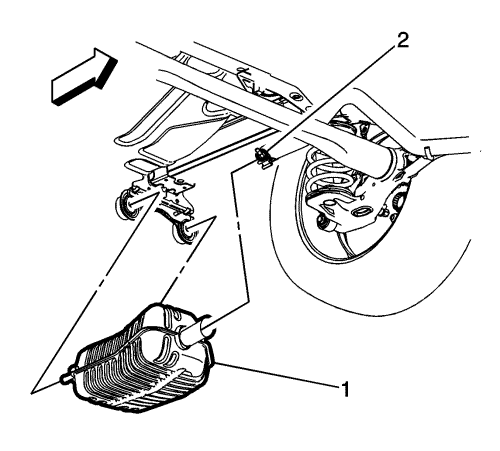
- Install the rear exhaust muffler (1) to the rear pipe with a NEW service clamp and tighten the nut (2) to 55 N·m (41 lb ft).

- Install the rear exhaust muffler hanger bolts (1) and tighten to 22 N·m (16 lb ft).
- Lower the vehicle.
- Start the engine and check for exhaust leaks.
| © Copyright Chevrolet. All rights reserved |


