Rear Side Door Outer Panel Replacement
Danger: Always perform the High Voltage Disabling procedure prior to servicing any High Voltage component or connection. Personal Protection Equipment (PPE) and proper procedures must be followed.
The High Voltage Disabling procedure will perform the following tasks:
| • | Identify how to disable high voltage. |
| • | Identify how to test for the presence of high voltage. |
| • | Identify condition under which high voltage is always present and personal protection equipment (PPE) and proper procedures must be followed. |
| • | Safety glasses with appropriate side shields when within 15 meters (50 feet) of the vehicle, either indoors or outdoors. |
| • | Certified and up-to-date Class "0" Insulation gloves rated at 1000V with leather protectors. |
| - | Visually and functionally inspect the gloves before use. |
| - | Wear the Insulation gloves with leather protectors at all times when working with the high voltage battery assembly, whether the system is energised or not. |
Removal Procedure
Warning : Refer to Approved Equipment for Collision Repair Warning in the Preface section.
Warning : To avoid personal injury when exposed to welding flashes or to galvanized (Zinc Oxide) metal toxic fumes while grinding/cutting on any type of metal or sheet moulded compound, you must work in a properly ventilated area, wearing an approved respirator, eye protection, earplugs, welding gloves, and protective clothing.
Note : Before beginning the repair, refer to Metal Panel Bonding for proper adhesive applicator preparations and general information.
Warning : Refer to SIR Warning in the Preface section.
- Disable the SIR system. Refer to SIR Disabling and Enabling .
- Inspect the high voltage system. Refer to High Voltage System Inspection .
- Remove the door from the vehicle. Refer to Rear Side Door Replacement .
- Remove the outer door handle.
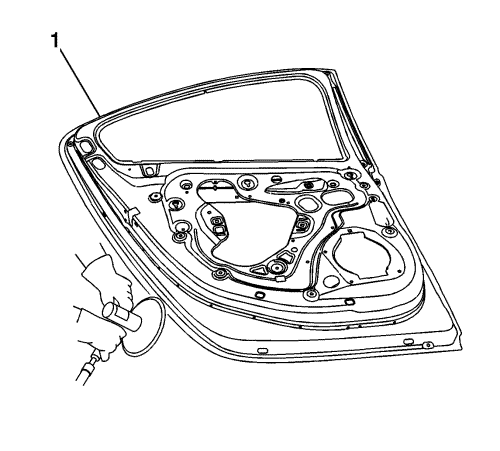
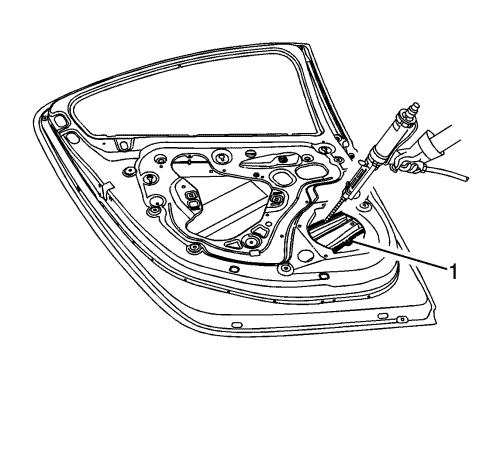
- Grind the edges of the door outer panel to separate the outer door panel from the door shell.
Warning : Inspection of the door guard beam for damage must be performed before replacement of the door outer panel. If damage to the door guard beam is found the door must be replaced. Failure to do so may compromise the structural integrity of the vehicle and may cause personal injury if the vehicle is involved in a collision.
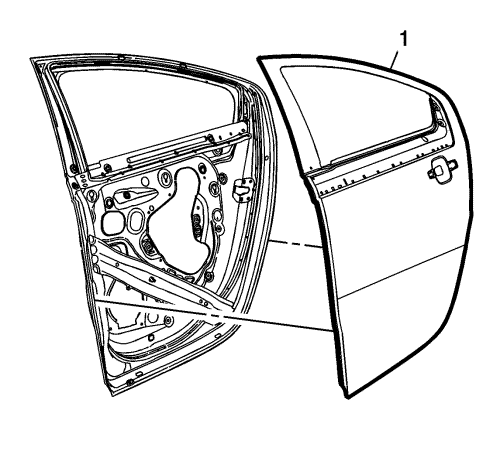
- Remove the outer door panel (1) from the door shell.
- Remove the sealers and anti-corrosion materials from the repair area, as necessary. Refer to Anti-Corrosion Treatment and Repair .
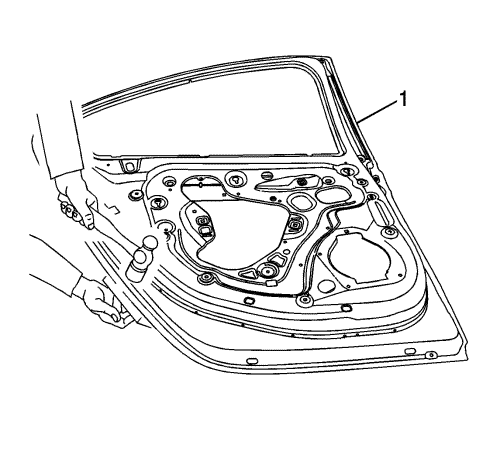
- Straighten the edges (1) of the door shell.
Installation Procedure

- Using a grinding disk, grind the surface of the door shell mating flanges (1) to bare steel.
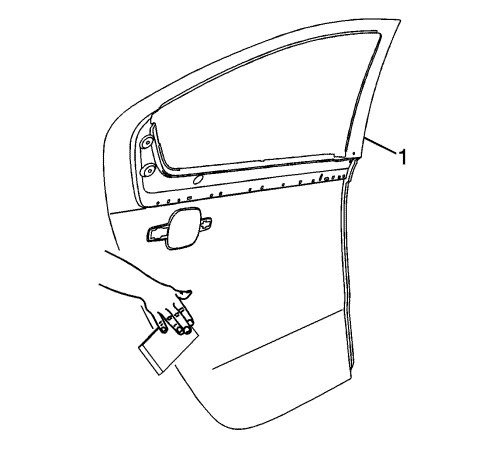
- Scuff the opposing mating surfaces of the door outer panel (1) to remove the gloss of the E-Coat.
- Clean the mating surfaces.
Note : The adhesive has a 40-50 minute working time. Do not allow the door to totally cure off the vehicle, as proper alignment of the door outer panel to the door shell will be difficult.
- Apply a 3-6 mm (1/8-1/4 in) bead of metal panel bonding adhesive (1) GM P/N 12378566/7 (Canadian P/N 88901674/5) or equivalent, to both of the mating surfaces.
- Using a small acid brush, spread a coat of adhesive to cover all the bare metal surfaces to ensure corrosion protection.
Note : Do NOT pull the panels apart after joined together. If necessary, slide the panels against each other to realign the panels.
- Install the door outer panel (1) to the door shell.
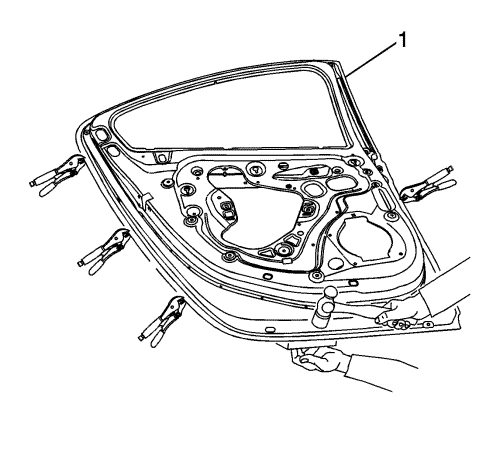
- Clamp the door outer panel into position, as required.
- Using a hammer and dolly, re-hem the hem flanges around the door shell. Continue to hammer in stages along the hem flanges.
- Using lacquer thinner, remove the excess adhesive from the door panel area.
- Install the door to the vehicle. Inspect the door outer panel for proper alignment. Adjust the alignment, as required.
- Clean and prepare all welded surfaces.
- Apply Fusor super flexible anti-flutter foam-fast set, or equivalent in 4-5 evenly spaced locations between the door outer panel and the inner safety beam (1).
- Apply sealers and anti-corrosion materials to the repair area, as necessary. Refer to Anti-Corrosion Treatment and Repair .
- Paint the repaired area. Refer to Basecoat/Clearcoat Paint Systems .
- Install the outer door handle.
- Install the door to the vehicle. Refer to Rear Side Door Replacement .
- Enable the SIR system. Refer to SIR Disabling and Enabling .
- If disabled, enable the high voltage system. Refer to High Voltage Enabling .
| ©© Copyright Chevrolet. All rights reserved |


