- Open the bonnet.
- Remove the windscreen wiper arms and blades. Refer to
Windscreen Wiper Arm Replacement : Passenger → Driver .
- Remove the air inlet grille panel. Refer to Air Inlet Grille Panel Replacement .
- Remove the left and right side corner weatherstrip by the air inlet panel.
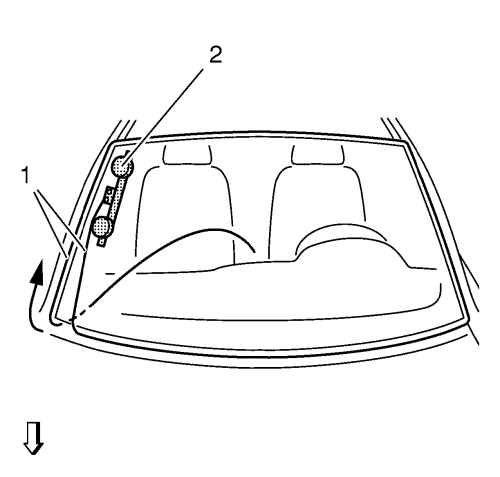
- Remove the left and right windscreen side garnish moldings. Refer to Windscreen Side Garnish Molding Replacement .
- Remove the rearview mirror. Refer to Inside Rearview Mirror Replacement .
- Disconnect the rain sensor connector, if equipped.
Warning: If broken glass falls into the defroster outlets, it can be blown into the passenger compartment and cause personal injury.
- Cover to protect the following parts from broken glass:
| • | Demister outlets and A/C outlets |

- Use BO-46974 system .
- Take the diagonal measurement of the windscreen.
- Cut cutting wire into four times lengths.
Approx. 5200 mm (204.724 in), the circumference of the corresponding role of wire is approx. 1000 mm (39.369 in)

- Heat the awl with a suitable tool.
Note: Ensure that the windscreen is not damaged in the process, otherwise stress cracks in the windscreen may occur.
- Stick the awl (1) with adhesive bed in the area of the front wall.
- Pull the wire through.
| 14.1. | Thread the cutting wire into the hole of the awl and bend the end over. |
| 14.2. | Pull the cutting wire with the awl to the middle of the steering wheel in the interior. |
Note: The cutting wire (1) should be rolled in beneath the rubber window seal (2) at the windscreen.
- Lay the wire under the windscreen all the way around.
- Pull the second wire end through.
| 16.1. | Stick awl approx. 10 mm (0.393 in), overlapping the first entry place with adhesive bed. |
| 16.2. | Thread the cutting wire into the hole of the awl and bend it over. |
| 16.3. | Pull the rest of the wire into the interior using the awl. |
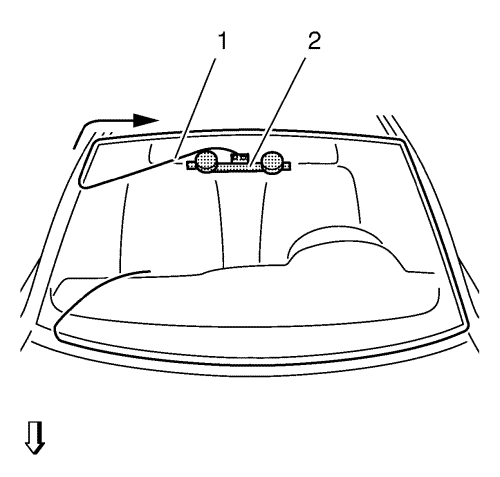
Note: Ensure that the cutting wire is fitted correctly to the winch deflection roller.
- Place the winch with two winding heads (2) on windscreen inside.
- Position the winch in the right hand area of the windscreen inside.
- Attach the cutting wire to the winch.
Note: In the area of the A-pillar/front wall, increased cutting effort is necessary. Arrow shows the path of cutting wire (1).
- Cut out the windscreen.
| 20.1. | Use the plastic sheet in order to protect the instrument panel assembly. |
| 20.2. | Insert transfer ratchet and apply tension to the cutting wire. |
| 20.3. | Cut out the windscreen until the cutting wire is on the same level with the winch. |
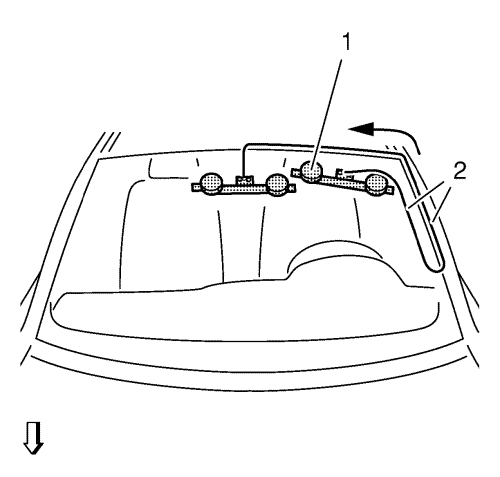
Note: Ensure that the cutting wire is fitted correctly to the winch deflection roller.
- Place the winch with two winding heads (2) on the inside of the windscreen near to the interior rear view mirror.
- Insert the transfer ratchet and apply tension to the cutting wire.
Note: In the area of the A-pillar/roof frame, increased cutting effort is necessary. Arrow shows the path of the cutting wire (1).
- Cut out the windscreen.
| 23.1. | Use the hold-down positioner and the plastic sheet to protect the sunroof. |
| 23.2. | Cut out the windscreen until the cutting wire is on the same level with the winch. |

Note: Ensure that the cutting wire is fitted correctly to the winch deflection roller.
- Place the winch with one winding head (2) on the inside the windscreen in the position of the A-pillar an the driver side.
- Attach the cutting wire (1) to the winch.
- Insert transfer ratchet and apply tension to the cutting wire.
Note: Use lubricant on the winch deflection roller. In the area of the A-pillar/bulkhead, increased cutting effort is necessary. Arrow shows the path of cutting wire (1).
- Cut out the windscreen.
| 27.1. | Cut out the windscreen until the cutting wire is on the same level with the winch. |
| 27.2. | Use the plastic sheet in order to protect the instrument panel assembly. |
Note: Ensure that the cutting wire is fitted correctly to the winch deflection roller.
- Place the winch with one winding head (1) on the inside of the windscreen in the area of the roof frame (1).
- Insert the transfer ratchet and apply tension to the cutting wire.
Note: Use lubricant on the winch deflection roller. In the area of the A-pillar/roof frame, increased cutting effort is necessary. Arrow shows the path of cutting wire (2).
- Cut out the windscreen.
| 30.1. | Cut out the windscreen until the cutting wire is on the same level with the winch. |
| 30.2. | Use the plastic sheet in order to protect the headlining trim panel. |
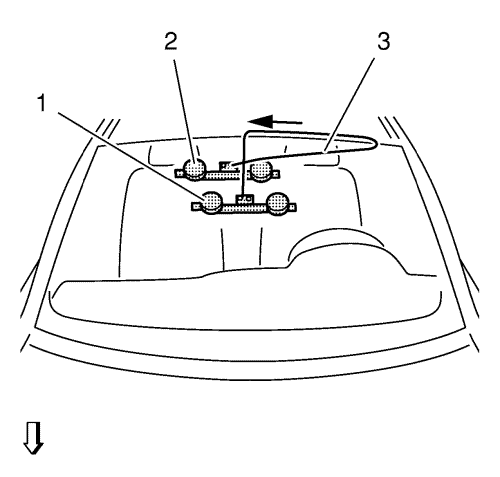
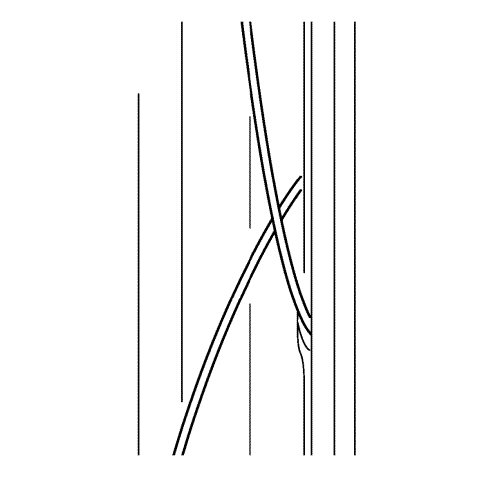
- Position both cutting tools.
- Shift the winch (1) with two winding heads downwards
- Shift the winch with one winding head (2) in the headlining area so that the cutting wire (3) is crossed.
- Insert the transfer ratchet and apply tension to the cutting wire.
Note: Arrow shows the path of cutting wire (3).
- Cut out the windscreen.
| 35.1. | Cut out windscreen until the cutting wire has cut through the adhesive bed completely. |
| 35.2. | Use the plastic sheet in order to protect the headlining trim panel. |
- Remove the glass removal system.
- Install and lock the BO-641 holder onto the windscreen.
Note: A second technician is required.
- Remove the windscreen from the vehicle.
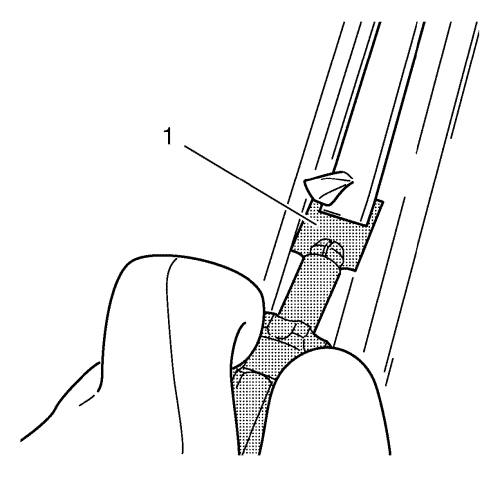
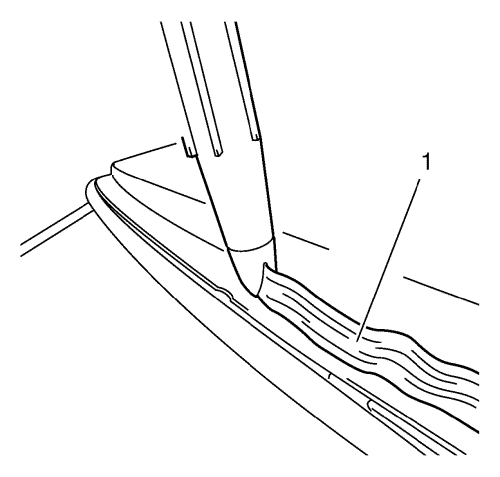
- Cut the adhesive tape with the provided knife (1) within a depth of 1 mm (0.039 in).
- Repair any paint damage, using a touch-up pen that matches the vehicle color.
- Replace the windscreen rubber if damaged.
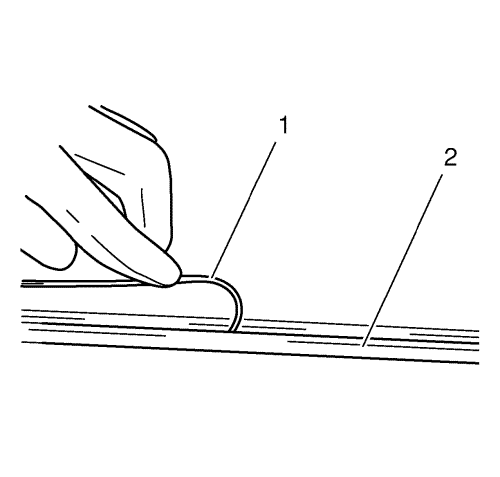
- Cut the adhesive tape on the glass pane with the provided knife within a depth of 1 mm (0.039 in).