- Remove the air cleaner assembly. Refer to
Air Cleaner Assembly Replacement : LE5 or LE9 .
- Remove the battery tray. Refer to Battery Tray Replacement .
- Raise and support the vehicle. Refer to Lifting and Jacking the Vehicle .
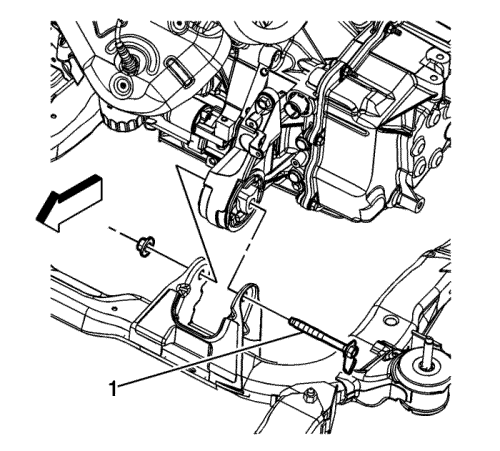
- Loosen the front transaxle mount through bolt (1).
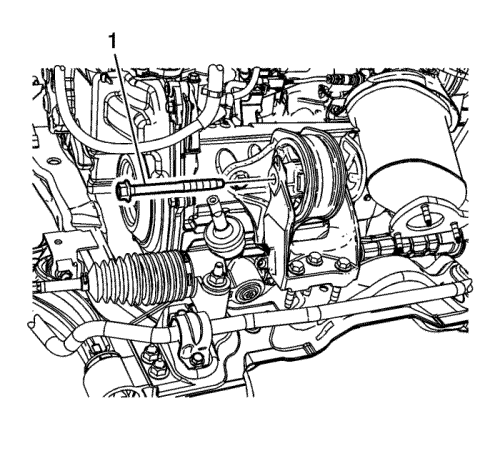
- Loosen the rear transaxle mount through bolt (1).
- Lower the vehicle.
- Position two floor jacks with wood blocks under the engine and transaxle in order to support the powertrain assembly.
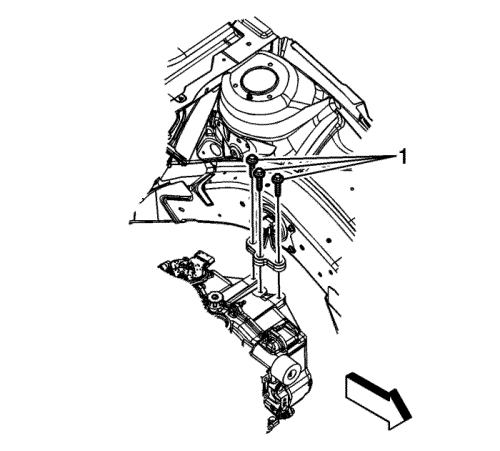
- Loosen the transaxle mount bolts (1).
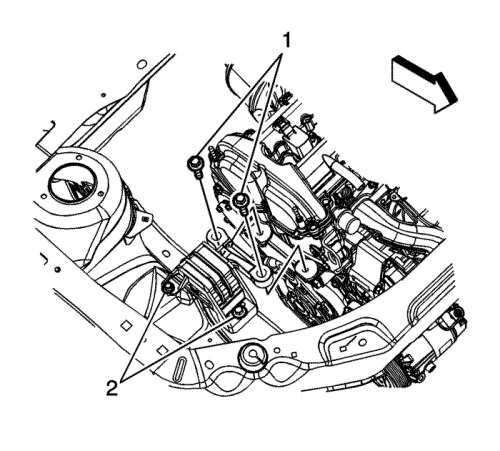
- Loosen the engine mount to bracket bolts (1).
- Reposition both floor jacks in order to allow a 1/8 inch gap between the mount and bracket.
Caution: Refer to Fastener Caution in the Preface section.
- Tighten the transaxle mount bolts (1) in the following sequence.
Tighten
Tighten the bolts to 45 N·m (33 lb ft).
- Tighten the engine mount to bracket bolts (1) in the following sequence.
Tighten
Tighten the bolts to 50 N·m (37 lb ft).
- Remove the floor jacks from under the sump.
- Shake the powertrain vigorously from front to rear and allow the powertrain to settle.
- Raise the vehicle.
- Tighten the rear transaxle mount through bolt (1).
Tighten
Tighten the bolt to 100 N·m (74 lb ft).
- Tighten the front transaxle mount through bolt (1).
Tighten
Tighten the bolt to 100 N·m (74 lb ft).
- Lower the vehicle.
- Install the battery tray. Refer to Battery Tray Replacement .
- Install the air cleaner assembly. Refer to
Air Cleaner Assembly Replacement : LE5 or LE9 .


