Fuel Line Replacement - Chassis
Removal Procedure
Warning: Ensure that the vehicle is properly supported and squarely positioned. To help avoid personal injury when a vehicle is on a hoist, provide additional support for the vehicle on the opposite end from which the components are being removed.
Warning: Do not allow smoking or the use of naked flames in the area where work on the fuel or EVAP system is taking place. Anytime work is being done on the fuel system, disconnect the negative battery cable, except for those tests where battery voltage is required.
Warning: Whenever fuel lines are removed, catch fuel in an approved container. Container opening must be a minimum of 300 mm (12 in) diameter to adequately catch the fluid.
Caution: Fuel/Vapour lines cannot be spliced or repaired. The line must be replaced (if damaged) with the same type of line.
- Relieve the fuel system pressure. Refer to
Fuel Pressure Relief : Without CH 48027-100 → CH 48027-100 .
- Disconnect the negative battery cable. Refer to Battery Negative Cable Disconnection and Connection .
- Remove the air cleaner outlet duct. Refer to
Air Cleaner Outlet Duct Replacement : LE5 or LE9 .
- Remove the intake manifold cover. Refer to
Intake Manifold Cover Replacement : LE5 or LE9 .
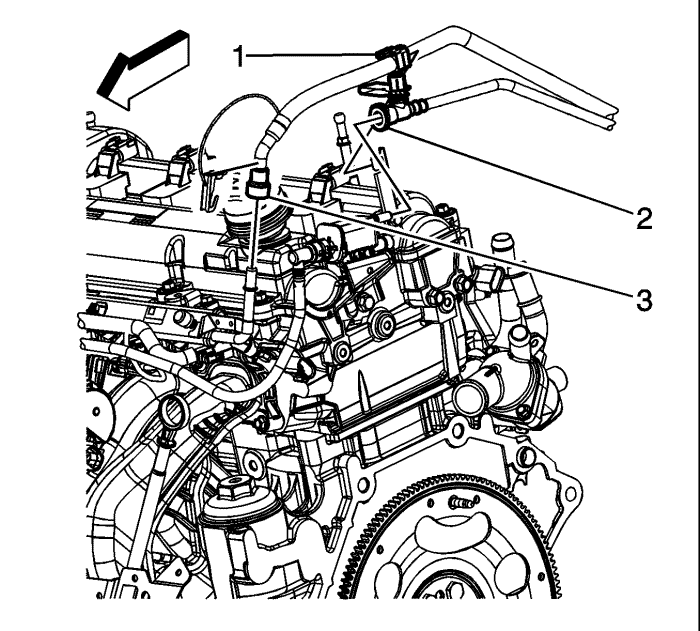
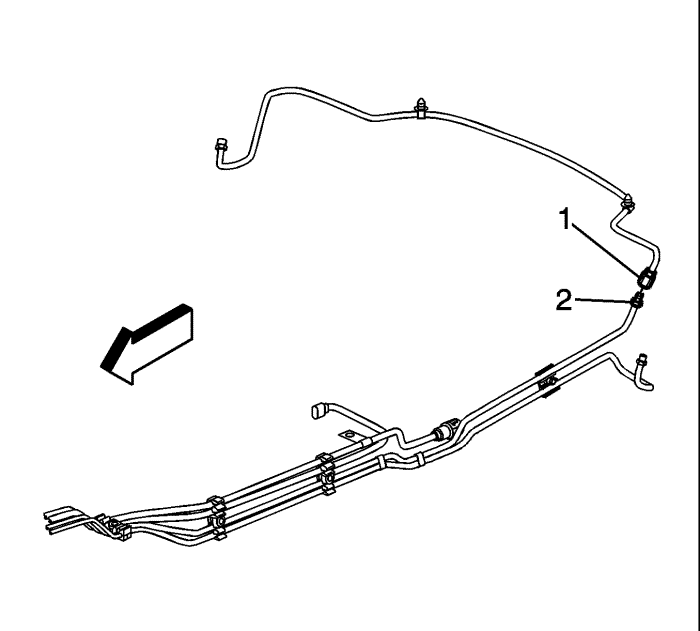
- Disconnect the chassis fuel feed line quick connect fitting (3) from the fuel rail. Refer to Metal Collar Quick Connect Fitting Service .
- Disconnect the chassis evaporative emission (EVAP) line quick connect fitting (2) from the EVAP canister purge solenoid valve. Refer to Plastic Collar Quick Connect Fitting Service .
- Remove the underhood electrical center, non LAT equipped. Refer to Underhood Electrical Center or Junction Block Replacement .
- If equipped with LAT, remove the engine coolant surge tank. Refer to
Radiator Surge Tank Replacement : Diesel → Petrol Engines .
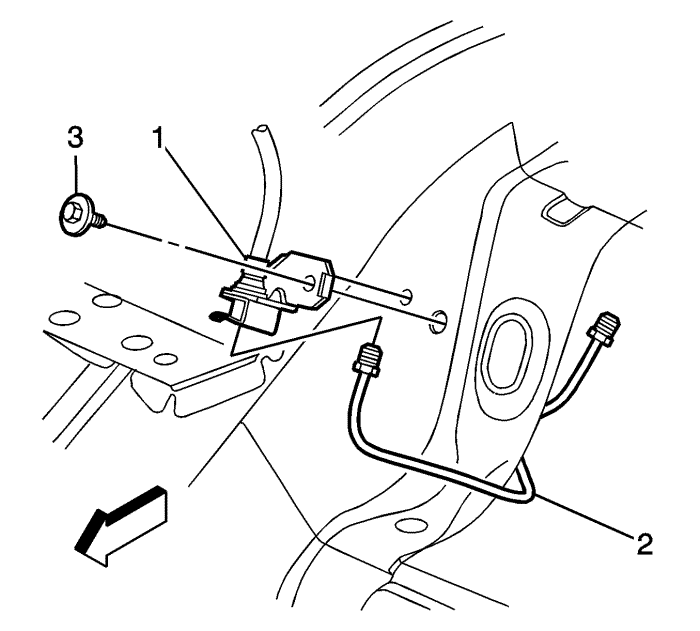
- Remove chassis fuel feed line clip (1) from the fuel line bracket.
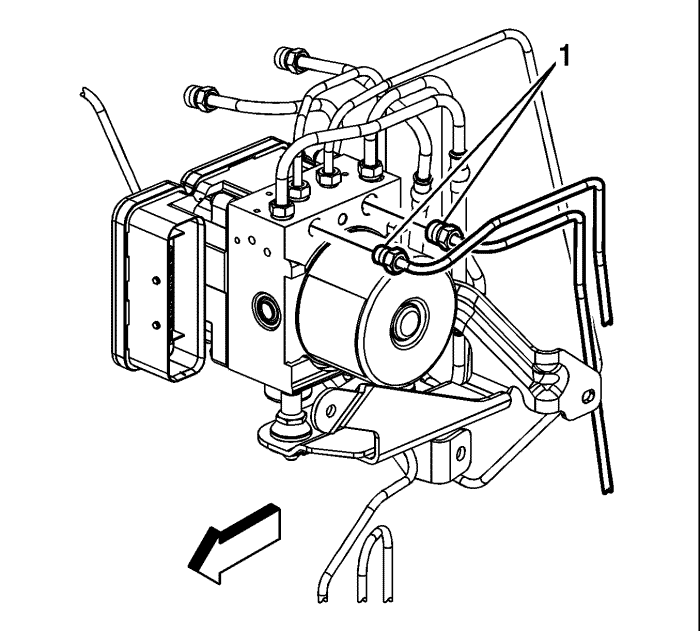
- Remove the rear brake pipe fittings (1) from the brake pressure modulator valve (BPMV).
- Cap the brake pipe fittings and plug the BPMV outlet ports in order to prevent brake fluid loss and contamination.
- Remove the fuel tank. Refer to
Fuel Tank Replacement : FWD → AWD .
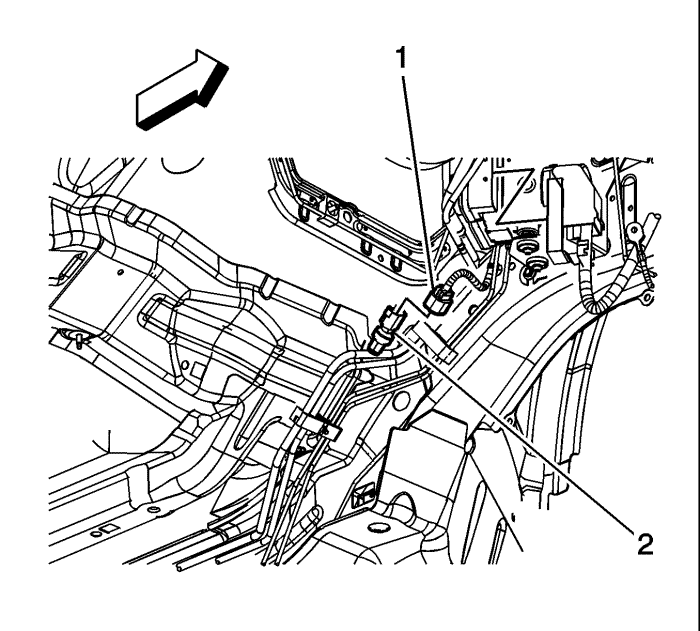
- Disconnect the body wiring harness electrical connector (1) from the fuel pressure sensor.
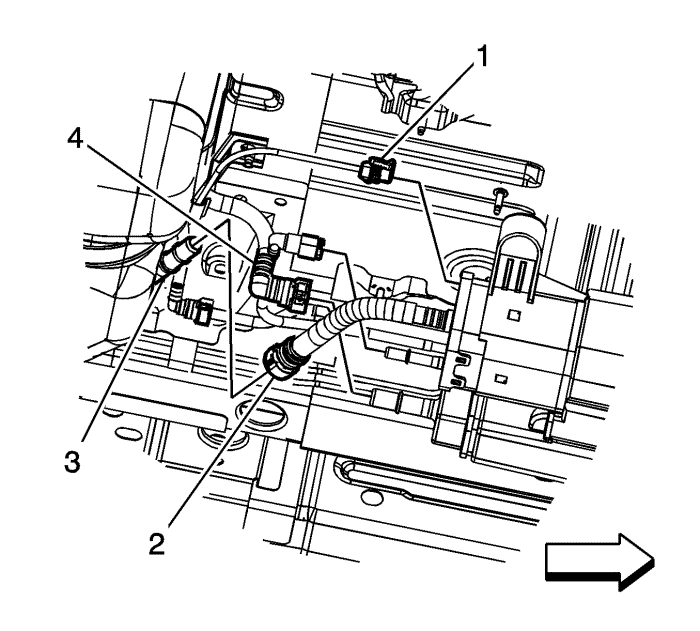
- Disconnect the chassis EVAP line quick connect fitting (1) from the EVAP canister. Refer to Plastic Collar Quick Connect Fitting Service .
- Remove the rear brake pipe fitting (2) from the rear brake crossover pipe fitting (1).
- Cap the brake pipe fittings in order to prevent brake fluid loss and contamination.
- Remove the rear brake pipe (2) fitting from the rear brake hose fitting (1).
- Cap the brake pipe fittings in order to prevent brake fluid loss and contamination.
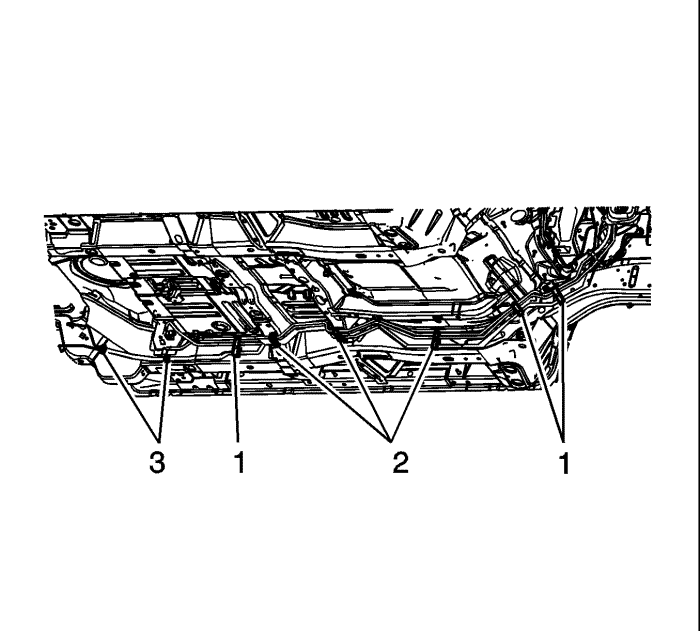
- Remove the brake, fuel and EVAP line retainers (1) from the underbody and side rail.
- Remove the brake, fuel and EVAP line retainers (2) from the underbody studs.
- Remove the brake line retainers (3) from the underbody side rail.
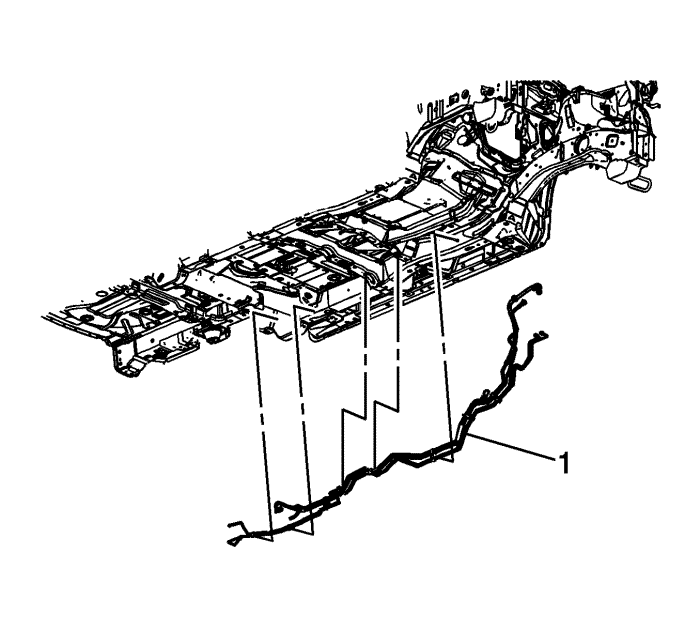
- Remove the brake, fuel and EVAP line bundle (1) from the vehicle.
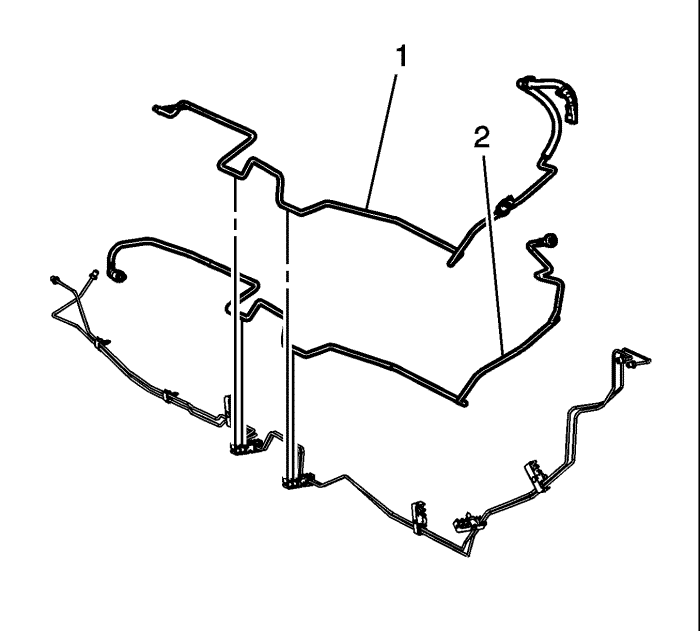
- Remove the chassis fuel feed line (1) from the retainers.
Installation Procedure
- Install the chassis fuel feed line (1) to the retainers.
- Install the brake, fuel and EVAP line bundle (1) to the vehicle.
- Install the brake, fuel and EVAP line retainers (1) to the underbody and side rail.
- Install the brake, fuel and EVAP line retainers (2) to the underbody studs.
- Install the brake line retainers (3) to the underbody side rail.
- Remove the caps from the brake pipe fittings.
Caution: Refer to Fastener Caution in the Preface section.
- Install the rear brake pipe (2) fitting to the rear brake hose fitting (1).
Tighten
Tighten the fitting to 18 N·m (13 lb ft).
- Remove the caps from the brake pipe fittings.
- Install the rear brake pipe fitting (2) to the rear brake crossover pipe fitting (1).
Tighten
Tighten the fitting to 18 N·m (13 lb ft).
- Connect the chassis EVAP line quick connect fitting (1) to the EVAP canister. Refer to Plastic Collar Quick Connect Fitting Service .
- Connect the body wiring harness electrical connector (1) to the fuel pressure sensor.
- Install the fuel tank. Refer to
Fuel Tank Replacement : FWD → AWD .
- Remove the caps and plugs from the brake pipe fittings and the BPMV outlet ports.
- Install the rear brake pipe fittings (1) to the BPMV.
Tighten
Tighten the fittings to 21 N·m (16 lb ft).
- Connect the chassis fuel feed line quick connect fitting (3) to the fuel rail. Refer to Metal Collar Quick Connect Fitting Service .
- Connect the chassis EVAP line quick connect fitting (2) to the EVAP canister purge solenoid valve. Refer to Plastic Collar Quick Connect Fitting Service .
- If equipped with LAT, install the engine coolant surge tank. Refer to
Radiator Surge Tank Replacement : Diesel → Petrol Engines .
- Install the underhood electrical center, non LAT equipped. Refer to Underhood Electrical Center or Junction Block Replacement .
- Install the chassis fuel feed line clip (1) to the fuel line bracket.
- Install the inlet manifold cover. Refer to
Intake Manifold Cover Replacement : LE5 or LE9 .
- Install the air cleaner outlet duct. Refer to
Air Cleaner Outlet Duct Replacement : LE5 or LE9
- Connect the negative battery cable. Refer to Battery Negative Cable Disconnection and Connection .
- Use the following procedure in order to inspect for leaks:
| 23.1. | Turn the ignition ON, with the engine OFF, for 2 seconds. |
| 23.2. | Turn the ignition OFF for 10 seconds. |
| 23.3. | Turn the ignition ON, with the engine OFF. |
| 23.4. | Inspect for fuel leaks. |
| © Copyright Chevrolet. All rights reserved |


