To the top of the document
Captiva
   
GMDE Start Page Load static TOC Load dynamic TOC Help?

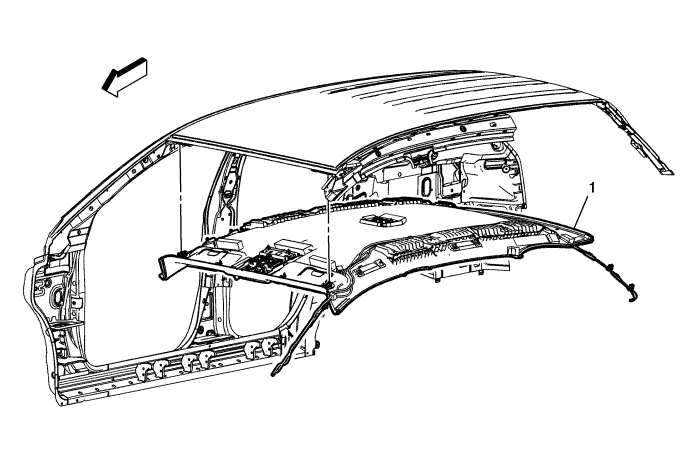
Headlining Trim Panel Replacement - Long Body


2245450

Callout

Component Name

Warning: Do not attempt to repair or alter the head impact energy-absorbing material glued to the headliner or to the garnish trims. If the material is damaged, replace the headliner and/or the garnish trim. Failure to do so could result in personal injury.

Caution: Use care when working around the head curtain inflator module. Sharp tools may puncture the curtain airbag. If the head curtain inflator module is damaged in any way, it must be replaced.

Caution: If a vehicle is equipped with a head curtain inflator module ensure that the inflator module and tether are undamaged. If tether or curtain airbag are damaged in any way, they must be replaced.

Preliminary Procedures

  1. Disable the roof rail SIR system. Refer to SIR Disabling and Enabling .
  2. Remove the windshield garnish moulding. Refer to Windscreen Pillar Garnish Moulding Replacement : Long Body  → Short Body .
  3. Remove the sunshade anchors. Refer to Sunshade Anchor Replacement .
  4. Remove the sunshade assembly. Refer to Sunshade Replacement .
  5. Remove the roof rail front assist handle assembly. Refer to Front Assist Handle Replacement .
  6. Remove the roof rail rear assist handle assembly. Refer to Assist Handle and Rear Coat Hook Replacement .
  7. Remove the roof console assembly. Refer to Roof Console Replacement .
  8. Remove the centre pillar upper trim panel. Refer to Centre Pillar Upper Garnish Moulding Replacement .
  9. Remove the rear quarter upper trim panel. Refer to Quarter Upper Trim Panel Replacement : Long Body  → Short Body .
  10. Remove the interior light. Refer to Interior Lamp Replacement .

1

Headliner Trim Panel Assembly

Procedure

  1. Remove the 3 push in retainers located at the rear edge of the headliner.
  2. Prior to removal, note the routing of the wire harness to aid in reassembly and to ensure proper installation.
  3. Disconnect the electrical connectors.
  4. If replacing the headliner assembly, transfer all necessary components.
  5. Ensure weatherstrips are properly positioned once headliner is in place.


© Copyright Chevrolet. All rights reserved