Intake Camshaft and Valve Lifter Replacement - LE5 or LE9
Removal Procedure
- Remove the camshaft position intake actuator. Refer to
Camshaft Position Intake Actuator Replacement : LE5 or LE9 .
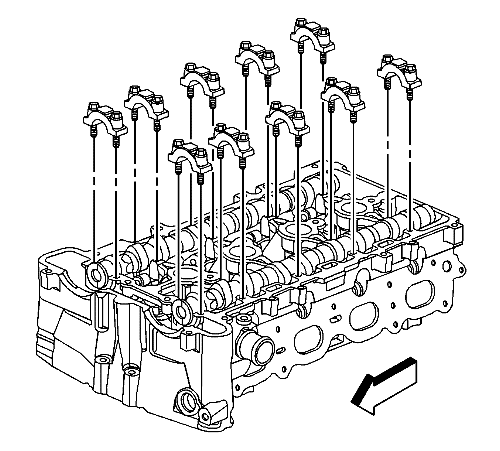
Note: Remove each bolt on each cap one turn at a time until there is no spring tension pushing on the camshaft.
- Mark the bearing caps to ensure they are installed in the original position.
- Remove the bearing cap bolts.
- Remove the bearing caps.
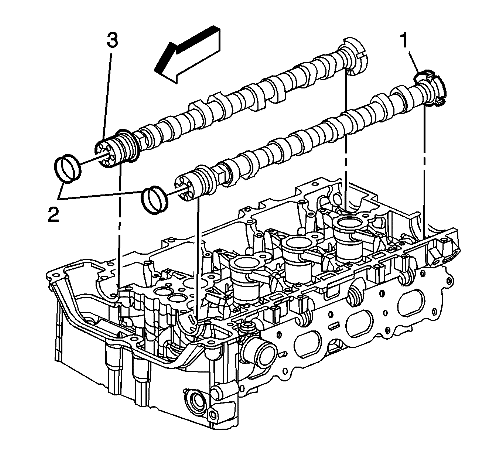
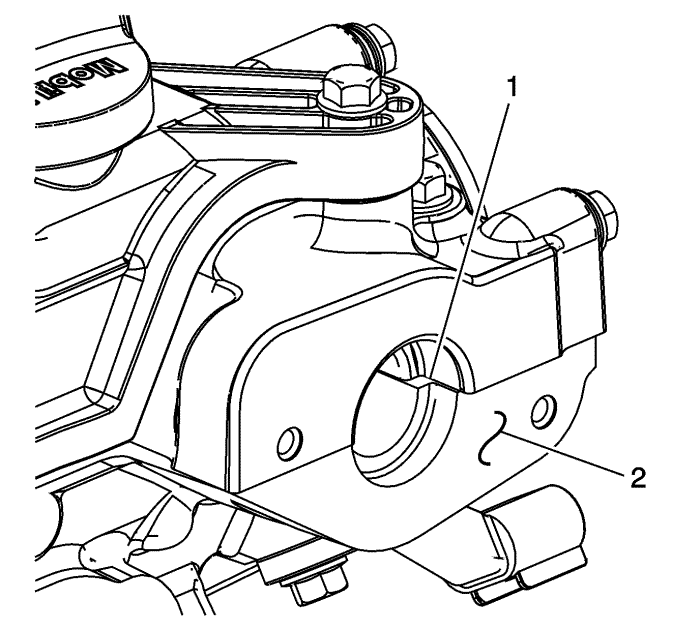
- Remove the inlet camshaft (1).
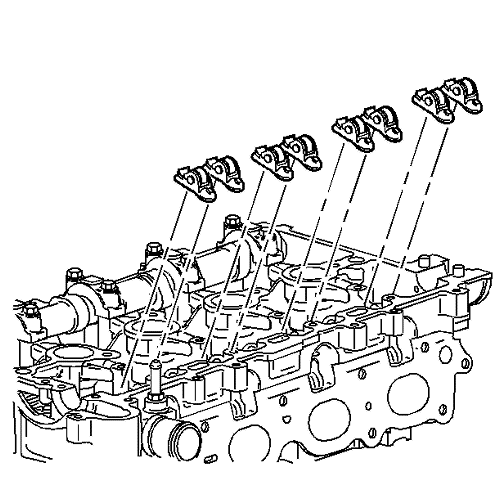
Note: Keep all of the roller followers and hydraulic adjusters in order so that they can be reinstalled in their respective locations.
- Remove the camshaft roller followers.
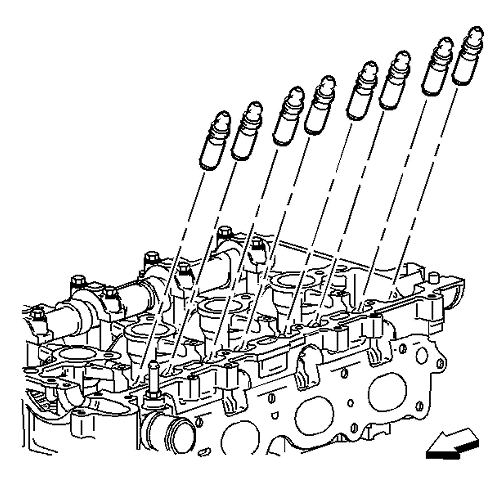
- Remove the hydraulic element clearance adjusters.
Installation Procedure
- Install the hydraulic element clearance adjusters into their bores in the cylinder head. Install the camshaft caps and hand start the camshaft cap bolts.
- Install the camshaft caps.
Caution: Refer to Fastener Caution in the Preface section.
- Tighten the camshaft cap bolts in increments of 3 turns until they are seated. Tighten the camshaft caps to 10 N·m (89 lb in).
Note:
| • | It is critical during installation to ensure the bearing rear cap and cylinder head alignment is correct and the mating surfaces are flush. |
| - | Ensure that all sealing material has been removed from the components, and the sealing surfaces are clean and free of contamination prior to applying the sealer. |
| - | Install and align the rear cap within 20 minutes of applying the sealer. |
| • | Apply the sealer to all locations centrally locating the bead on the rail. |
| - | Run bead to within 4.0 mm of the end points. |
| - | Where the cap ends on the perimeter rail, extend bead approximately 4.0 mm beyond edge of cap. |
| - | Run bead, dimension c, a total of 32 mm. |
| - | Run beads 20 mm from edge of cylinder head. |
- Apply a 3.5 mm bead of sealer to the cylinder head at the number 6 intake camshaft rear cap mating surface. Refer to Adhesives, Fluids, Lubricants, and Sealers for the recommended sealer.
- Install the number 6 intake camshaft rear cap.
| 5.1. | Tighten the cap bolts evenly to 5 N·m (44 lb in). |
| 5.2. | Tighten the cap bolts evenly a final pass to 10 N·m (89 lb in). |
- Remove all excess sealing material from the fuel pump roller tappet orifice (1), and ensure the orifice is free of debris.
- Remove all excess sealing material from the sealing surfaces.
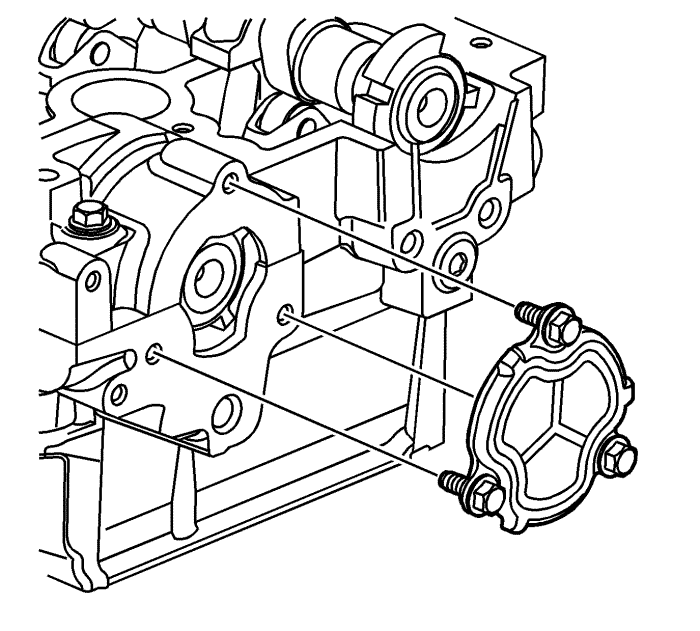
- Install the rear cylinder head opening plate and bolts and tighten to 10 N·m (89 lb in).
- Install the camshaft position intake actuator. Refer to
Camshaft Position Intake Actuator Replacement : LE5 or LE9 .
| © Copyright Chevrolet. All rights reserved |


