Camshaft Position Intake Actuator Replacement - LE5 or LE9
Special Tools
| • | EN-48749 Timing Chain Retention Tool Kit |
| • | EN-48953 Camshaft Actuator Locking Tool |
For equivalent regional tools, refer to
Special Tools : LE5 or LE9 .
Removal Procedure
- Remove the camshaft cover. Refer to
Camshaft Cover Replacement : LE5 or LE9 .
- Remove the spark plugs. Refer to Spark Plug Replacement .
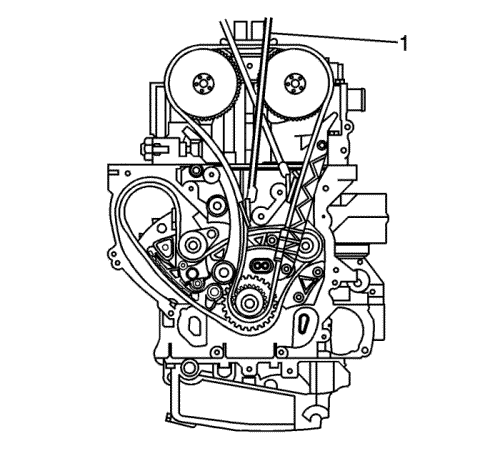
- Rotate the crankshaft clockwise and install the EN-48953 retention tool (1).
Caution: Refer to Fastener Caution in the Preface section.
- Install the camshaft actuator retainer bolts and tighten to 10 N·m (89 lb in) .
- Loosen, but DO NOT remove the intake camshaft actuator bolt.
- Remove the EN-48953 locking tool (1).
- Clean the timing chain and gears with solvent.
Note: Ensure the timing chain and the camshaft position actuators are marked for proper assembly.
- Mark the intake and exhaust camshaft actuators and the respective locations on the timing chain.
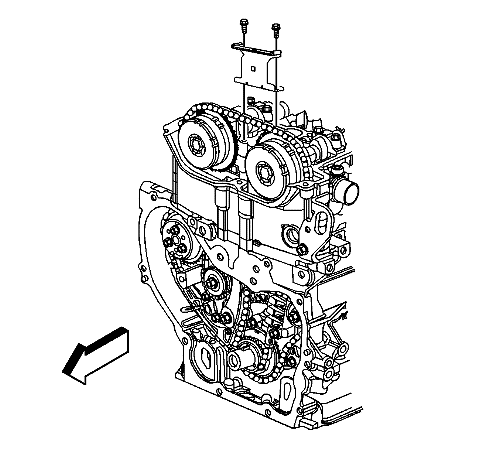
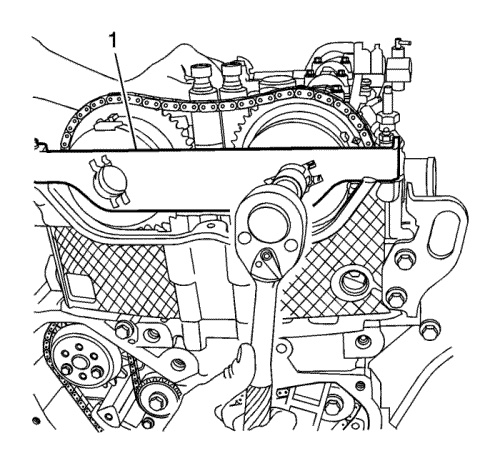
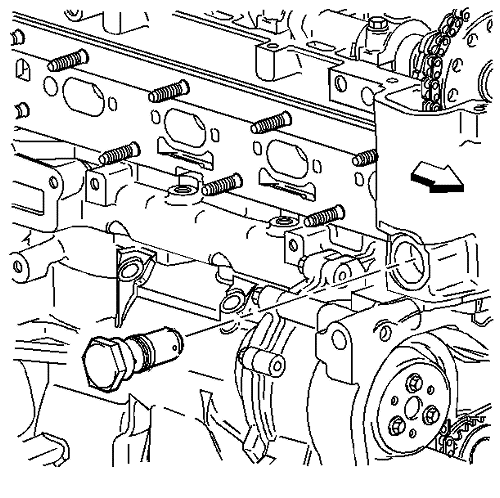
- Remove the upper timing chain guide bolts and guide.
- Remove the timing chain tensioner.
Note:
| • | The intake camshaft actuator should not rotate during removal or installation. |
| • | Ensure the tips of the tool are fully engaged into the timing chain. The retention tool rod can be used on the rear side of the chain to ensure the teeth from the retention tool are engaged. |
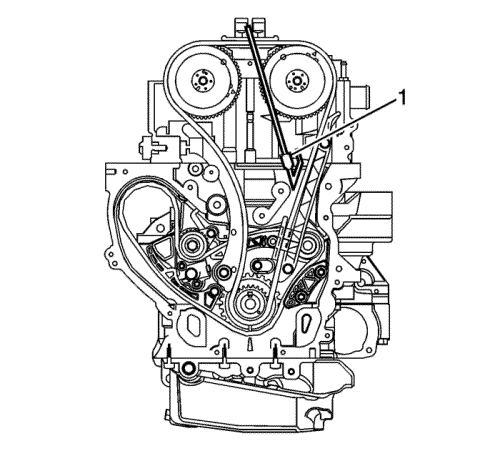
- Install the EN-48749 retention tool (1) to the intake side of the timing chain.
- Install the EN-48749 retention tool (1) to the exhaust side of the timing chain.
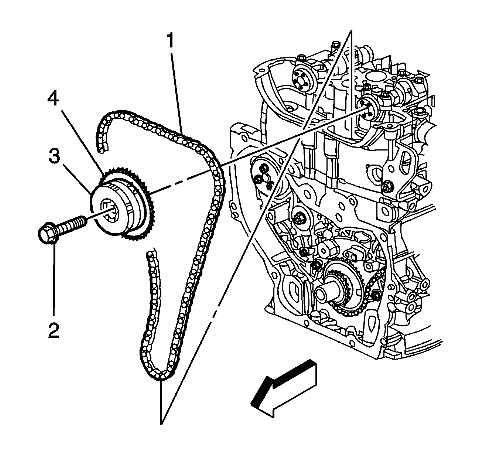
- Remove and discard the intake camshaft actuator bolt (1).
- Rotate the exhaust camshaft clockwise slightly to take the tension off of the timing chain on the intake actuator.
- Remove the intake camshaft actuator (3) from the camshaft while also removing the actuator from the timing chain.
Installation Procedure
Note: Ensure that the alignment mark made previously on the intake camshaft actuator is still aligned properly with the mark on the timing chain.
- Install the timing chain onto the intake camshaft actuator.
- Align the intake camshaft actuator alignment mark made previously with the timing chain mark and install the actuator onto the camshaft rotating the exhaust camshaft clockwise, if required.
- Install a NEW intake camshaft actuator bolt (1) until snug.
- Remove the timing chain retention tool (1) from the intake side of the timing chain.
Note: Ensure that the alignment mark previously on the inlet camshaft actuator is still aligned properly with the timing chain. If the mark made previously on the inlet camshaft actuator is not aligned properly, refer to Camshaft Timing Chain, Sprocket, and Tensioner Replacement : LE5 or LE9 .
- Remove the timing chain retention tool (1) from the exhaust side of the timing chain.
Note: Failure to reset the tensioner will allow the tensioner to over extend, limiting the timing chain's life.
- Reset and install the timing chain tensioner. Refer to
Timing Chain Tensioner Replacement : LE5 or LE9 .
- Install the EN-48953 retention tool (1) .
- Install the camshaft actuator retainer bolts and tighten to 10 N·m (89 lb in).
- Tighten the NEW camshaft actuator bolt to 30 N·m (22 lb ft) plus an additional 100 degrees using the EN-45059 meter .
Note: You must have the EN-48953 retention tool installed to perform this procedure.
- To release the tensioner apply an anticlockwise rotational torque to the crankshaft balancer bolt of 45 N·m (33 lb ft).
- Remove the EN-48953 retention tool (1).
- Install the upper timing chain guide and bolts and tighten to 10 N·m (89 lb in).
- Install the spark plugs. Refer to Spark Plug Replacement .
- Install the camshaft cover. Refer to
Camshaft Cover Replacement : LE5 or LE9 .
| © Copyright Chevrolet. All rights reserved |


