Handbrake Adjustment
Special Tools
CH-21177-A Drum to Brake Shoe Clearance Gauge
For equivalent regional tools, refer to Special Tools .
Warning: Refer to Brake Dust Warning in the Preface section.
- Disable the handbrake cable adjuster. Refer to Handbrake Cable Adjuster Disabling .
- Turn the ignition to the OFF position.
- Raise and support the vehicle. Refer to Lifting and Jacking the Vehicle .
- Remove the rear tyre and wheel assemblies. Refer to Tyre and Wheel Removal and Installation .
- Remove the rear brake rotors. Refer to Rear Brake Rotor Replacement .
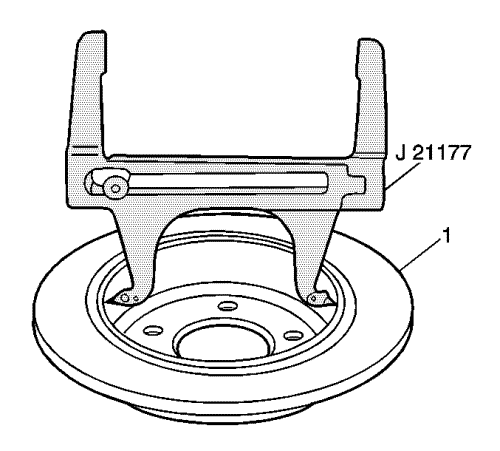
- Set the CH-21177-A drum to brake shoe clearance gauge inside of the drum portion of the disc brake rotor at the widest point.
| • | Place the contacts on the tool to the widest point of the park brake drum (1). |
| • | Tighten the set screw on the tool prior to removing the tool from the drum. |
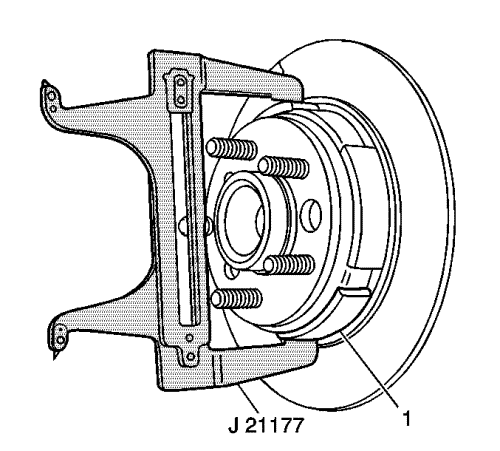
- Position the CH-21177-A drum to brake shoe clearance gauge over the parking brake shoes (1) at the widest point.
- Turn the adjuster on the actuator until the park brake shoes just contact the CH-21177-A drum to brake shoe clearance gauge .
- Repeat steps 6-8 for the opposite handbrake assembly.
- Install the rear brake rotors. Refer to Rear Brake Rotor Replacement .
- Install the rear tyre and wheel assemblies. Refer to Tyre and Wheel Removal and Installation .
- Enable the handbrake cable adjuster. Refer to Handbrake Cable Adjuster Enabling .
- Apply the electronic handbrake.
- Place the transmission in NEUTRAL.
- Raise and support the vehicle so the tyre and wheel assemblies are clear of the ground.
Note: If the rear wheels rotate during the following test, repeat the adjustment procedure completely.
- Attempt to rotate the rear tyre and wheel assemblies.
| • | The wheels should not rotate forward. |
| • | The wheels should not rotate rearward, or should exhibit significant rearward drag. |
- Release the electronic handbrake.
- Verify the rear tyre and wheel assemblies rotate freely and do not exhibit forward or rearward drag.
- If the rear tyre and wheel assemblies do not rotate freely and without forward or rearward drag, repeat the adjustment procedure completely.
| © Copyright Chevrolet. All rights reserved |


