Inlet Manifold Replacement
Special Tools
BO-38185 Hose Clamp Pliers
For equivalent regional tools, refer to Special Tools .
Removal Procedure
- Disconnect battery negative cable. Refer to Battery Negative Cable Disconnection and Connection .
- Drain the coolant fluid. Refer to Cooling System Draining and Filling .
- Remove the fuel injection fuel rail. Refer to Fuel Injection Fuel Rail Assembly Replacement .
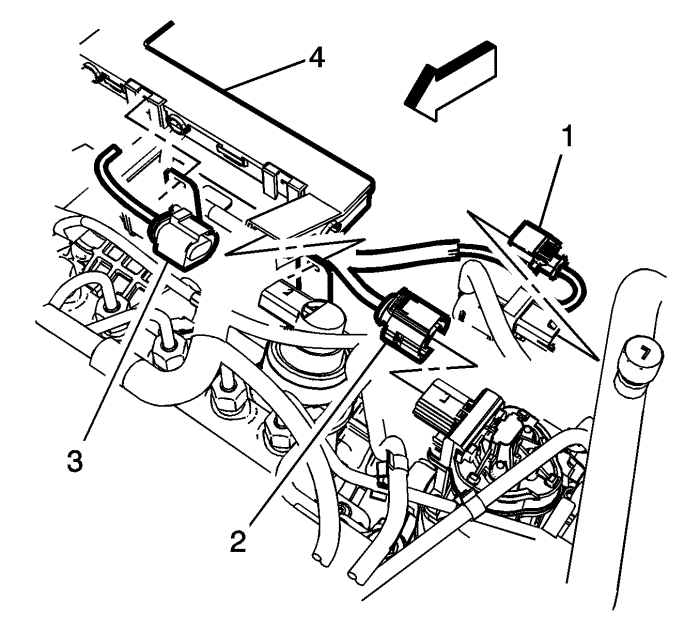
- Remove the surge tank overflow hose. Refer to Radiator Surge Tank Overflow Hose Replacement .
- Disconnect the following:
| • | EGR vacuum solenoid (1) |
| • | Intake actuator assembly (3) |
| • | Engine harness conduit (4) |
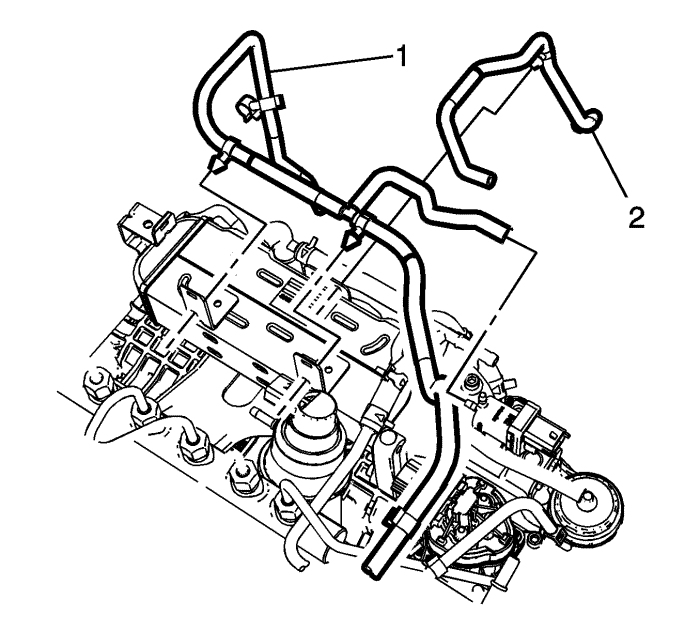
- Remove the vacuum pump hose (1) and the manifold intake tuning valve hose (2).
- Raise and support the vehicle. Refer to Lifting and Jacking the Vehicle .
- Remove the transmission mount bracket. Refer to
Transmission Mount Bracket Replacement - Rear : FWD → AWD .
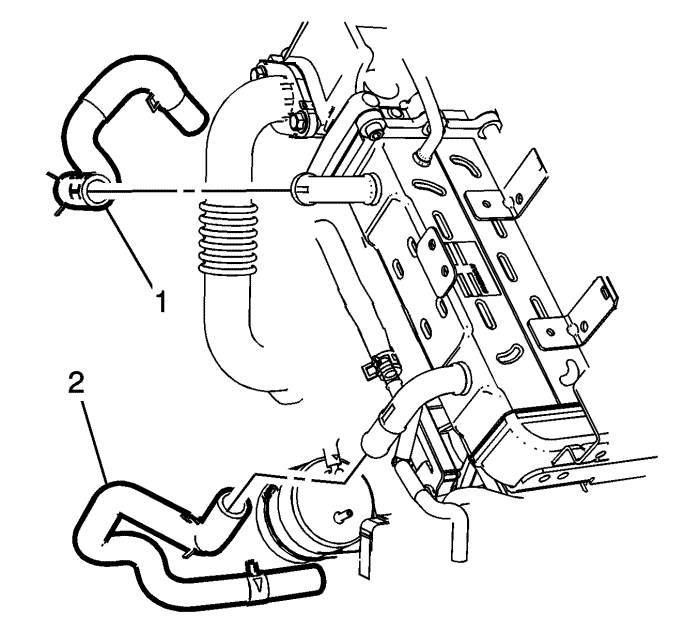
- Remove the EGR manifold cooling return hose (1) and the EGR valve cooling feed hose (2) , from the EGR cooler.
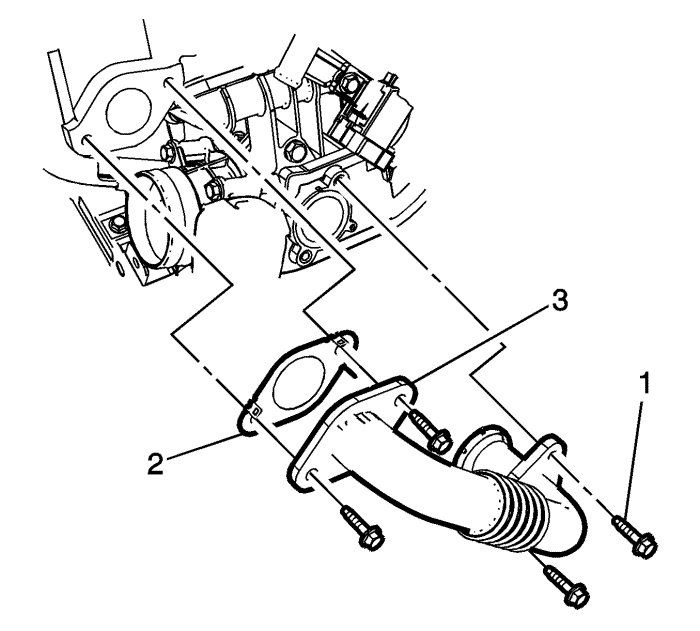
- Remove the EGR pipe bolts (1), gasket (2) and seal (3).
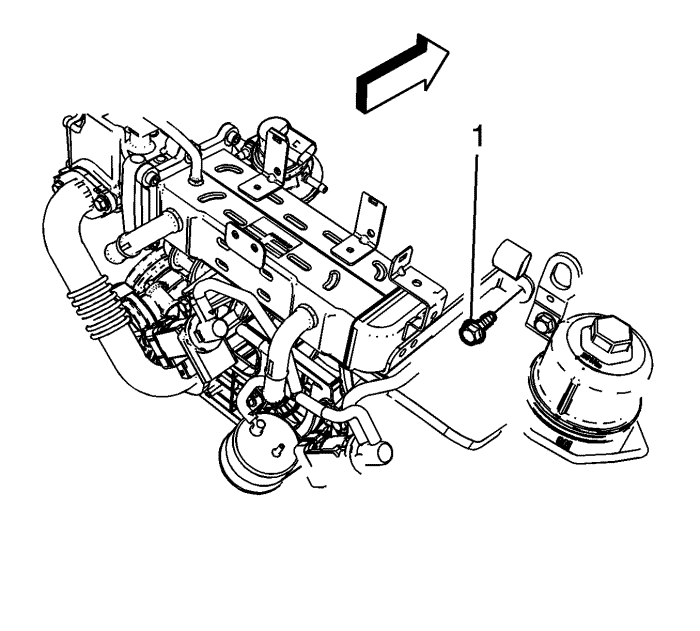
- Remove the EGR cooler support bracket bolt (1).
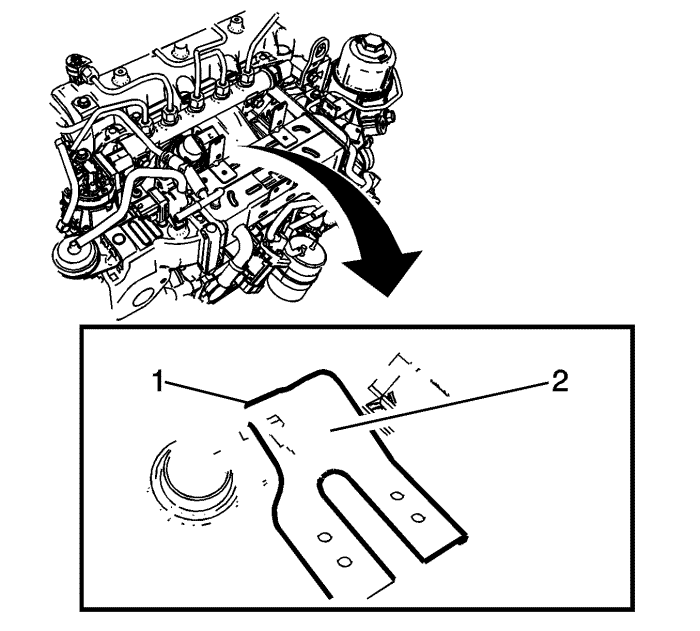
Note: The EGR cooler brace nut can be accessed from the side of the brace with a 1/4 inch extension and a swivel adapter.
- Remove the EGR cooler brace nut (2).
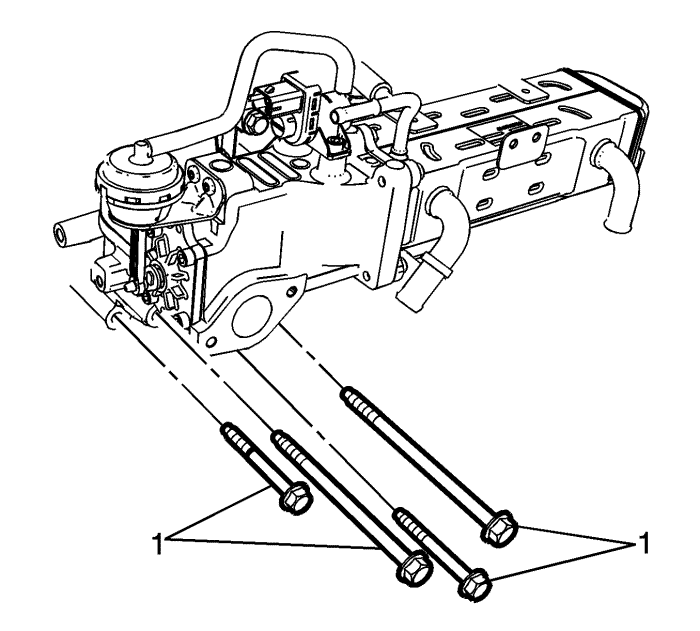
- Remove the EGR valve mounting bolts (1).
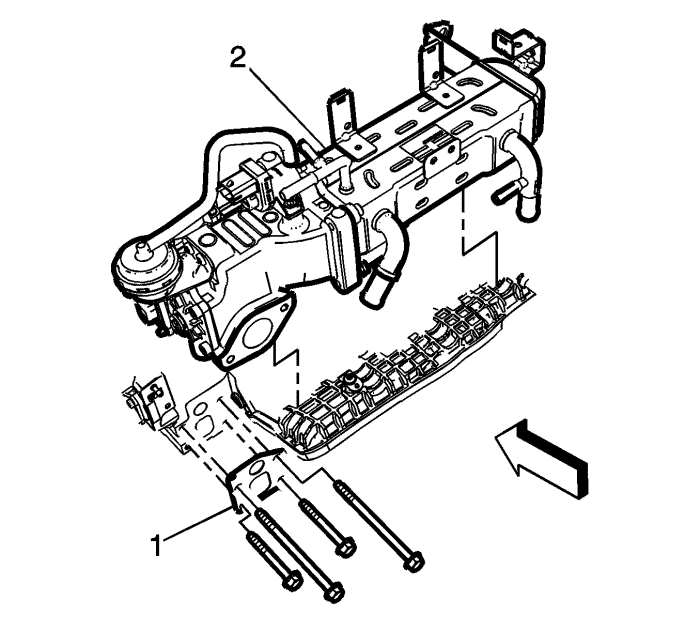
- Remove the EGR valve and the EGR cooler (2) as one assembly.
- Discard the EGR valve gasket (1).
- Remove the turbocharger coolant return pipe. Refer to
Turbocharger Coolant Return Pipe Replacement : LNQ .
- Mark the location of the vacuum hoses.
- Disconnect vacuum lines as necessary.
- Remove the intake air tuning valve vacuum control solenoid valve. Refer to Inlet Air Tuning Valve Vacuum Control Solenoid Valve Replacement .
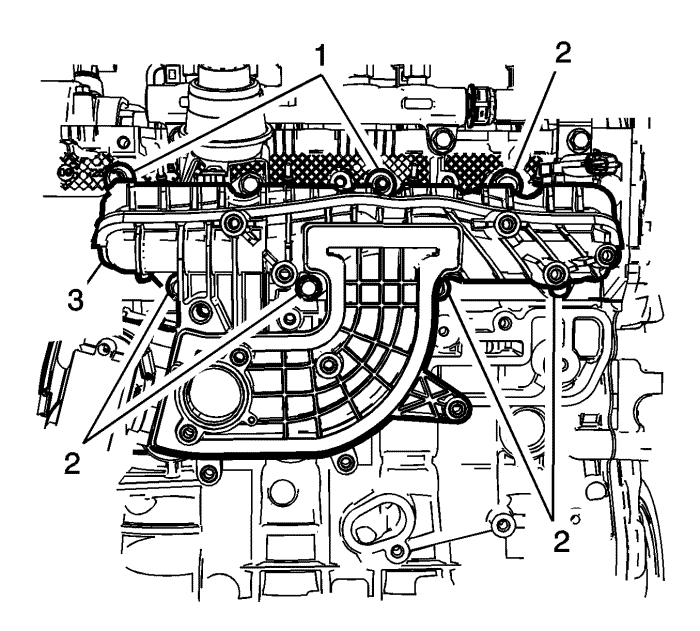
- Remove the intake bolt (2) and nut (1).
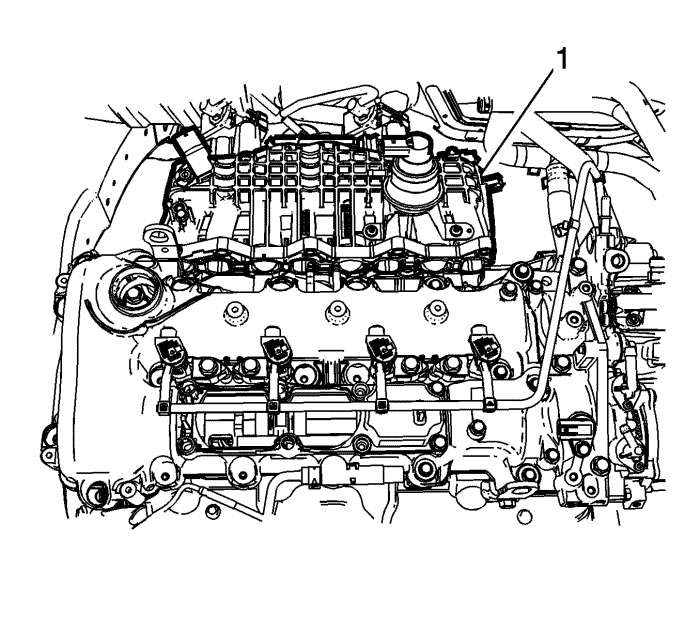
- Remove the intake manifold from the vehicle (1).
- Disconnect electrical connectors as necessary.
- Clean and inspect the intake manifold.
- Transfer components as necessary.
Installation Procedure
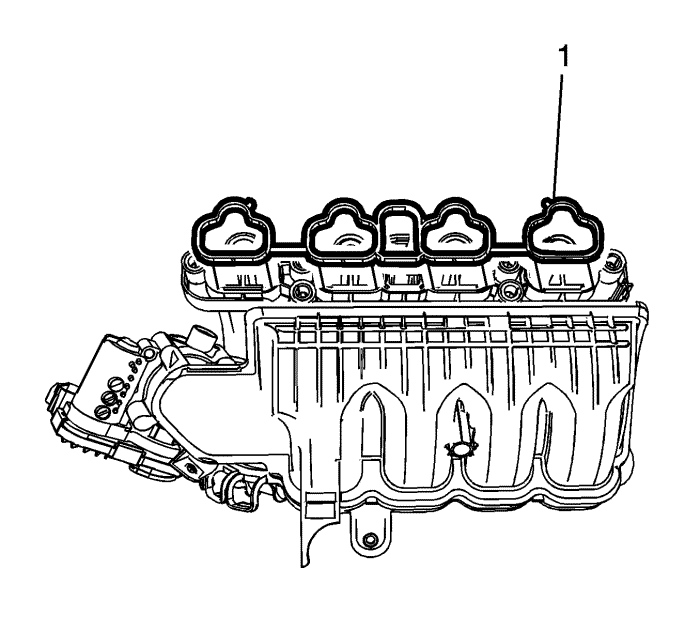
- Ensure the surface of the intake manifold is clean before installing the new gasket.
- Install the manifold gasket (1).

- Install the intake manifold in the vehicle (1).
Caution: Refer to Fastener Caution in the Preface section.

- Install the intake manifold assembly retaining bolts (2) and nuts (1) and tighten to 25 N·m (18 lb ft).
- Install the intake air tuning valve vacuum control solenoid valve. Refer to Inlet Air Tuning Valve Vacuum Control Solenoid Valve Replacement .
- Connect vacuum lines as necessary.

- Position the EGR valve and cooler assembly (2) to the cylinder head with a NEW gasket (1).

- Install the EGR valve assembly bolts (1) and tighten to 25 N·m (18 lb ft).

- Install the EGR cooler brace nut (2) to the cylinder head and tighten to 25 N·m (18 lb ft).

Note: The EGR cooler support nut can be accessed from the side of the brace with a 1/4 inch extension and a swivel adapter.
- Install the EGR cooler support nut (1) to the cylinder head and tighten to 25 N·m (18 lb ft).

- Install the EGR manifold cooling return hose (1) and the EGR valve cooling feed hose (2).

- Install the EGR pipe (4) to the intake manifold and EGR valve with a NEW gasket (2) and seal (3).
- Tighten the bolts (1) to 25 N·m (18 lb ft).

- Install the vacuum pump hose (1) and the manifold tuning valve hose (2).
- Install the surge tank overflow hose. Refer to Radiator Surge Tank Overflow Hose Replacement .

- Position the engine harness conduit (4) onto the EGR cooler tabs.
- Connect the following:
| • | EGR valve regulator solenoid (1) |
| • | Intake actuator assembly (3) |
| • | Engine harness conduit (4) |
- Install the fuel injection fuel rail. Refer to Fuel Injection Fuel Rail Assembly Replacement .
- Fill the coolant fluid. Refer to Cooling System Draining and Filling .
- Connect the battery negative cable. Refer to Battery Negative Cable Disconnection and Connection .
| © Copyright Chevrolet. All rights reserved |


