Captiva
Clutch Master Cylinder Replacement
Removal Procedure
Remove the battery tray. Refer to
Battery Tray Replacement
.
Remove as much clutch/brake fluid out of clutch fluid reservoir as possible.
Remove the driver knee bolster. Refer to
Driver Knee Bolster Replacement
:
Long Body
→
Short Body
.
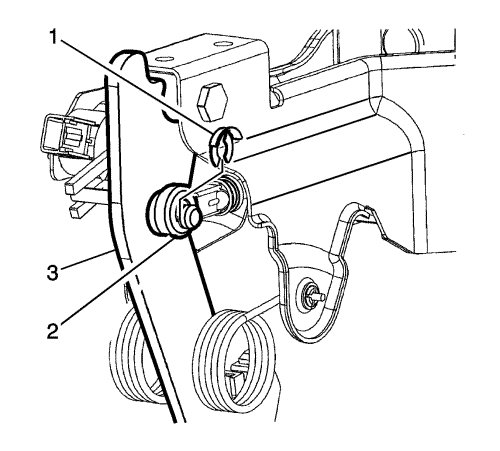
Remove the clutch master cylinder push rod retaining clip (1) from the clutch pedal (3).
Disconnect the clutch master cylinder push rod (2) from the clutch pedal (3).
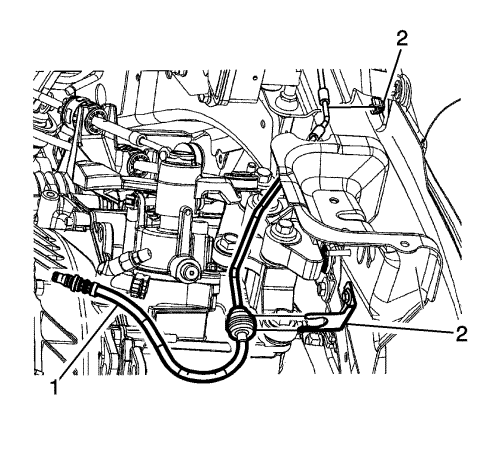
Unclip the clutch actuator cylinder front pipe (1) from the 2 retainers (2).
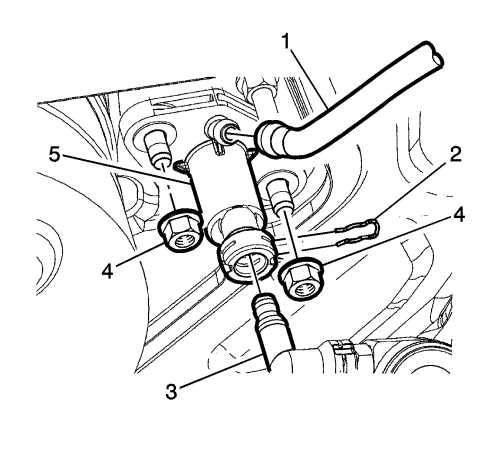
Remove the clutch master cylinder reservoir hose (1) from the clutch master cylinder (5).
Remove the retaining clip (2).
Disconnect the clutch actuator cylinder front pipe (3) from the clutch master cylinder (5).
Remove the 2 clutch master cylinder nuts (4).
Remove the clutch master cylinder (5) from the vehicle.
Installation Procedure
Position the clutch master cylinder (5) into the vehicle.
Caution:
Refer to
Fastener Caution
in the Preface section.
Install the 2 clutch master cylinder nuts (4) and tighten to
27N·m(20 lb ft).
Connect the clutch actuator cylinder front pipe (3) to the clutch master cylinder (5).
Install the retaining clip (2).
Install the clutch master cylinder reservoir hose (1) to the clutch master cylinder (5).
Clip the clutch actuator cylinder front pipe (1) to the 2 retainers (2).
Connect the clutch master cylinder push rod (2) to the clutch pedal (3).
Install the clutch master cylinder push rod retaining clip (1) to the clutch pedal (3).
Install the driver knee bolster. Refer to
Driver Knee Bolster Replacement
:
Long Body
→
Short Body
Bleed the hydraulic clutch system. Refer to
Hydraulic Clutch System Bleeding
.
Fill the clutch fluid reservoir with clutch/brake fluid up to the MAX level.
Install the battery tray. Refer to
Battery Tray Replacement
© Copyright Chevrolet. All rights reserved