Heater and Air Conditioning Evaporator Case Replacement
Removal Procedure
- Recover the refrigerant. Refer to Refrigerant Recovery and Recharging .
- Drain the cooling system. Cooling System Draining and Filling .
- Remove instrument panel assembly. Refer to Instrument Panel Assembly Replacement .

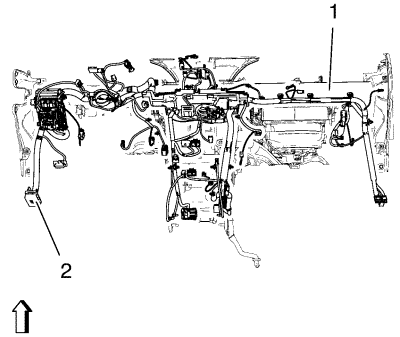
- Remove instrument panel wiring harness (2) from instrument panel tie bar (1).
Disconnect electrical connectors.

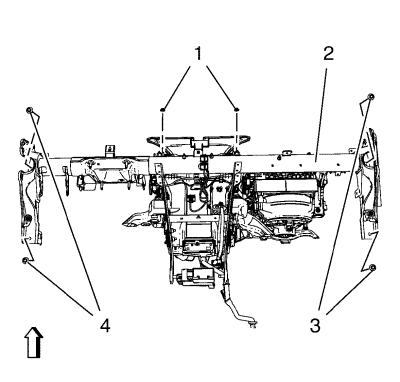
- Remove instrument panel tie bar (2).
| 5.1. | Remove 4 instrument panel tie bar bolts (3, 4). |
| 5.2. | Remove 2 instrument panel tie bar nuts (1). |

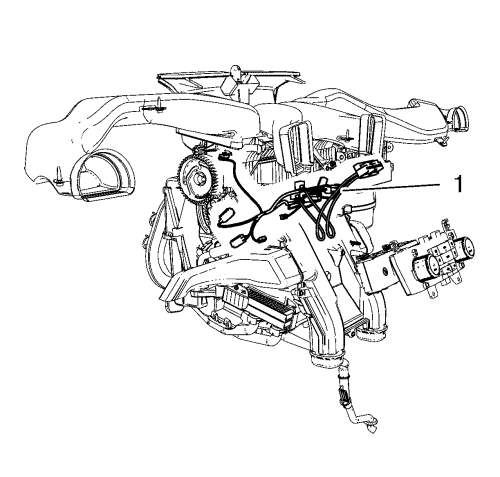
- Remove air conditioning module wiring harness (1).
Disconnect electrical connectors.
- Remove heater core. Refer to Heater Core Replacement .
- Remove blower motor. Refer to Blower Motor Replacement .
- Remove heater and blower and air conditioning control module. Refer to Heater and Blower and Air Conditioning Control Module Replacement or Heater and Blower and Air Conditioning Control Module Replacement .

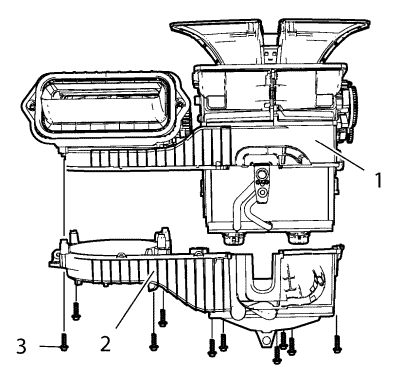
- Remove heater and air conditioning evaporator case (2) from heater and blower and air conditioning control module (1).
- Remove 10 heater and air conditioning evaporator case bolts (3).
Installation Procedure

- Install heater and air conditioning evaporator case (2) to heater and blower and air conditioning control module (1).
Caution: Refer to Fastener Caution in the Preface section.
- Install 10 heater and air conditioning evaporator case bolts (3) and tighten to 2.5 N·m (23 lb in).
- Install heater and blower and air conditioning control module. Refer to Heater and Blower and Air Conditioning Control Module Replacement or Heater and Blower and Air Conditioning Control Module Replacement .
- Install blower motor. Refer to Blower Motor Replacement .
- Install heater core. Refer to Heater Core Replacement .

- Install air conditioning module wiring harness (1).
Connect electrical connectors.

- Install instrument panel tie bar (2).
| 7.1. | Install 4 instrument panel tie bar bolts (3, 4) and tighten to 22 N·m (17 lb ft). |
| 7.2. | Install 2 instrument panel tie bar nuts (1) and tighten to 9 N·m (80 lb in). |

- Install instrument panel wiring harness (2) from instrument panel tie bar (1).
Connect electrical connectors.
- Install instrument panel assembly. Refer to Instrument Panel Assembly Replacement .
- Fill the cooling system. Cooling System Draining and Filling .
- Evacuate and charge the refrigerant system. Refer to Refrigerant Recovery and Recharging .
| © Copyright Chevrolet. All rights reserved |


