Transmission Mount Replacement - Left Side
Special Tools
CH-49290 Engine Support Tool
For equivalent regional tools, refer to Special Tools .
Removal Procedure
- Remove the battery tray. Refer to Battery Tray Replacement .
- Raise the vehicle.
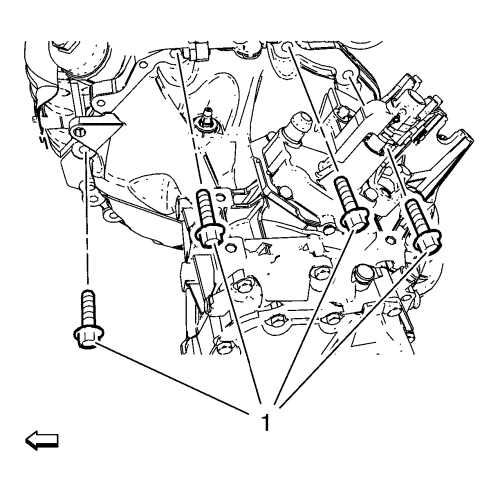
- Remove the upper transmission bolts (1).
- Install the EN-47649 support fixture. Refer to Engine Support Fixture
- Raise and support the vehicle. Refer to Lifting and Jacking the Vehicle .
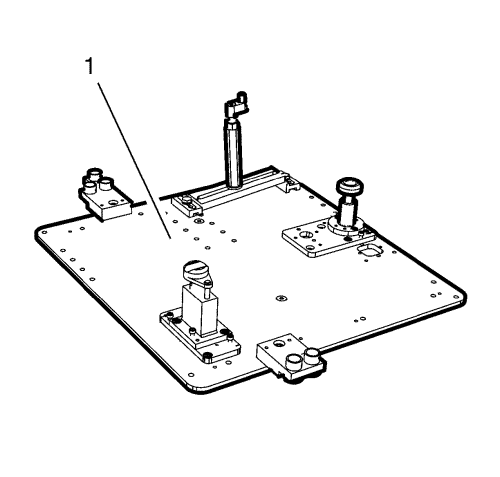
Note: The SPX installation manual is supplied with the special tool and is also available online from SPX directly. Go to www.spxtools-shop.com.
- Assemble the CH-49290 support tool (1) according to the details provided in the SPX installation manual.
- Support the CH-904 base frame on a jack.
- Support the CH-49290 support tool on the CH-904 base frame.
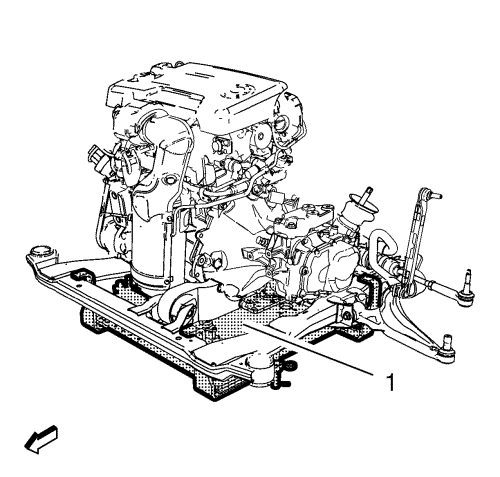
Note: The SPX installation manual is supplied with the special tool and is also available online from SPX directly. Go to www.spxtools-shop.com.
- Install the CH-49290 support tool (1) according to the details provided in the SPX installation manual.
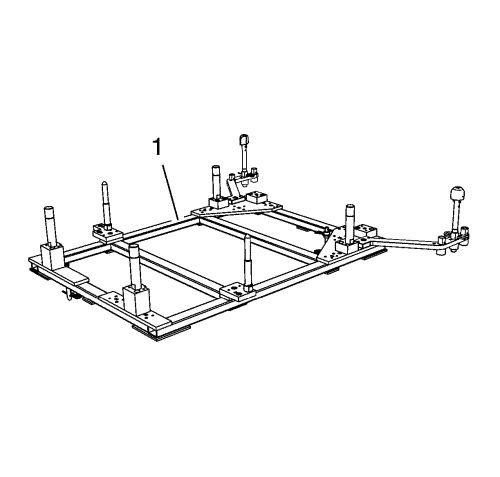
Note: The SPX installation manual is supplied with the special tool and is also available online from SPX directly. Go to www.spxtools-shop.com.
- Assemble the CH-49289 centring frame (1) according to the details provided in the SPX installation manual.
- Support the CH-904 base frame on a jack.
- Support the CH-49289 centring frame on the CH-904 base frame.
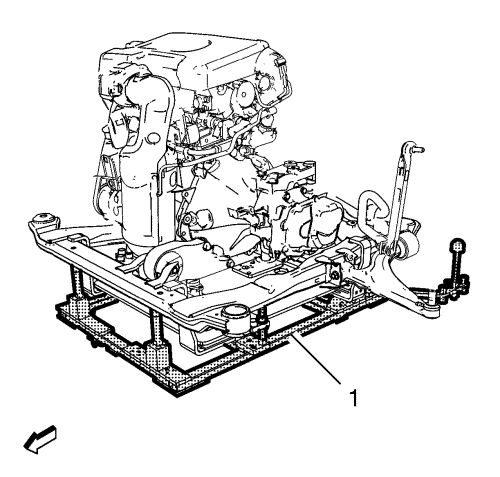
Note: The SPX installation manual is supplied with the special tool and is also available online from SPX directly. Go to www.spxtools-shop.com.
- Install the CH-49289 centring frame (1) according to the details provided in the SPX installation manual.
- Lower the vehicle.
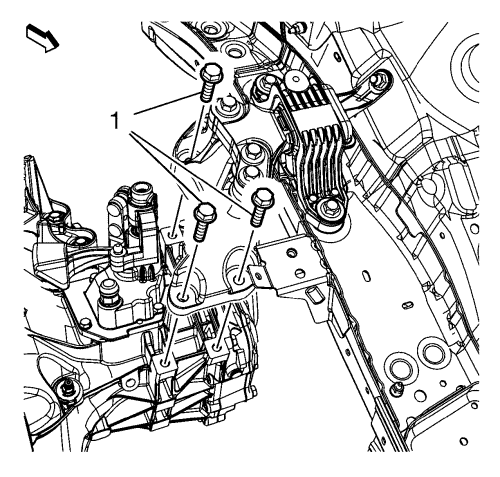
- Remove the left transmission mount bracket bolts (1).
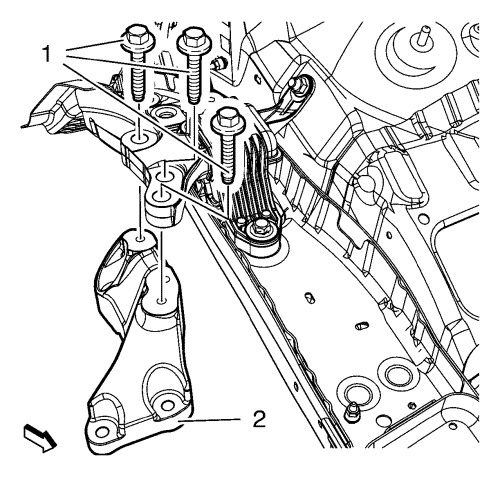
- Remove and DISCARD the left transmission mount bolts (1) from the transmission mount bracket (2).
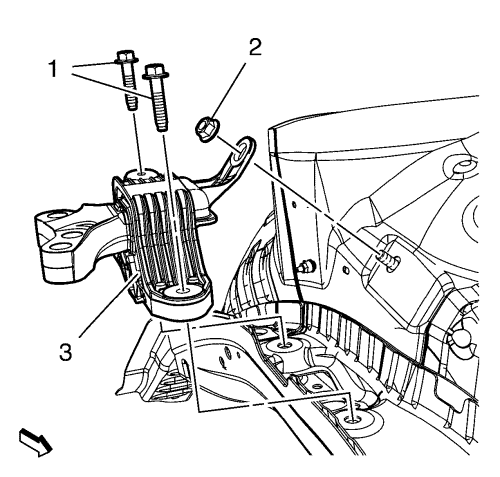
- Remove the left transmission mount to body bolts (1).
- Remove the left transmission mount to body nut (2).
- Remove the transmission mount (3) from the vehicle.
Installation Procedure

- Install the transmission mount (3) to the vehicle.
Caution: Refer to Fastener Caution in the Preface section.
Caution: Refer to Torque-to-Yield Fastener Caution in the Preface section.
- Install the transmission mount to body bolts (1) and tighten to 62 N·m (46 lb ft).
- Install the transmission mount to body nut (2) and tighten to 62 N·m (46 lb ft).

- Install the NEW left transmission mount bolts (1) to the transmission mount bracket (2) and tighten to 50 N·m + 60°-75° (37 lb ft + 60°-75°).

- Install the left transmission mount bracket bolts (1) and tighten to 62 N·m (46 lb ft).
- Raise the vehicle.

- Lower the CH-49289 centring frame (1) with the CH-904 base frame and a jack until it is removable.
- Remove the CH-49289 centring frame from the CH-904 base frame.

Note: The SPX installation manual is supplied with the special tool and is also available online from SPX directly. Go to www.spxtools-shop.com.
- Disassemble the CH-49289 centring frame (1) according to the details provided in the SPX installation manual.

- Lower the CH-49290 support tool (1) with the CH-904 base frame and a jack.
- Remove the CH-49290 support tool from the CH-904 base frame.

Note: The SPX installation manual is supplied with the special tool and is also available online from SPX directly. Go to www.spxtools-shop.com.
- Disassemble the CH-49290 support tool (1) according to the details provided in the SPX installation manual.
- Lower the vehicle.
- Install the battery tray. Refer to Battery Tray Replacement .
| © Copyright Chevrolet. All rights reserved |


