Volt |
||||||||
|
|
|
|||||||
| • | BO-641 Suction Holder |
| • | BO-46974 Glass Removal System |
| • | Use an adhesive that is approved by GM |
For equivalent regional tools, refer to Special Tools .
Warning: Refer to Cracked Window Warning in the Preface section.
Warning: Refer to Glass and Sheet Metal Handling Warning in the Preface section.
Warning: Refer to Defroster Outlet Warning in the Preface section.
| • | Upper dash pad |
| • | Seats and carpeting |
Approx. 5200 mm (204.724 in), the circumference of the corresponding role of wire is approx. 1000 mm (39.369 in)
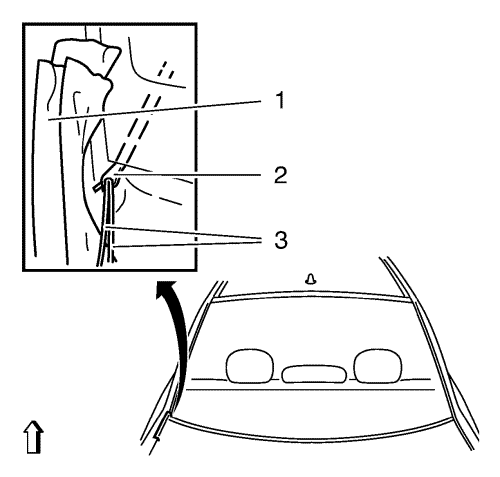
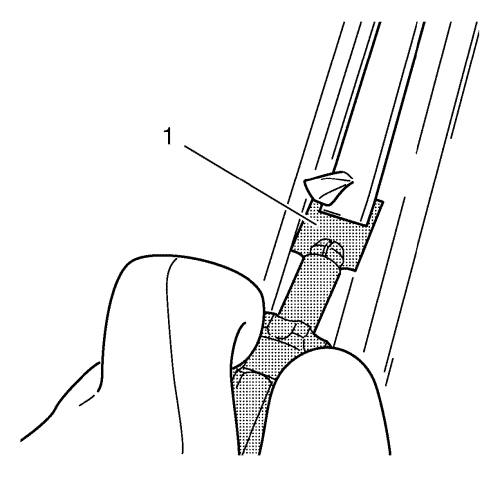
Note: Ensure that the tailgate window is not damaged in the process. Otherwise, stress cracks could form in the tailgate window. Mask off the area with fabric tape (1).
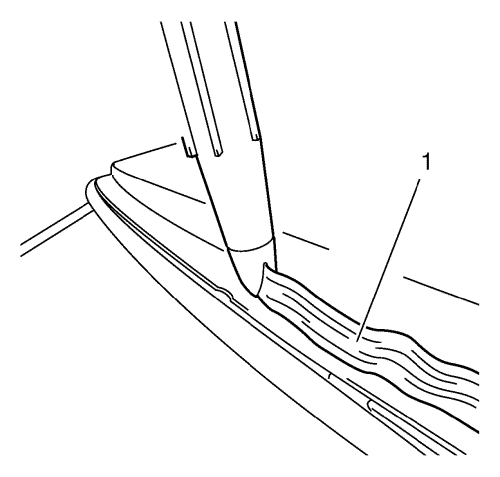
| 12.1. | Thread both ends of the cutting wire (3) in the bores of the piercing awl (2) and bend them over. |
| 12.2. | Use the piercing awl (2) to pull the cutting wire to the centre of the tailgate window. |
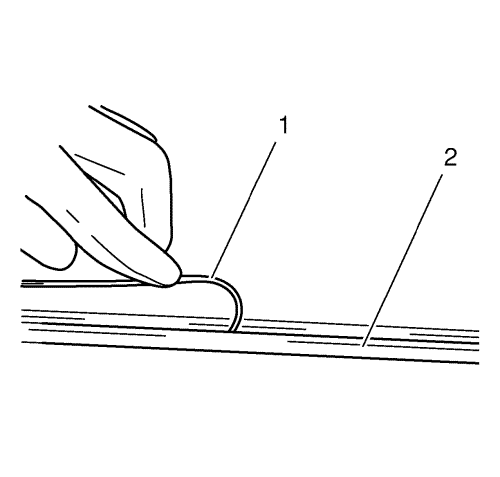
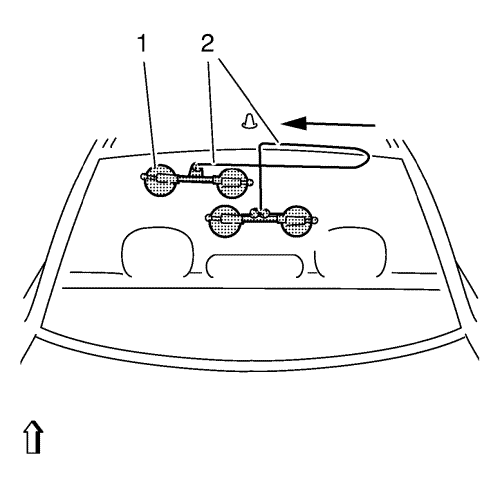
Note: The cutting wire (1) should be rolled in beneath the rubber window seal (2) at the tailgate window.
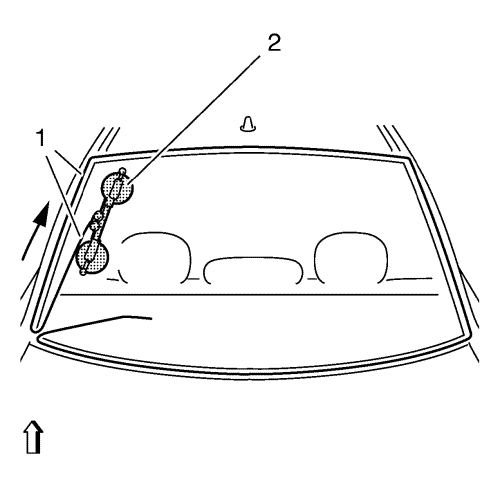
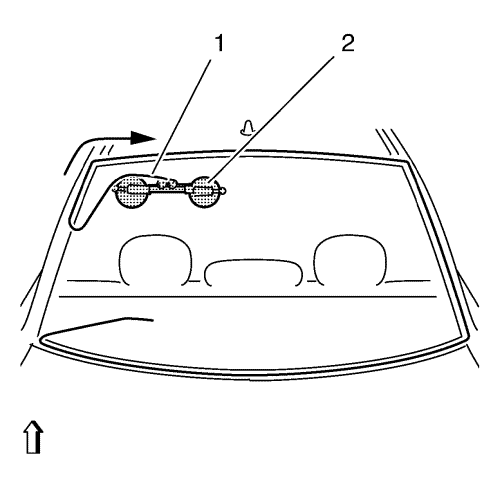
Note: Ensure that the cutting wire (1) is fitted correctly to the winch deflection roller.
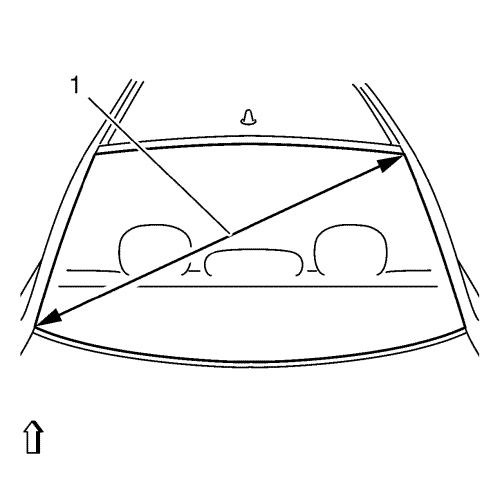
Note: Arrow shows the path of the cutting wire (1).
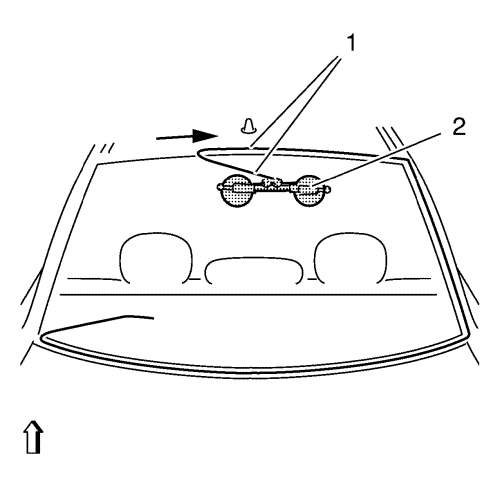
Note: Ensure that the cutting wire (1) is fitted correctly to the winch deflection roller.
Note: In the area of the tailgate window radius, increased cutting effort is necessary. Arrow shows the path of the cutting wire (1).
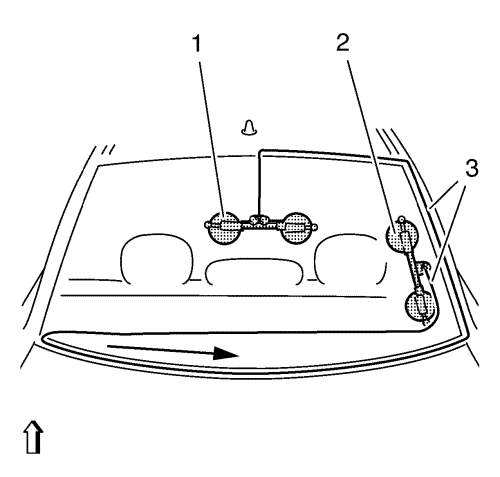
Note: Ensure that the cutting wire (1) is fitted correctly to the winch deflection roller.
Note: Arrow shows the path of the cutting wire (1).
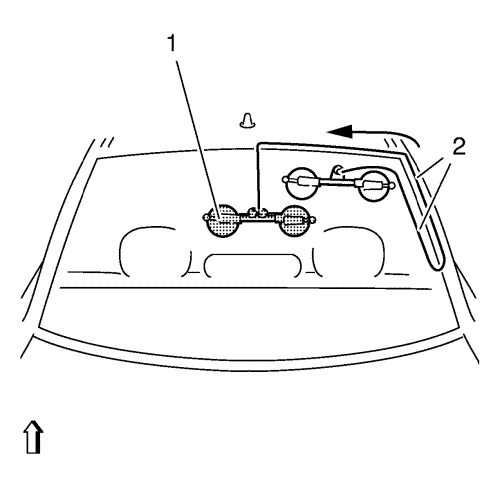
Note: Ensure that the cutting wire (1) is fitted correctly to the winch deflection roller.
Note: In the area of the tailgate window radius, increased cutting effort is necessary. Arrow shows the path of the cutting wire (1).
Note: Ensure that the cutting wire (2) is fitted correctly to the winch deflection roller.
Note: In the area of the tailgate window radius, increased cutting effort is necessary. Arrow shows the path of the cutting wire (1).
Note: Ensure that the cutting wire (2) is fitted correctly to the winch deflection roller.
Note: Arrow shows the path of the cutting wire (1).
Note: A second technician is required.
| • | High weld |
| • | Solder spots |
| • | Hardened sealer |
| • | Any other obstruction or irregularity in the pinch-weld flange |
Cut into the tip of the cartridge so that a bead of adhesive with a thickness approx. of 13 mm (0.511 in) is produced.
Note: A second technician is required.
| 5.1. | Insert tailgate window, using the BO-641 holder . |
| 5.2. | Place the tailgate window on the roof frames and lower it down. |
Note: A second technician is required.
| 12.1. | Lower a door window partially in order to prevent pressure buildups when closing the doors before the adhesive is cured. |
| 12.2. | DO NOT drive the vehicle until the adhesive is cured. Refer to the above curing times. |
| 12.3. | DO NOT use compressed air to dry the adhesive. |
| ©© Copyright Chevrolet. All rights reserved |


