Handbrake Rear Cable Replacement - Left Side
Special Tools
CH-37043 Handbrake Cable Release Tool
For equivalent regional tools, refer to Special Tools .
Removal Procedure
Warning: Refer to Brake Dust Warning in the Preface section.
- Disable the handbrake cable adjuster. Refer to Handbrake Cable Adjuster Disabling .
- Turn the ignition to the OFF position.
- Raise and support the vehicle. Refer to Lifting and Jacking the Vehicle .
- Remove the tyre and wheel assembly. Refer to Tyre and Wheel Removal and Installation .
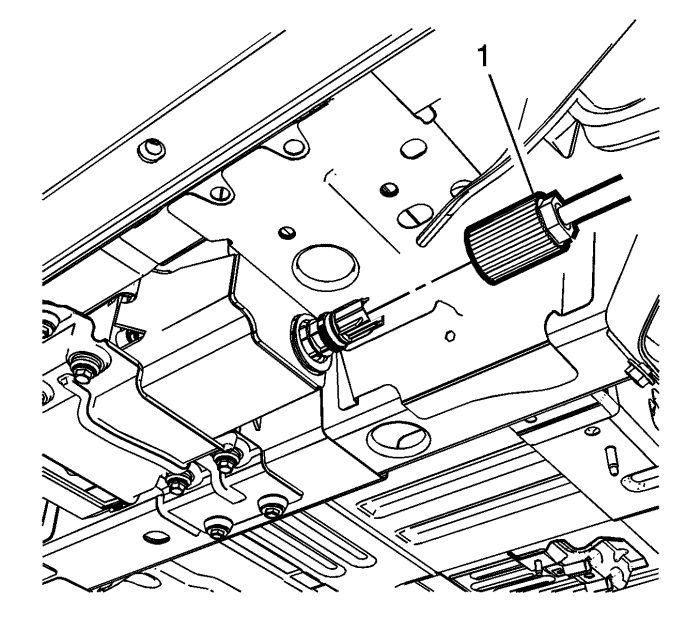
- Disconnect the handbrake intermediate cable nut (1) from the electronic handbrake control module spindle by rotating the nut anticlockwise.
- Disconnect the handbrake intermediate cable and position the cable aside.
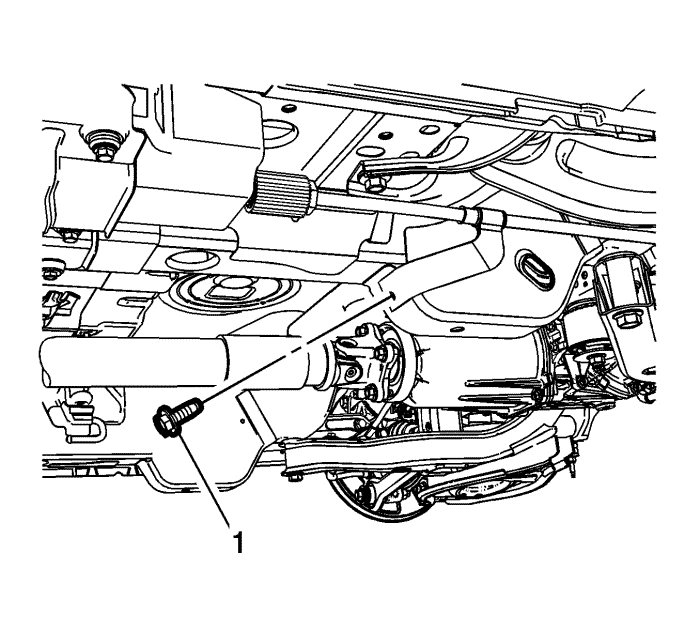
- Remove the intermediate handbrake cable forward bracket bolt (1).
- Lower the rear suspension support approximately 152-254 mm (6-10 in) to access the handbrake cable fasteners. Refer to
Support Replacement : FWD → AWD .
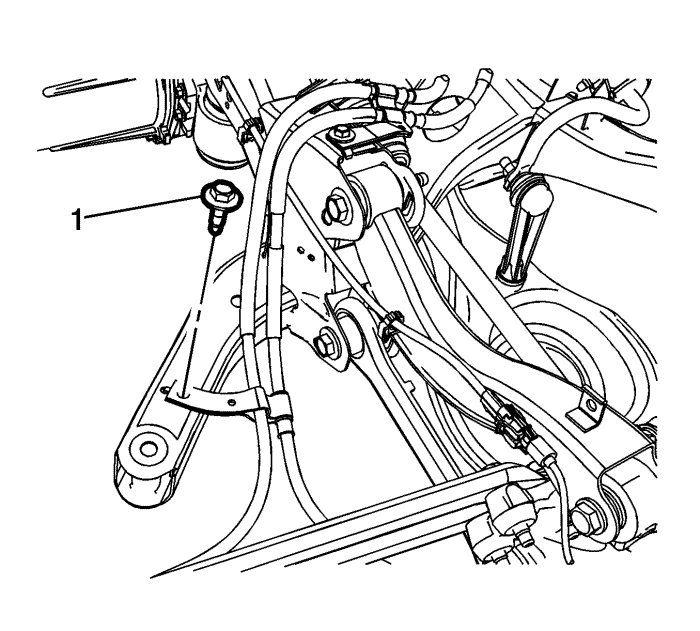
- Remove the intermediate handbrake cable lower support bracket bolt (1).
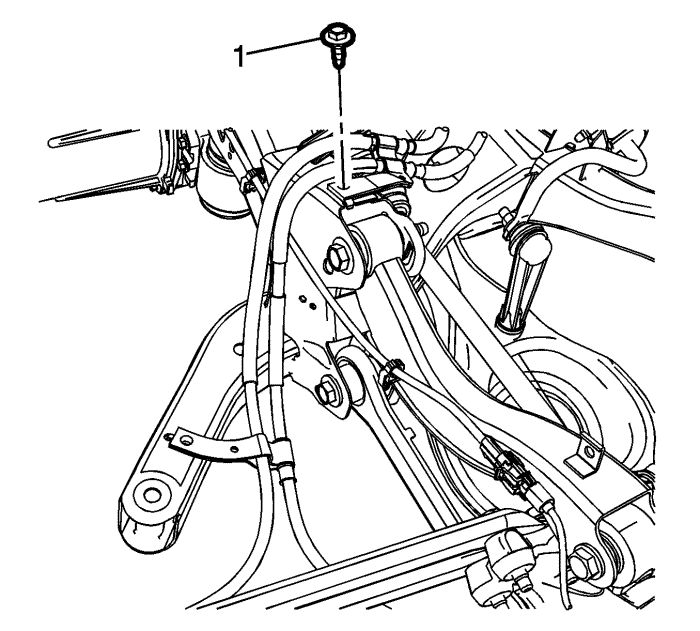
- Remove the intermediate handbrake cable upper support bracket bolt (1).
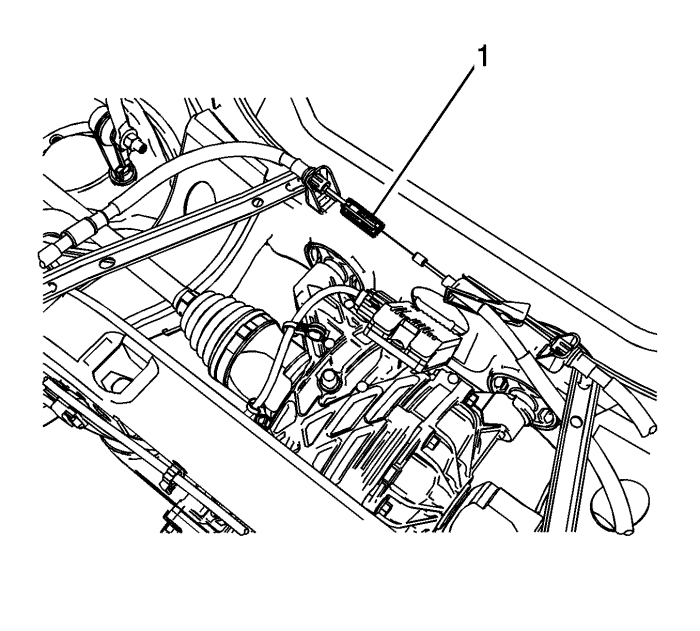
- Disconnect the intermediate handbrake cable from the right rear handbrake cable connector (1).
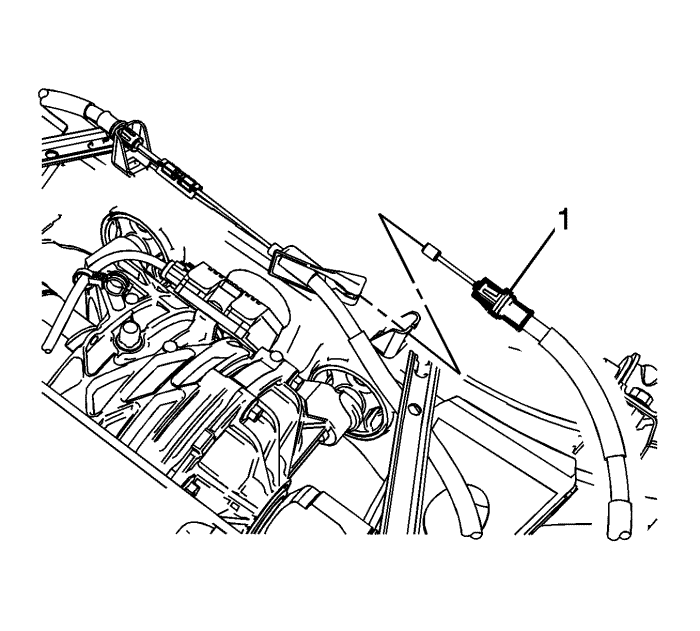
- Using the CH-37043 Handbrake Cable Release Tool , compress the locking tabs on the left rear handbrake cable conduit (1) and remove the handbrake cable from the support bracket.
- Disconnect the left rear handbrake cable from the handbrake cable equaliser.
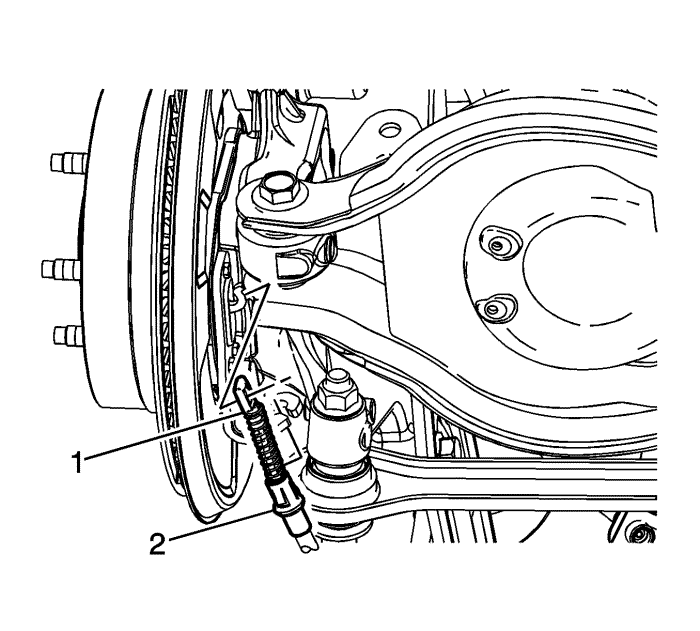
- Disconnect the left handbrake cable eyelet (1) from the handbrake actuator.
- Using the CH-37043 Handbrake Cable Release Tool , remove the handbrake cable (2) from the handbrake cable bracket.
- Remove the intermediate handbrake cable from the rear suspension support.
- Separate the intermediate and rear left handbrake cables.
Installation Procedure
- Connect the intermediate and rear left handbrake cables.

- Connect the left handbrake cable eyelet (1) to the handbrake actuator.
- Install the left handbrake cable (2) to the handbrake cable bracket.
- Ensure the locking tabs on the cable conduit are securely engaged to the cable bracket.

- Connect the left rear handbrake cable to the handbrake cable equaliser.
- Install the handbrake cable to the support bracket.
- Ensure the locking tabs on the left rear handbrake cable conduit (1) are securely engaged to the support bracket.

- Connect the intermediate handbrake cable to the right rear handbrake cable connector (1).
Caution: Refer to Fastener Caution in the Preface section.

- Install the intermediate handbrake cable upper support bracket bolt (1) and tighten to 25 N·m (18 lb ft).

- Install the intermediate handbrake cable lower support bracket bolt (1) and tighten to 25 N·m (18 lb ft).

- Install the intermediate handbrake cable forward bracket bolt (1) and tighten to 25 N·m (18 lb ft).
- Install the rear suspension support. Refer to
Support Replacement : FWD → AWD .

- Inspect the O-ring seals on the electronic handbrake control module spindle and the handbrake intermediate cable for damage and correct positioning and replace, if necessary.
Note: Ensure the park brake intermediate cable fitting is engaged in the actuator in the spindle.
- Install the handbrake intermediate cable fitting to the spindle.
Note: When installing the handbrake intermediate cable nut to the electronic park brake module spindle, hold the spindle housing securely to avoid distorting the housing.
- Connect the handbrake intermediate cable nut (1) to the electronic handbrake control module spindle by rotating the nut clockwise and tighten to 6 N·m (53 lb in).
- Install the tyre and wheel assembly. Refer to Tyre and Wheel Removal and Installation .
- Enable the handbrake cable adjuster. Refer to Handbrake Cable Adjuster Enabling .
| © Copyright Chevrolet. All rights reserved |


