Support Replacement - AWD
Special Tools
J-37043 Park Brake Cable Release Tool
Removal Procedure
- Place the park brake lever in the release position.
- Raise and support the vehicle. Refer to Lifting and Jacking the Vehicle .
- Remove the tires and wheels. Refer to Tyre and Wheel Removal and Installation .
- Remove the exhaust muffler. Refer to
Exhaust Muffler Replacement : NB5 .
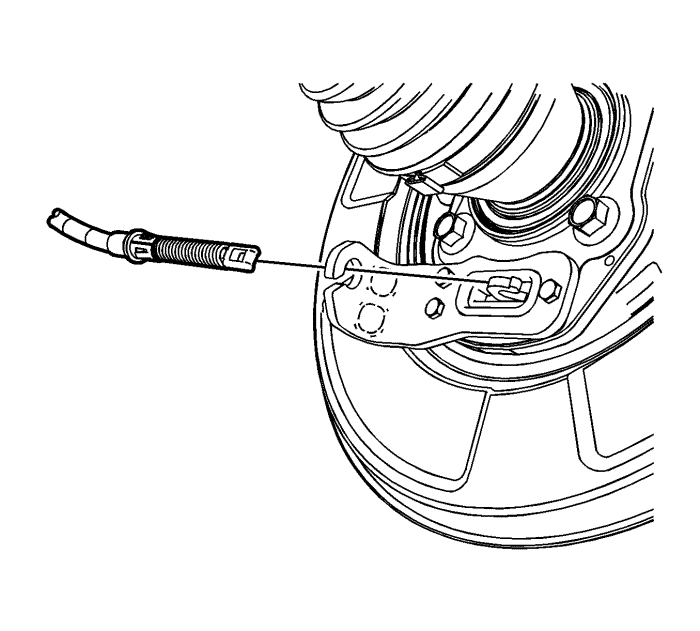
- Disconnect the rear park brake cables from the park brake actuators.
- Using the J-37043 release tool , remove the park brake cables from the mounting brackets
- Position the rear park brake cables aside.
- Disconnect the rear wheel speed sensor electrical connectors and routing clips from the rear support and upper control arms.
Position the wiring harness aside.
- Remove the rear brake hose bracket nut and bolt.
Caution: Support the brake calliper with heavy mechanic wire, or equivalent, whenever it is separated from its mount and the hydraulic flexible brake hose is still connected. Failure to support the calliper in this manner will cause the flexible brake hose to bear the weight of the calliper, which may cause damage to the brake hose and in turn may cause a brake fluid leak.
- Remove the brake calipers and brackets as assemblies and support them with heavy mechanics wire or equivalent. Refer to Rear Brake Calliper Bracket Replacement .
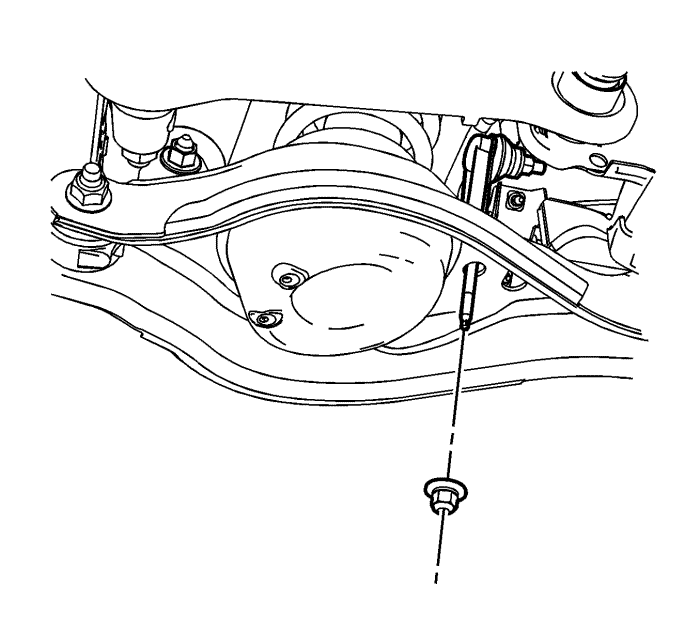
- Remove the rear park brake cable routing bolts.
- While holding the stabilizer link with a wrench, remove the stabilizer link-to-lower control arm nut.
- Remove the trailing arms. Refer to Trailing Arm Replacement .
- Remove the adjustment links. Refer to Rear Suspension Link Replacement - Toe Link .
- Remove the rear wheel drive shafts. Refer to Rear Wheel Drive Shaft Replacement .
- Remove the rear differential. Refer to Differential Replacement .
- Position a transmission jack under the rear support and firmly secure the support to the jack with straps.
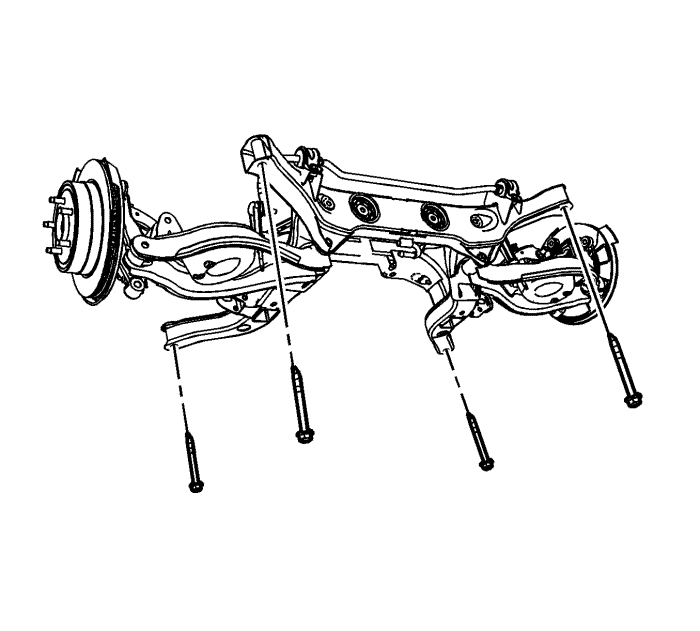
- Remove the 4 rear support to body bolts .
- Remove the rear support assembly from the vehicle.
- With the aid of an assistant, remove the rear support from the transmission jack and place it on the floor.
Installation Procedure
Caution: Refer to Fastener Caution in the Preface section.
- If a new rear support is being installed, a transfer of components is necessary.
| | Tighten the upper control arm to rear support nut and bolt to 100 N·m (74 lb ft). |
| | Tighten the lower control arm to rear support nut and bolt to 110 N·m (81 lb ft). |
| • | Stabilizer bar and insulators |
| | Tighten the stabilizer shaft insulator clamp bolts to 50 N·m (37 lb ft). |
| | Tighten the stabilizer link to stabilizer shaft nut to 115 N·m (85 lb ft). |
| • | Knuckles - Loosely install the upper and lower control arm to knuckle nuts/bolts. These fasteners will be tightened later in this procedure after the wheel driveshafts are installed. |
- With the aid of an assistant, position the rear support onto the transmission jack and firmly secure the support to the jack with straps.
- Position the rear support assembly to the vehicle.
- Install the 4 rear support to body bolts and tighten to 190 N·m (140 lb ft).
- Install the rear differential. Refer to Differential Replacement .
- Install the rear wheel drive shafts. Refer to Rear Wheel Drive Shaft Replacement .
- Install the adjustment links. Refer to Rear Suspension Link Replacement - Toe Link .
- Install the trailing arms. Refer to Trailing Arm Replacement .
- While holding the stabilizer link, install the stabilizer link-to-lower control arm nut and tighten to 15 N·m (11 lb ft).
Caution: Support the brake calliper with heavy mechanic wire, or equivalent, whenever it is separated from its mount and the hydraulic flexible brake hose is still connected. Failure to support the calliper in this manner will cause the flexible brake hose to bear the weight of the calliper, which may cause damage to the brake hose and in turn may cause a brake fluid leak.
- Remove the supporting wire and position the brake caliper and bracket assemblies back onto the knuckles. Refer to Rear Brake Calliper Bracket Replacement .
- Install the rear brake hose bracket nut and bolt. Refer to Rear Brake Hose Replacement .
- Position the wiring harness back to the original location, connect the routing clips to the rear support and upper control arms.
Connect the rear wheel speed sensor electrical connectors.
- Connect the rear park brake cables through the mounting brackets and onto the park brake actuators.
- Install the rear park brake cable routing bolts. Refer to Parking Brake Rear Cable Replacement - Left Side and Parking Brake Rear Cable Replacement - Right Side .
- Install the exhaust muffler. Refer to
Exhaust Muffler Replacement : NB5 .
- Install the tires and wheels. Refer to Tyre and Wheel Removal and Installation .
- Check the wheel alignment. Refer to Wheel Alignment Measurement .
- Correct the wheel alignment of the vehicle, if necessary. Refer to Rear Camber Adjustment and Rear Toe Adjustment .
| © Copyright Chevrolet. All rights reserved |


