Air Conditioning Compressor Hose Replacement - Diesel
Special Tools
J 39400-A Halogen Leak Detector
Removal Procedures
- Recover the refrigerant. Refer to Refrigerant Recovery and Recharging .
- Remove the left headlamp. Refer to
Headlamp Replacement : Long Body → Short Body .

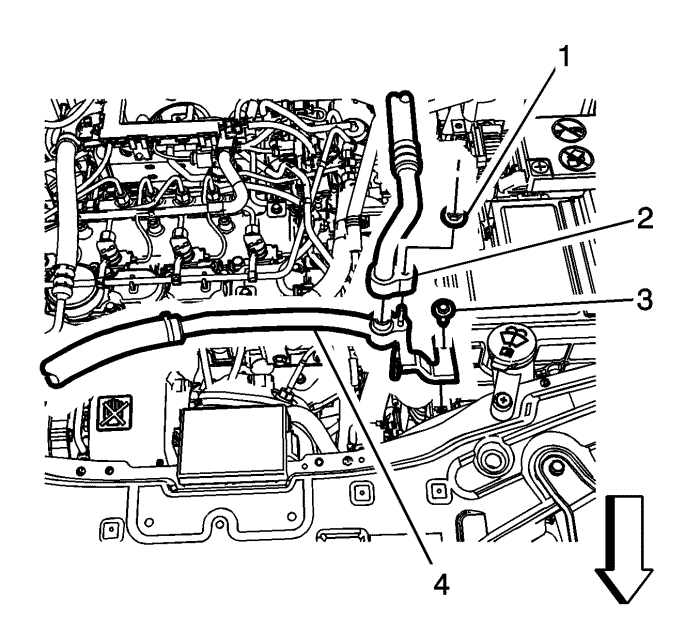
- Remove the evaporator outlet hose nut (1).
- Remove the evaporator outlet hose (2).
- Remove the air conditioning compressor hose bolt (3) from the electronic control module bracket.
- Remove the air conditioning compressor hose (4) from the electronic control module bracket.

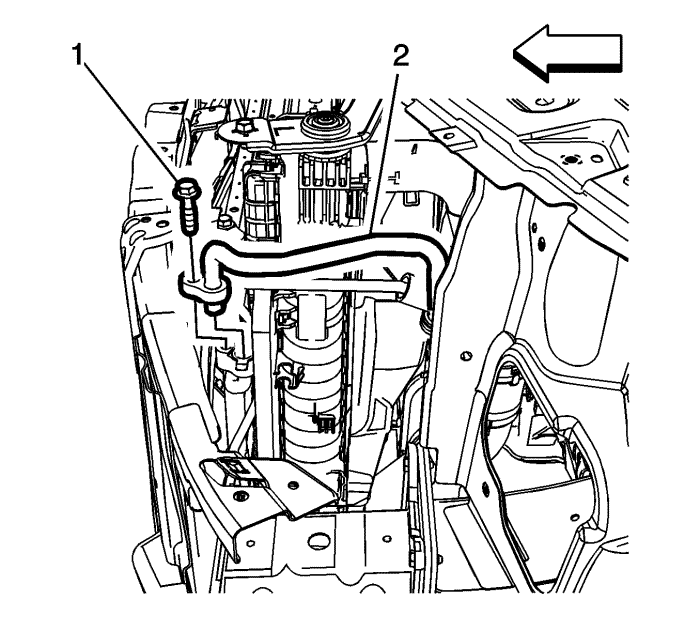
- Remove the air conditioning compressor hose bolt (1) from the condenser.
- Remove the compressor hose (2) from the condenser.
- Raise and support the vehicle. Refer to Lifting and Jacking the Vehicle .

- Disconnect the electrical connector from the air conditioning refrigerant pressure sensor valve.
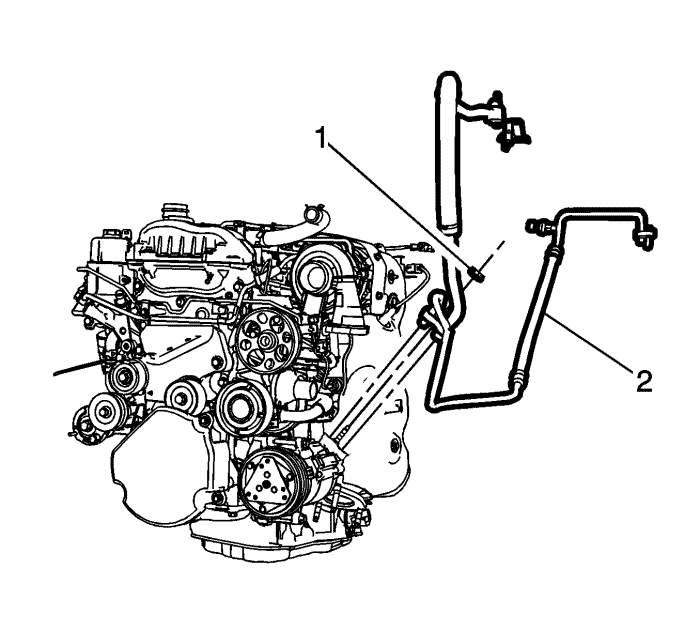
- Remove the compressor hose nut (1) at the compressor.
- Remove the compressor hose (2) from the compressor.
- Remove the compressor hose from the vehicle.
- Remove and discard the sealing washers from the compressor hose. Refer to Air Conditioning System Seal Replacement .
Installation Procedure

- Install new seal washers to the compressor hose. Refer to Air Conditioning System Seal Replacement .
- Install the compressor hose (2) to the compressor.
Caution: Refer to Fastener Caution in the Preface section.
- Install the compressor hose nut (1) to the compressor and tighten to 22 N·m (16 lb ft).
- Connect the electrical connector to the air conditioning refrigerant pressure sensor valve.

- Lower the vehicle.
- Install the compressor hose (2) to the condenser.
- Install the air conditioning compressor hose bolt (1) to the condenser and tighten to 22 N·m (16 lb ft).

- Install the air conditioning compressor hose (4) to the electronic control module bracket.
- Install the air conditioning compressor hose bolt (3) to the electronic control module bracket and tighten to 20 N·m (15 lb ft)
- Install the evaporator outlet hose (2).
- Install the evaporator outlet hose nut (1) and tighten to 20 N·m (15 lb ft).
- Install the evaporator outlet hose to the air conditioning compressor hose. Refer to
Evaporator Outlet Hose Replacement : V6 → Diesel → L4
- Install the left headlamp. Refer to
Headlamp Replacement : Long Body → Short Body .
- Recharge the A/C system. Refer to Refrigerant Recovery and Recharging .
- Test the affected A/C joints for leaks using J 39400-A.
| © Copyright Chevrolet. All rights reserved |


