Turbocharger Replacement
Removal Procedure
Caution: If a turbocharger has failed, clean any turbocharger debris or excessive oil from the charge air cooler system before installing the new turbocharger. Failure to clean debris from the charge air cooler system will cause severe turbocharger and engine damage upon startup. Failure to clean excessive oil from the charge air cooler system may cause an engine runaway condition on startup, resulting in severe engine damage.
- Remove the air cleaner outlet duct. Refer to Air Cleaner Assembly Replacement .
- Remove the engine sight shield. Refer to Engine Sight Shield Replacement .
- Remove the diesel particulate filter/catalytic converter. Refer to
Exhaust Particulate Filter Replacement : LNQ .
- Remove the charge air inlet duct. Refer to Charge Air Cooler Inlet Duct Replacement .
- Disconnect the turbocharger coolant return pipe at the turbo. Refer to
Turbocharger Coolant Return Pipe Replacement : LNQ .
- Disconnect the turbocharger coolant feed pipe at the turbo. Refer to
Turbocharger Coolant Feed Pipe Replacement : LNQ .
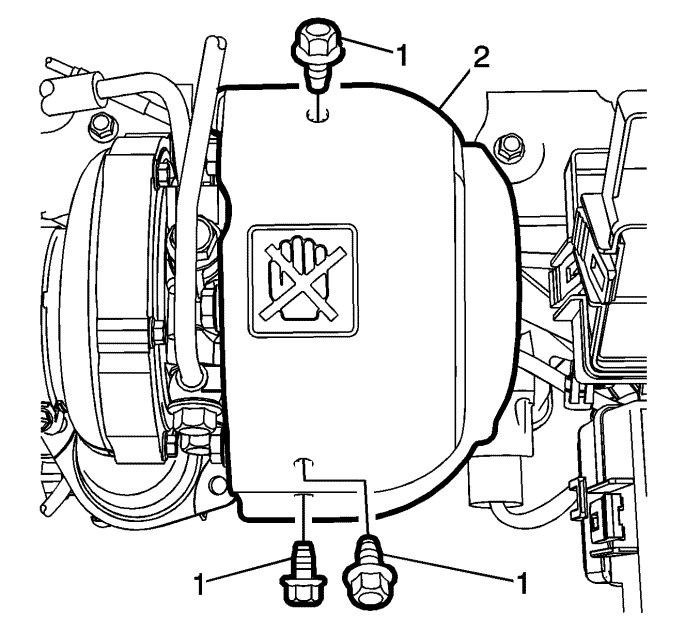
- Remove the turbocharger heat shield bolts (1).
- Remove the turbocharger heat shield (2).
- Remove the turbocharger bracket bolts (1).
- Remove the bracket (2).

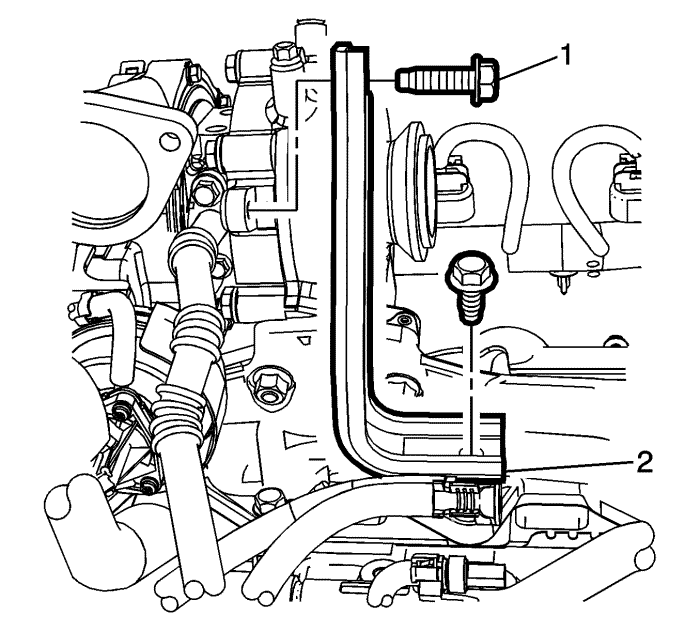
- Remove the turbo oil return pipe bolts (1).
- Remove the turbocharger lower mounting nuts (2).
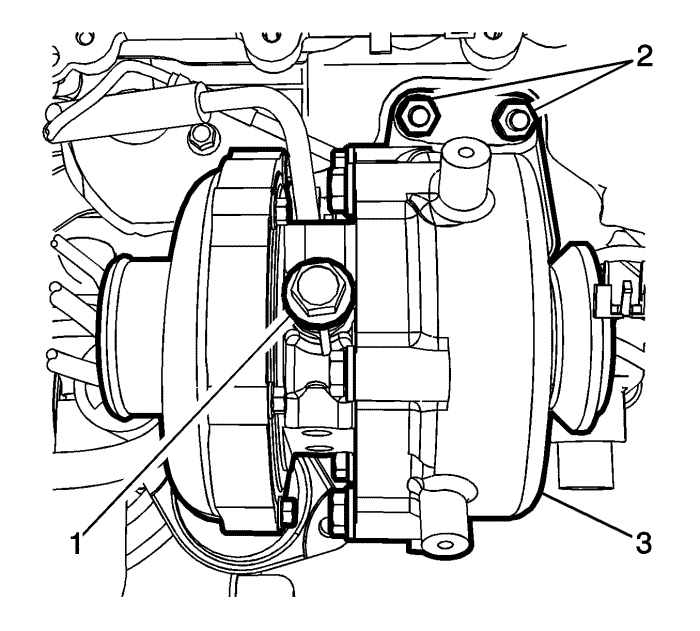
- Remove the turbocharger oil feed line (1).
- Remove the turbocharger upper mounting bolts (2).
- Remove the turbocharger (3).
- Disconnect electrical connector as necessary.
- Transfer parts as necessary.
Installation Procedure
Caution: Do not twist the turbocharger oil feed pipe. Twisting of the feed pipe will result in the collapse and deformation of the plastic pipe, restricting oil flow and causing turbocharger damage. During turbocharger replacement, gently push the oil feed pipe towards the front of the engine to clear the turbocharger. Assistance may be required to keep the pipes clear of the turbocharger during removal or installation.
- Install a new turbocharger gasket.
- Install the turbocharger assembly (3).
Caution: Refer to Fastener Caution in the Preface section.
- Install the turbocharger mounting bolts (2) and tighten to 30 N·m (22 lb ft).
- Install the turbocharger oil feed line bolt (1) and tighten to 32 N·m (24 lb ft).
- Raise the vehicle.
- Install the turbo oil return pipe bolts (1) and tighten to 10 N·m (89 lb in).
- Install the turbocharger mounting nuts (2) and tighten to 30 N·m (22 lb ft).
- Install the turbocharger bracket (2) and bolts (1). Tighten the bolts to 35 N·m (26 lb ft).
- Install the turbocharger heat shield (2).
- Install the turbocharger upper heat shield bolts (1) and tighten to 10 N·m (89 lb in).
- Connect the turbocharger coolant feed pipe at the turbo. Refer to
Turbocharger Coolant Feed Pipe Replacement : LNQ .
- Connect the turbocharger coolant return pipe at the turbo. Refer to
Turbocharger Coolant Return Pipe Replacement : LNQ .
- Connect the charge air inlet duct. Refer to Charge Air Cooler Inlet Duct Replacement .
- Install the diesel particulate filter/catalytic converter. Refer to
Exhaust Particulate Filter Replacement : LNQ .
- Install the engine sight shield. Refer to Engine Sight Shield Replacement .
- Install the air cleaner outlet duct. Refer to Air Cleaner Assembly Replacement .
- Replace the oil filter and fill the engine oil system. Refer to Engine Oil and Oil Filter Replacement .
| © Copyright Chevrolet. All rights reserved |


