SECTION
MAINTENANCE AND REPAIR
ON-VEHICLE SERVICE
GENERAL A/C SYSTEM SERVICE PROCEDURES
General Service Procedures
- Discharging, Adding Oil, Evacuating, and Charging Procedures for A/C System.
- Handling of Refrigerant Lines and Fittings.
- Handling Refrigerant.
- Maintaining Chemical Stability in the Refrigeration System.
- O-Ring Replacement.
SERVICEABLE COMPONENTS
Common HVAC Components
Those components used in non-automatic systems are covered in other sections of this manual.
- Blower Motor.
- Heater Hoses.
- Blower Resistor.
- High-Blower Relay.
- Heater/Air Distributor Case Assembly (A/C Module).
- Heater Core.
- A/C Pressure Transducer.
- A/C Compressor Relay.
- Air Filter.
- A/C Expansion Valve.
- A/C High-Pressure Pipe Line.
- Evaporator Core.
- A/C Suction Hose Assembly.
- A/C Discharge Hose-Compressor to Condenser.
- Compressor.
- Condenser.
- Receiver-Dryer.
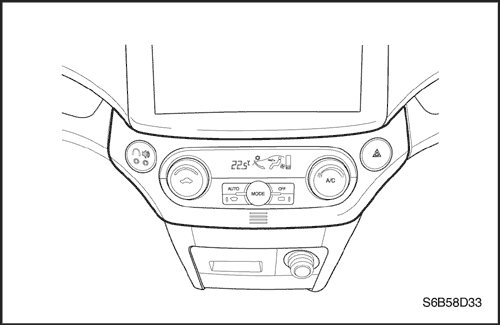


Automatic Temperature Control Assembly
Removal Procedure
- Disconnect the negative battery cable.
- Remove the audio molding. Refer to Section 9E, Instrumentation/Driver Information.
- Remove the lower A/C switch cover.
- Remove the ATC screws.
- Disconnect the electrical connectors.


Installation Procedure
- Position the automatic temperature control assembly on the center molding and install the retaining screws.
Tighten
Tighten the control assembly retaining screws to 2 N•m (18 lb-in).
- Connect the electrical connectors.
- Install the audio molding. Refer to Section 9E, Instrumentation/Driver Information.
- Connect the negative battery cable.
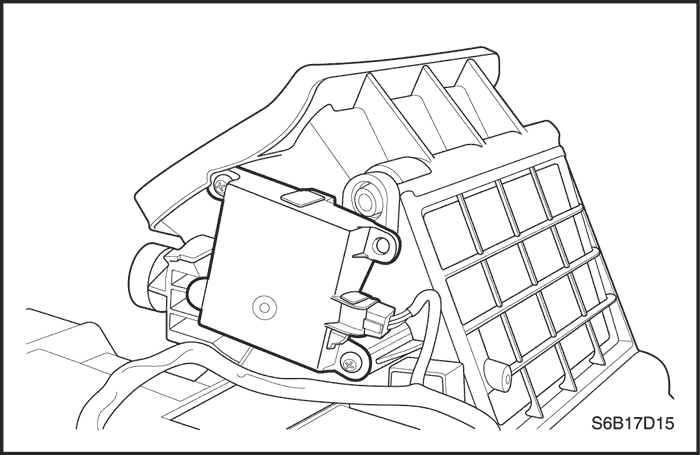


Inlet Air Door Motor
Left-Hand Drive Shown, Right-Hand Drive Similar -
Removal Procedure
- Disconnect the negative battery cable.
- Remove the instrument panel. Refer to Section 9E, Instrumentation/Driver Information.
- Disconnect the electrical connector.
- Remove the motor retaining screws.
- Remove the motor.


Installation Procedure
- Install the motor with the retaining screws.
- Install the actuating rod.
- Connect the electrical connector.
- Remove the instrument panel. Refer to Section 9E, Instrumentation/Driver Information.
- Connect the negative battery cable.
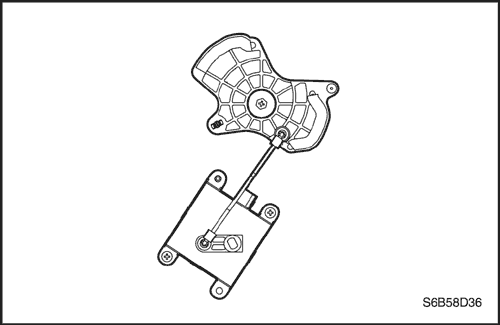


Mode Door Motor
Left-Hand Drive Shown, Right-Hand Drive Similar -
Removal Procedure
- Disconnect the negative battery cable.
- Remove the instrument panel under cover. Refer to Section 9G, Interior Trim.
- Disconnect the electrical connector.
- Remove the motor actuating rod by snapping out it out of the lever with needle-nose pliers.
- Remove the motor retaining screws.
- Remove the mode door motor.


Installation Procedure
- Install the mode door motor with the retaining screws.
- Install the actuating rod.
- Connect the electrical connector.
- Install the instrument panel under cover. Section 9G, Interior Trim.
- Connect the negative battery cable.
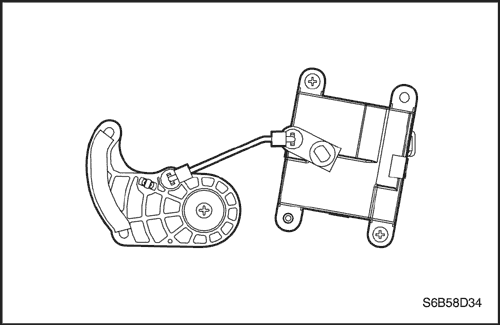


Air Mix Door Motor
Removal Procedure
- Disconnect the negative battery cable.
- Remove the instrument panel under cover. Refer to Section 9G, Interior Trim.
- Disconnect the electrical connector.
- Remove the motor actuating rod by snapping out it out of the lever with needle-nose pliers.
- Remove the motor retaining screws.
- Remove the mode door motor.


Installation Procedure
- Install the mode door motor with the retaining screws.
- Install the actuating rod.
- Connect the electrical connector.
- Install the instrument panel under cover. Section 9G, Interior Trim.
- Connect the negative battery cable.
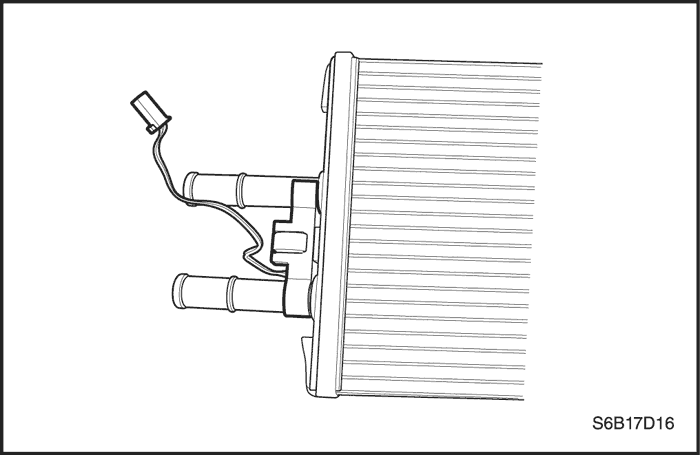


Water Sensor
Left-Hand Drive Shown, Right-Hand Drive Similar -
Removal Procedure
- Disconnect the negative battery cable.
- Remove the heater core cover. Refer to Section 7B, Manual Control heating, Ventilation and Air Conditioning System.
- Disconnect the electrical connector.
- Remove the sensor from heater core pipe.
- Remove the sensor.


Installation Procedure
- Install the sensor with the retaining screw.
- Connect the electrical connector.
- Install the heater core cover. Refer to Section 7B, Manual Control heating, Ventilation and Air Conditioning System.
- Connect the negative battery cable.
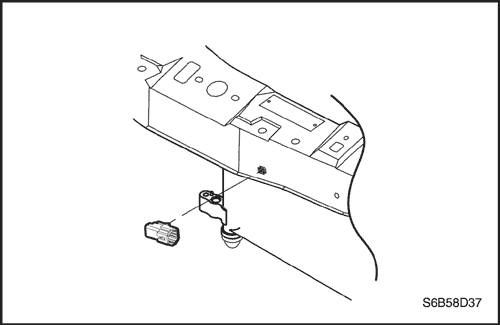


Ambient Air Temperature Sensor
Removal Procedure
- Disconnect the negative battery cable.
- Remove the front bumper. Refer to Section 9O, Bumper and Facias.
- Disconnect the ambient air temperature sensor electrical connector.
- Remove the ambient air temperature sensor from the bracket.


Installation Procedure
- Install the ambient air temperature sensor into its bracket.
- Connect the electrical connector.
- Install the front bumper. Refer to Section 9O, Bumper and Facias.
- Connect the negative battery cable.
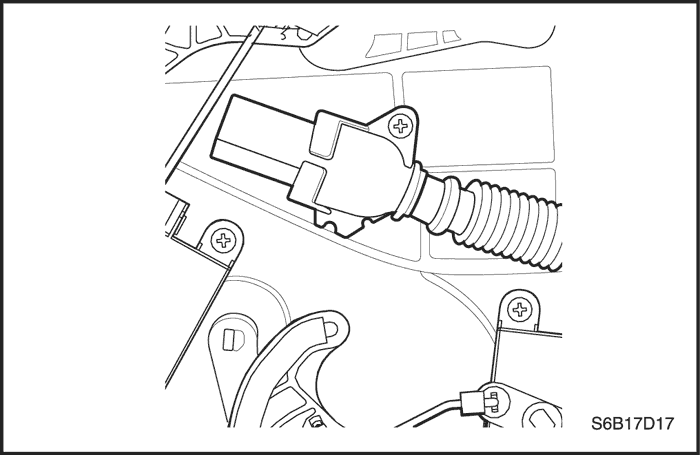


In-Car Temperature Sensor
Removal Procedure
- Disconnect the negative battery cable.
- Remove the instrument panel under cover. Refer to Section 9G, Interior Trim.
- Disconnect the electrical connector.
- Remove the screws.
- Remove the tube.


Installation Procedure
- Install the in-car sensor.
- Install the in-car sensor retaining screws and tighten.
- Install the air inlet tube and connect the electrical connector.
- Install the instrument panel under cover. Refer to Section 9G, Interior Trim.
- Connect the battery negative cable.
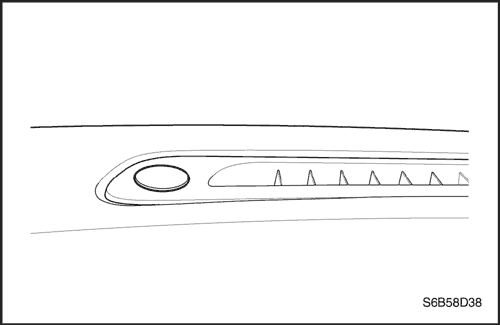


Sun Sensor
Removal Procedure
- Disconnect the negative battery cable.
- Gently pry up on the sun sensor to remove it.
- Secure the electrical connector to prevent it from falling beneath the dash.
- Disconnect the electrical connector and remove the sun sensor.


Installation Procedure
- Connect the electrical connector.
- Insert and press the sun sensor into position in the dash.
- Connect the negative battery cable.
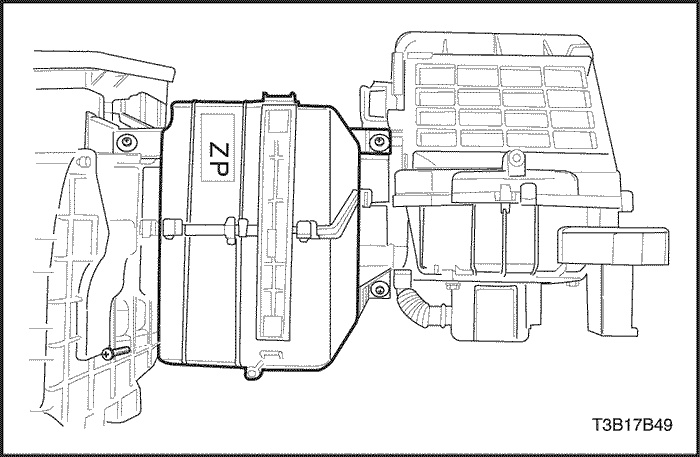


Intake Sensor
Removal Procedure
- Disconnect the negative battery cable.
- Remove the evaporator core. Refer to Section 7B, Manual Control Heating, Ventilation, and Air Conditioning System
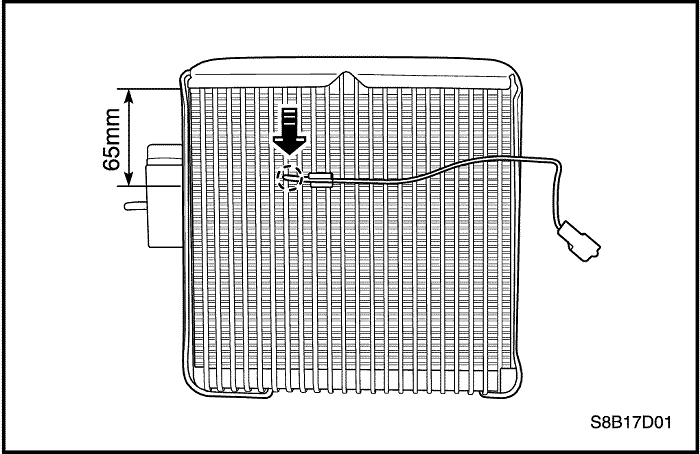


- Remove the intake sensor with the connector.


Installation Procedure
Notice : The sensor position should be located as shown in the picture.(height: 65mm, column: 8th)
Notice : Make sure the sensor position is correct. Otherwise the air conditioning performance could be deteriorated.
- Install the intake sensor with the connector.


- Install the evaporator core. Refer to Section 7B, Manual Control Heating, Ventilation, and Air Conditioning System
- Connect the negative battery cable.
UNIT REPAIR
V5 AIR CONDITIONING COMPRESSOR OVERHAUL
Compressor Overhaul
- Clutch Coil.
- Clutch Plate and Hub Assembly.
- Clutch Rotor and Bearing.
- Component Locator V5 Compressor.
- Control Valve Assembly.
- Cylinder to Front Head O-Ring.
- Leak Testing (External).
- Pressure Relief Valve.
- Rear Head, Gasket, Valve Plate, Reed Plate, and O-Ring.
- Shaft Seal Replacement.
GENERAL DESCRIPTION AND SYSTEM OPERATION
GENERAL INFORMATION
The V5 System
- System Components - Functional.
- The V5 A/C System.
- V5 Compressor - Description of Operation.
- V5 Compressor - General Description.
System Components-Control
Controller
The operation of the A/C system is controlled by the switches on the control head. This console-mounted heating and ventilation system contains the following knobs and display:
Temperature Control Push Knobs
- Raise the temperature of the air entering the vehicle by turning the lotary switch clockwise(red arrow direction).
- Lower the temperature by turning the switch counter clockwise (blue arrow direction).
- Actuate the air mix door by an electric motor.
- Vary the mix of the air passing through the heater core with the air bypassing the core.
Each press of a switch changes the set temperature by increments of 0.5°C (1°F). This is shown in the temperature window on the function display.
The Function Display
This is an VFD display indicating the status of the control settings selected. Starting from the left end of the display, the sections are as follows:
- Temperature setting - Indicates the temperature set with the temperature control knob.
- Auto status - Indicates whether the system is operating in the full auto mode or the manual mode.
- Defroster icon - Indicates manual selection of full defrost mode.
- Mode - Indicated by icon, the mode chosen by the system in auto (or by the operator in manual) is shown by an illumination arrow indicating the air path.
- A/C - A snowflake icon indicating whether the A/C is ON or OFF.
- Fan speed - Indicates the fan speed by illuminating a bar based on the segment at the front, for low speed, and adding additional segments in order up to the eighth, for high speed.
Seven Additional Push Knobs
- Full defrost - Causes the mode motors to direct all air to the windshield and aide window outlets for maximum defrosting.
- Air intake - Switches between fresh air intake, the default, and recirculating air. Airflow arrows on the display indicate the mode in effect.
- Full Auto Switch - Maintains the set temperature automatically. In this mode, the fully automatic temperature control (FATC) system controls the following:
- The air mix door motor.
- The mode door motor.
- The blower motor speed.
- The inlet air door motor.
- A/C ON/OFF.
- OFF Switch - Turns the automatic air conditioning and fan control off.
- Mode Switch - Allows manual selection of the airflow direction.
- Selection is shown on the function display.
- Each time the mode switch is pressed, the next function is displayed.
- A/C Switch - Allows manual selection and control of the air conditioning function.
- Defogger Switch - Turns on the electric defogging heater in the rear window and the outside rearview mirrors, if the vehicle is equipped with heated mirrors.
Fan Control Rotary Knob allows manual selection among 8 Fan speed.
Pressure Transducer
Pressure transducer switching incorporates the functions of the high-pressure and the low-pressure cutout switches along with the fan cycling switch. The pressure transducer is located in the high-side liquid refrigerant line behind the right strut tower, between the right strut tower and the fire wall. The output from this pressure transducer goes to the electronic control module (ECM), which controls the compressor function based on the pressure signal.
Wide-Open Throttle - WOT - Compressor Cutoff
During full-throttle acceleration, the throttle position sensor (TPS) sends a signal to the ECM, which then controls the compressor clutch.
High RPM Cutoff
As engine rpm approaches the maximum limit, the ECM will disengage the compressor clutch until the engine slows to a lower rpm.


