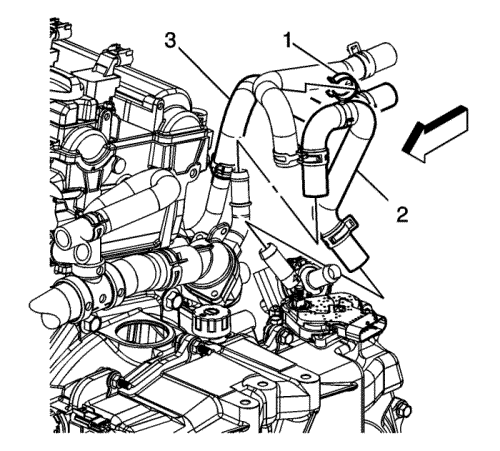
- Disconnect the negative battery cable. Refer to Battery Negative Cable Disconnection and Connection .
- Remove the bonnet. Refer to Bonnet Replacement .
- Recover the refrigerant. Refer to Refrigerant Recovery and Recharging .
- Relieve the fuel system pressure. Refer to
Fuel Pressure Relief : Without CH 48027-100 → CH 48027-100 .
- Remove the air cleaner outlet duct. Refer to
Air Cleaner Outlet Duct Replacement : LE5 or LE9 .
- Remove the air cleaner assembly. Refer to
Air Cleaner Assembly Replacement : LE5 or LE9 .
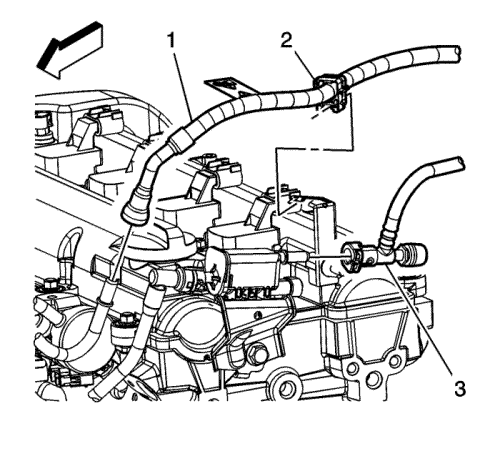
- Disconnect the fuel feed pipe (1) quick connect fitting at the fuel rail. Refer to Metal Collar Quick Connect Fitting Service .
- Disconnect the evaporative emission (EVAP) line (3) quick connect fitting from the EVAP purge solenoid. Refer to Plastic Collar Quick Connect Fitting Service .
- Remove the fuel feed pipe clip (2) from the fuel line bracket.
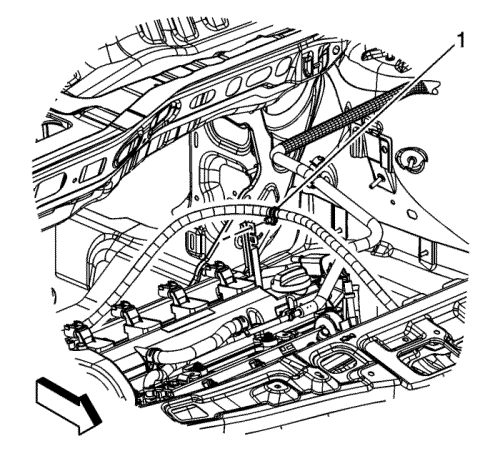
- Remove the transaxle shift cable clip (1) from the fuel line bracket.
- Remove the bolts from the engine control module and position aside. Refer to
Engine Control Module Replacement : LE5, LE9 or LAF .
- Remove the battery. Refer to Battery Replacement .
- Remove the exhaust manifold heat shield. Refer to
Exhaust Manifold Heat Shield Replacement : LE5 .
- Remove the oxygen sensors. Refer to
Heated Oxygen Sensor Replacement - Sensor 1 : LE5, LE9 or LAF and Heated Oxygen Sensor Replacement - Sensor 2 : LE5, LE9 or LAF .
- Remove the throttle body. Refer to
Throttle Body Assembly Replacement : LE5 or LE9 .
- Remove the engine oil level indicator.
- Raise and support the vehicle. Refer to Lifting and Jacking the Vehicle .
- Remove the front wheels and tyres. Refer to Tyre and Wheel Removal and Installation .
- Drain the cooling system. Refer to Cooling System Draining and Filling .
- Drain the engine oil. Refer to
Engine Oil and Oil Filter Replacement : LE5 or LE9 .
- Lower the vehicle.
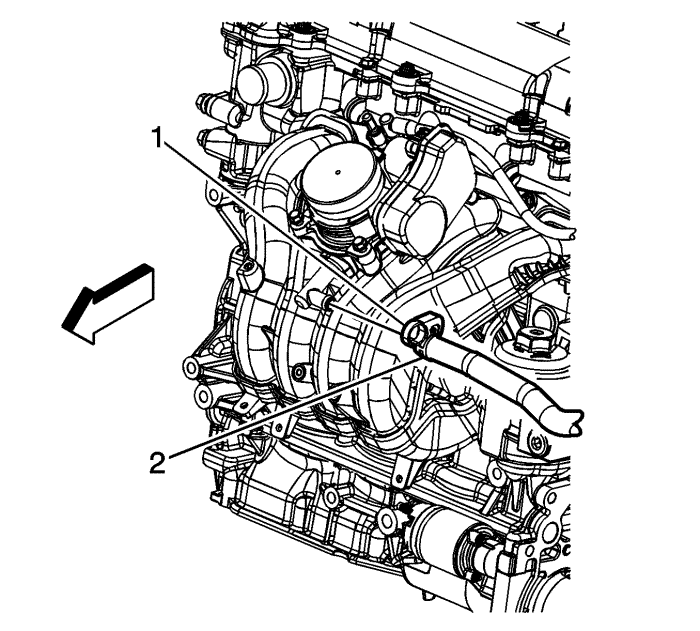
- Reposition the vacuum brake booster hose clamp (1) at the intake manifold.
- Remove the vacuum brake booster hose (2) from the intake manifold. Reposition the brake booster hose out of the way.
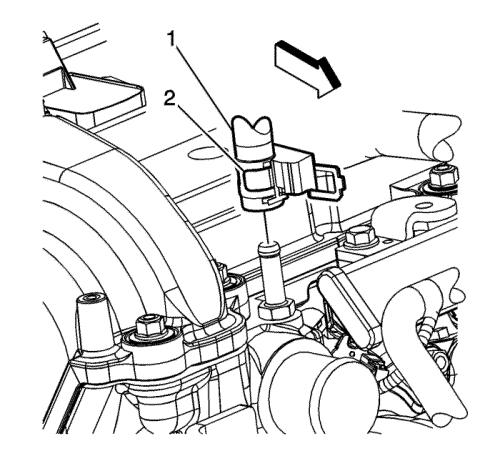
- Remove the coolant recovery inlet hose clamp (2) at the cylinder head.
- Remove the coolant recovery inlet pipe clip from the fuel rail.
- Remove the coolant recovery inlet hose (1) from the cylinder head. Reposition the hose/pipe out of the way.
- Remove the radiator inlet hose from the cylinder head. Refer to
Radiator Inlet Hose Replacement : Diesel → V6 → LE5 .
- Remove the radiator outlet hose. Refer to
Radiator Outlet Hose Replacement : Diesel → V6 → LE5 .
- Remove the heater inlet hose (3) from the thermostat housing.
- Remove the coolant recovery reservoir/heater inlet hose (2) from the thermostat housing.
- Raise and support the vehicle. Refer to Lifting and Jacking the Vehicle .
- Disconnect the engine wiring harness electrical connector (2) from the air conditioning (A/C) compressor.
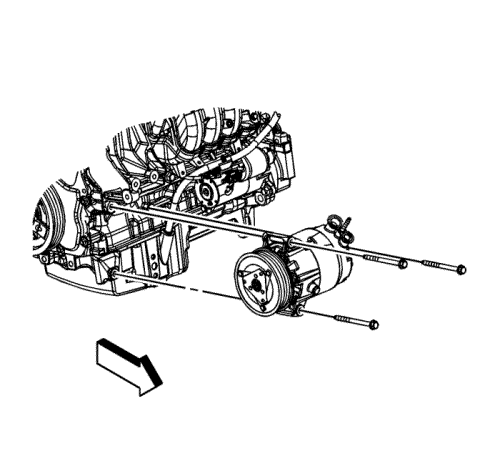
- Unbolt the A/C compressor and reposition it out of the way.
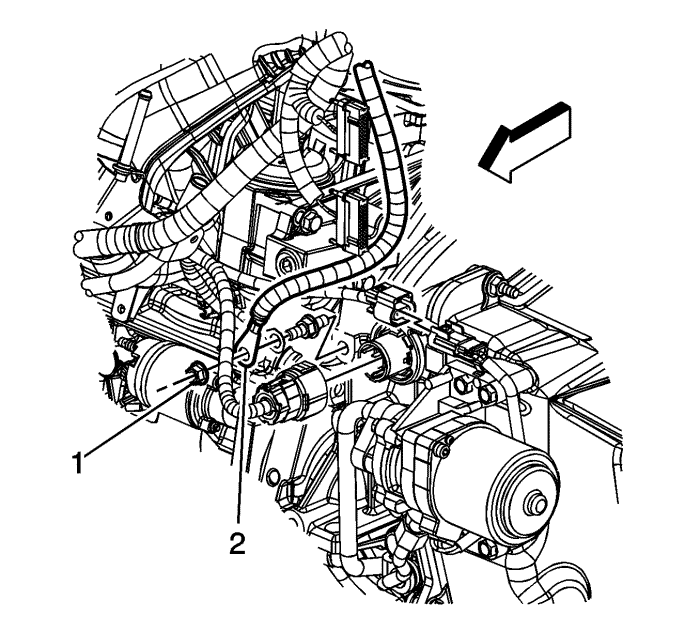
- Remove the engine wiring harness ground lead nut (1) from the transaxle stud.
- Remove the negative battery cable lead (2) from the transaxle stud. Reposition the negative battery cable out of the way.
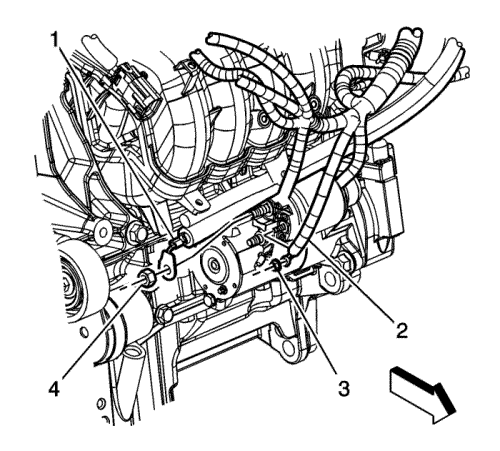
- Remove the positive battery cable to the starter motor nut (4).
- Remove the positive battery cable lead (1) from the starter motor.
- Remove the positive battery cable from in between the starter and the engine. Reposition the positive battery cable out of the way.
- Lower the vehicle.
- Disconnect engine wiring harness electrical connectors as necessary.
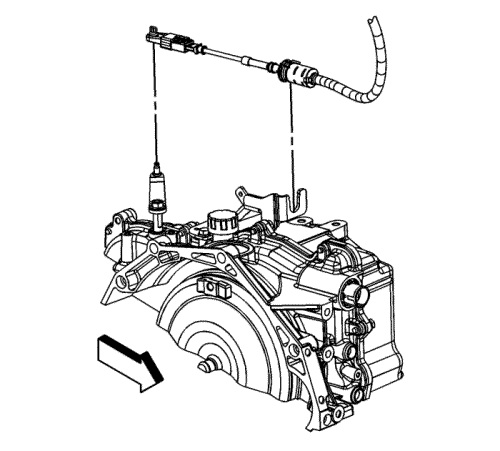
- Remove the transaxle shift cable from the range select lever.
- Release the shift control cable retaining clip and remove the cable from the shift control cable bracket.
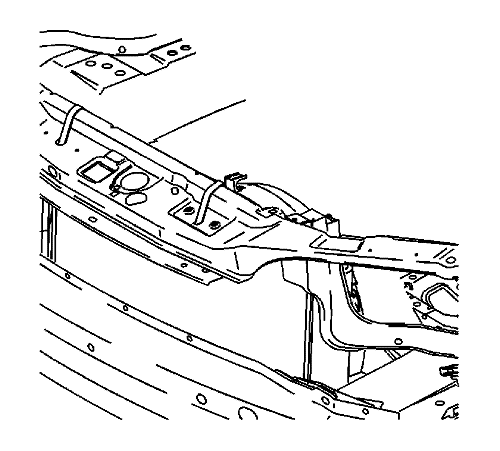
Note: The radiator/condenser/fan assembly will stay in the vehicle during engine removal.
- Using long tie straps, secure the radiator/condenser/fan assembly to the radiator support.
- Raise the vehicle.
- Remove the front wheel housing liners. Refer to Front Wheelhouse Liner Replacement .
Note: A piece of hardwood should be used between the transaxle and the engine cradle. This wood will support the engine when the left side engine mount bolts are removed.
- Install a piece of hardwood 1 x 2 x 4 between the transaxle and the engine cradle.
Note: A piece of hardwood should be used between the sump and the engine cradle. This wood will support the engine when the right side engine mount bolts are removed.
- Install a piece of hardwood 1 x 2 x 4 between the sump and the engine frame.
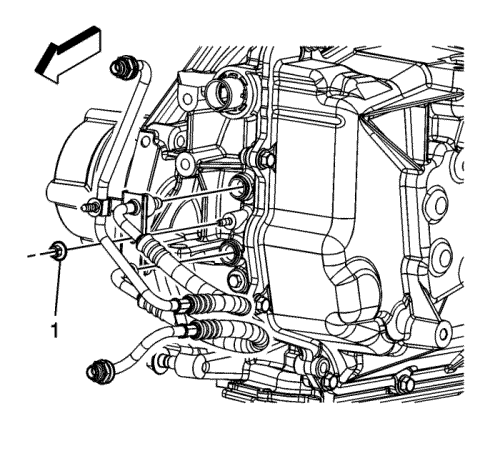
- Drain the transaxle fluid.
- Remove the transaxle oil cooler line to transaxle nut (1).
- Remove the transaxle oil cooler lines from the transaxle.
- Remove the catalytic converter. Refer to
Catalytic Converter Replacement : LE5 .
- Remove the intermediate to steering gear pinch bolt and disconnect the intermediate shaft from the steering gear. Discard the pinch bolt. Refer to Intermediate Steering Shaft Replacement .
- Separate the outer tie rods from the steering knuckles. Refer to Steering Linkage Outer Track rod Replacement .
- Disconnect the stabilizer links from the stabilizer shaft. Refer to Stabilizer Shaft Link Replacement .
- Separate the ball joints from the steering knuckles. Refer to Lower Control Arm Ball Joint Replacement .
- Remove the wheel drive shafts. Refer to Front Wheel Drive Shaft Replacement .
- Lower the vehicle.
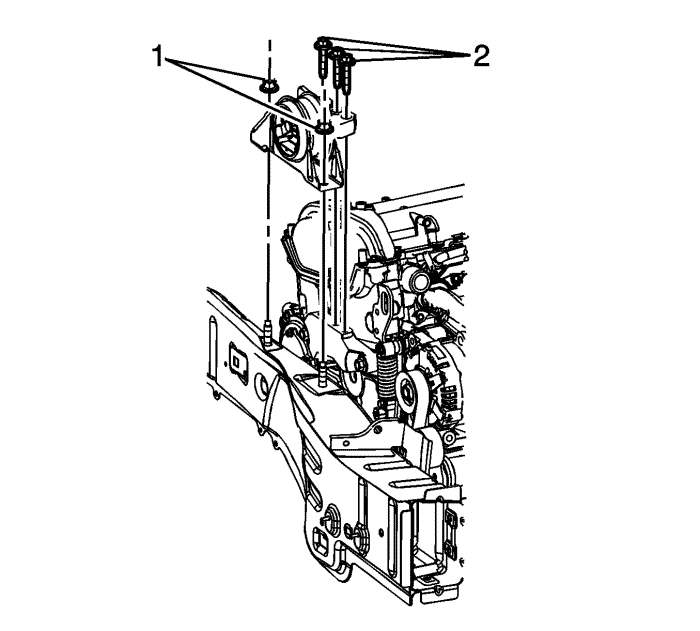
- Remove the engine mount to engine mount bracket bolts (2).
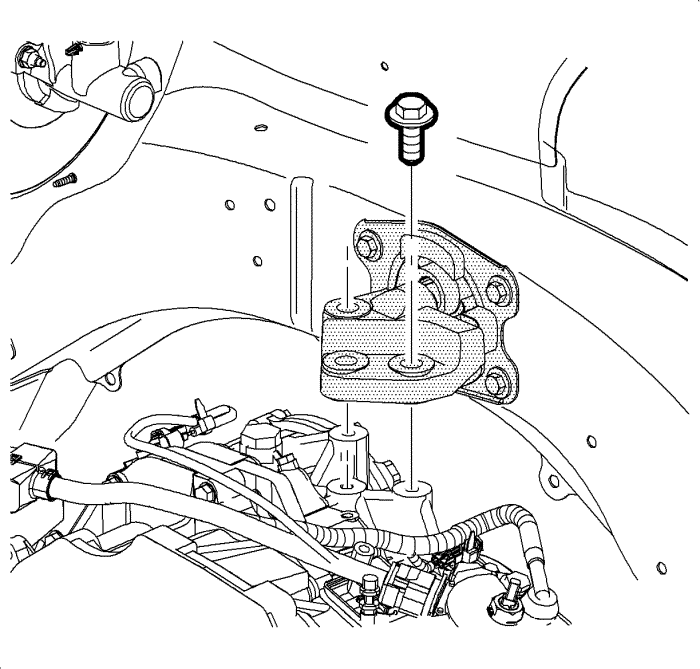
- Remove the transaxle mount to transaxle adapter bolts.
- Raise the vehicle.
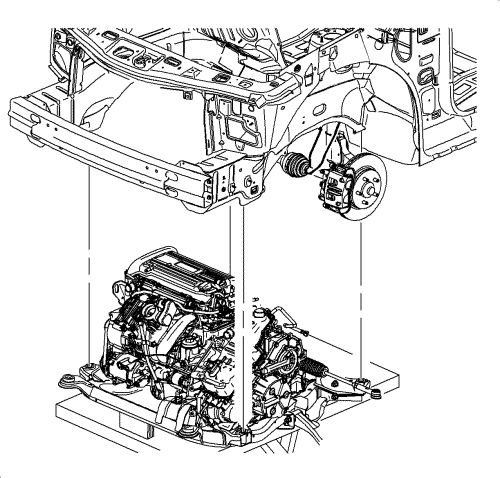
Note: During the powertrain removal support the vehicle body by placing a jack at the rear of the vehicle.
- Position an engine support table under the powertrain assembly.
Note: Blocks of wood can be used between the front of the frame and the sump to table in order to level the powertrain during removal.
- With the table positioned, fully raise the table to contact with the powertrain assembly.
- Remove the frame to body bolts. Discard the bolts.
Note: When lowering the engine/transaxle assembly, verify all brake lines, shifter cables and other components are free during removal.
- Lower the engine table and raise the body on the hoist until the engine/transaxle and cradle are free from the vehicle.
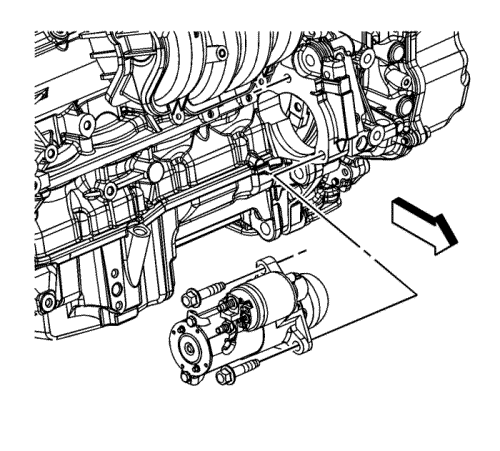
- Remove the starter motor bolts and starter.
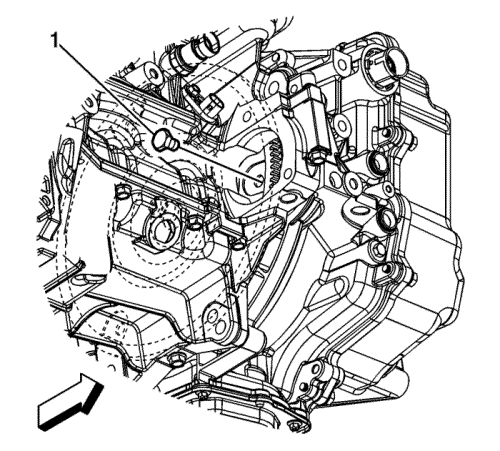
- Remove the torque converter to flex plate bolts (1).
- Install a suitable lifting device to the engine.
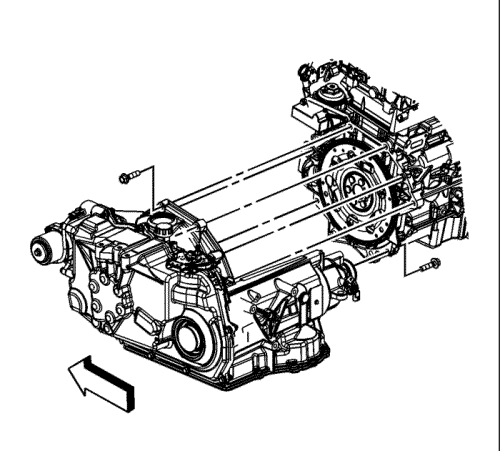
- Remove the transaxle bolts from the engine.
- Separate the engine from the transaxle.
- Install the engine to a suitable engine stand.


